
Storage
Storing Mower Safely
Storing Mower
1. Clean engine and top of deck.
3. Model JA62: Clean belt and transmission area. Install shield.
4. Disconnect spark plug wire. Turn mower onto its LEFT SIDE.
5. Remove mulch plug. Clean underside of deck with water pressure to remove grass buildup, lawn chemicals, and fertilizer.
7. Use John Deere Gasoline Storage Stabilizer or an equivalent. Follow directions on can.
8. Lubricate rear axle bushings.
9. Remove bolts and fold handles down, if desired. Do not crimp cables.
10. Do not store mower with fuel in tank in a building where fumes may reach an open flame or spark.
Remove Mower From Storage
1. Unfold handles. Tighten knobs. Do not crimp cables.
2. Fill fuel tank with fresh gasoline.
4. Connect wire to spark plug.
5. Inspect shields, safety devices and hardware.
6. Lubricate rear axle bushings.
7. Push primer bulb three times to prime engine.
8. Run engine at the HALF-THROTTLE position briefly.
Fold Handles
IMPORTANT: Avoid damage! Avoid damage to mower control cables: |
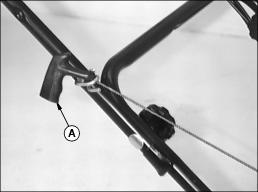
2. Remove starter handle (A) from bracket.
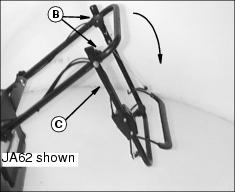
3. Loosen knob (B) 25 mm (1 in.) on each side. Carefully pivot upper handle (C) down.
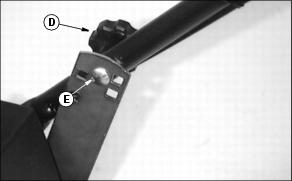
4. Remove knob (D) and carriage bolt (E) from each side.
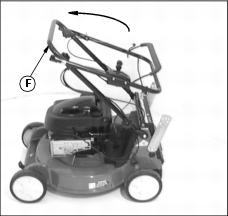
5. Carefully fold lower handle (F) forward. Guide cables inside lower handle. DO NOT CRIMP CABLES.