
Installing
Remove Mulch Cover
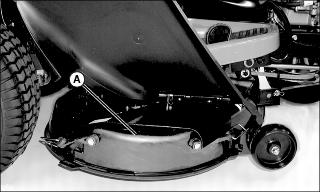
The mulch cover (A) or mulch plug kit is not compatible with the installation of the 2-bag bagger. Remove mulch cover or mulch plug kit before installing bagger attachment.
Install Proper Ballast
Install the proper front ballast to help counter-balance the total weight of the bagger. Remove ballast when the bagger is removed. This will ensure proper operation of the machine when not bagging. See your authorized service center for recommended weights on your machine.
Install High Lift Mower Blades
1. Park vehicle safely. (See Parking Safely in the Safety section.)
2. Disconnect the spark plug wire.
3. Thoroughly clean the top and underside of the mower deck.
4. Remove mower blades. See your machine operator's manual.

6. Tighten blade hardware (A) to 62 N·m (46 lb-ft).
Installing 2-Bag Bagger
Install Mounting Post and Bagger Support Rod

1. Fit tabs (A) on mounting post into slots (B) on rear hitch plate.

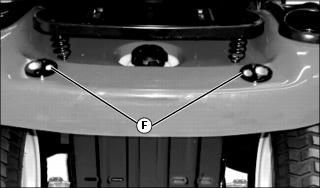
2. Insert bagger support rod (E) into the smaller holes in rear cargo mounts (F).
3. Install drilled cargo pin (D) into mounting post.
4. Install spring locking pin (C) into hole in drilled cargo pin.
Installing Bags

1. Install left and right bags (G) on mounting post (H).
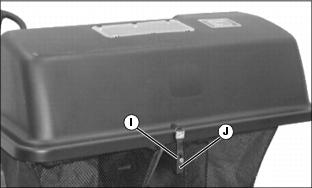
2. Close hopper top and fasten hood hold-down (I) over latch rod (J).
Install Rear Bagger Chute
42-Inch Mower Decks
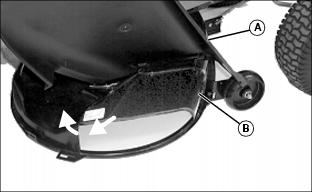
1. Hold plastic discharge chute (A) open.
2. To unlock metal deflector (B), grasp corner, pull outward and swing upward to open.
NOTE: Make sure discharge chute assembly does not get caught inside mower deck discharge opening.

3. Position lower discharge chute assembly (F) in front of mower deck discharge opening (E).
4. Fit tab (C) on lower discharge chute behind hinge (D) of the chute deflector.
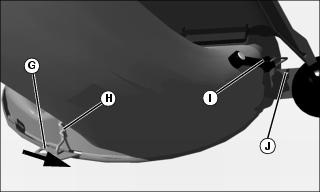
5. Insert rod (H) into keyhole (G) on deck, then slide discharge chute forward, locking rod into place.
6. Hook rubber strap latch (I) over the top of the gage wheel bracket and insert through hole (J).
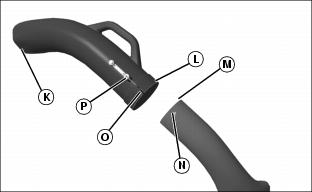
7. Slide top (K) of upper discharge chute assembly into hopper top.
8. Slide bottom (O) of upper chute over top (M) of lower chute, aligning notch (P) with bolt (N).
9. Hook rubber strap latch (L) onto bolt (N) in lower chute.
48-Inch Mower Decks

1. Hold plastic discharge chute (A) open.
2. To unlock metal deflector (B), grasp corner, pull outward and swing upward to open.
3. Position lower discharge chute assembly in front of mower deck discharge opening.
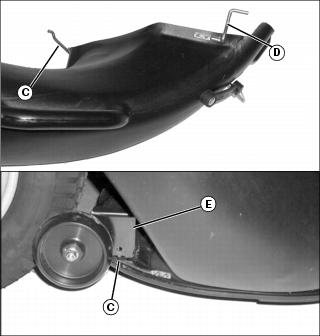
4. Hook rear wireform (C) behind gage wheel bracket (E).
NOTE: Make sure discharge chute assembly does not get caught inside mower deck discharge opening.

5. Slide discharge chute forward to fit front wireform (D) on lower discharge chute behind the hardware on the hinge bracket (F) of the chute deflector.
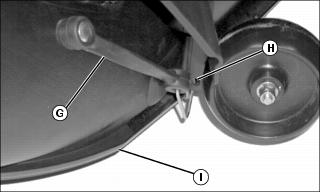
6. Make sure discharge chute is seated completely inside lip (I) of deck .
7. Hook front rubber strap latch (G) through hole (H) in gage wheel bracket.

8. Slide top (J) of upper chute into hopper top.
9. Slide bottom (K) of upper chute over top (L) of lower chute, aligning notch (N) with bolt (M).
10. Hook rubber strap latch (O) onto bolt (M) in lower chute.