Installing
Preparing Tractor
Required Equipment
• Dual Selective Control Valve (SCV)
Installing Ballast
Required ballast:
To improve traction:
NOTE: Certain working conditions may be improved by using tire chains or rear ballast.
• Install chains on rear drive tires.
• Install wheel weights on rear drive wheels.
• Install liquid ballast in rear drive tires.
• Install ballast box and weight.
Installing Snowblower on Front Hitch
1. Review instructions on using hydraulic selective control valve (SCV) and dual selective control valve lock lever included in your tractor operator’s manual.
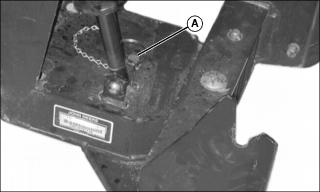
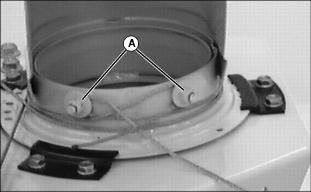
3. Insert locking pin (A) in front hole on front hitch and fasten with spring locking pin.
IMPORTANT: Avoid damage! To prevent damage to driveshaft: • Put snowblower driveshaft on support rod before driving machine forward. |
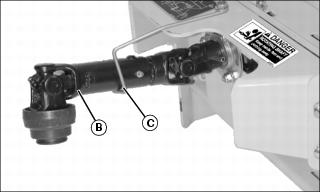
4. Install driveshaft (B) on support rod (C).
NOTE: Locking pin lever (D) on each side of front hitch bracket must be in the unlocked position.
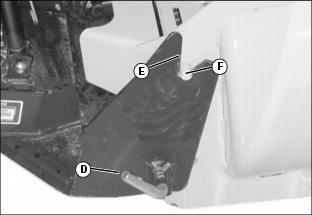
6. Move machine forward slowly until slot (E) on front hitch bracket lines up with pin (F) on snowblower.
IMPORTANT: Avoid damage! Lift only until locking pins click into hitch bracket to prevent bending the driveshaft support rod. |
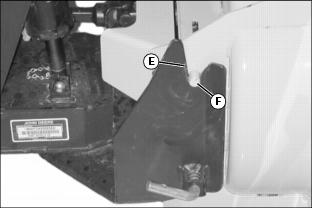
7. Raise front hitch until slot (E) locks in place under pin (F) and locking pins click into hitch bracket.
8. Lower snowblower to the ground.
Connecting Driveshaft to Tractor
2. Pull back coupler on driveshaft to lock collar open.
3. Push driveshaft onto tractor PTO shaft until coupler locks.
Connecting Hydraulic Hoses
2. Review Connecting Implement Hydraulic Hoses, Using Hydraulic Dual Selective Control Valve (SCV) and Using Dual Selective Control Valve instructions in your tractor operator’s manual.
3. Move the tractor dual SCV lever rearward-to-forward and side-to-side several times to relieve hydraulic pressure.
4. If machine is equipped with an angling kit, disconnect the angling kit hydraulic hoses and secure them.
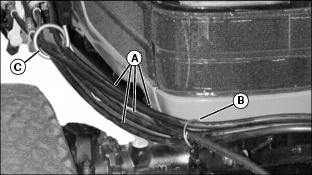
5. Route hydraulic hoses (A) on the inside of hose clip (B) and through hose bracket (C).
6. Install hoses in matching color coded SCV couplers.
7. Install coupler dust plugs in hose dust covers for storage.
Checking Discharge Chute Rotation
2. Start the engine and turn the chute in both directions:
• Move dual SCV lever to the right to rotate chute to the right.
• Move dual SCV lever to the left to rotate chute to the left.
3. If chute does not move in direction indicated:
b. Reverse hydraulic hose installation in the SCV couplers.
IMPORTANT: Avoid damage! Ensure proper rotation of chute. Position chute to face right (as viewed from machine seat) before adjusting cables. |