Installing
Required Equipment
The iMatch™ Quick-Hitch must be installed on the tractor before the iMatch™ AutoHitch™ can be installed.
The AutoHitch Cutter Kit must be installed on a Rotary Cutter before the Rotary Cutter can be installed on the AutoHitch.
A replacement clutch must be installed on any Tiller, and a Retrofit Kit may need to be installed on older model Tillers before the Tiller can be installed on the AutoHitch.
Shorten Driveshaft (790 Installation)
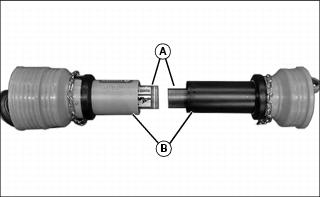
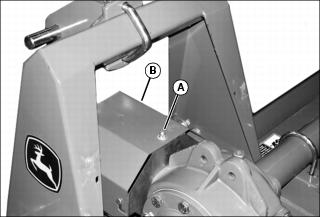
1. Cut 30mm from ends of both inner steel tubes (A) and outer plastic tubes (B).
Prepare iMatch™ Quick-Hitch
NOTE: This procedure is required for first installation only.
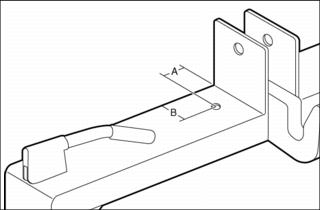
1. Drill one 12mm hole in hitch, located 2.5 cm (1 inch) from edge of bracket (A) and centered from front to rear (B).
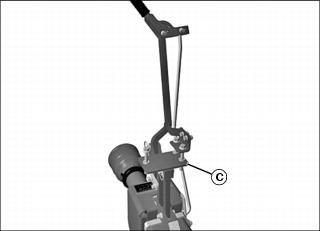
2. Remove mounting bracket (C) from iMatch AutoHitch™ to use as a template to drill remaining holes.
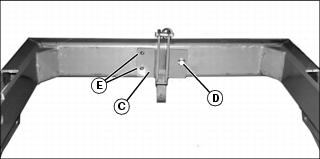
3. Clamp mounting bracket (C) underneath iMatch Quick-Hitch, aligning single hole side (D) with hole just drilled and edges of mounting bracket parallel with edges of hitch.
4. Mark and drill two 12mm or 1/2-inch holes (E) using holes in mounting bracket as a guide.
5. Reinstall mounting bracket on iMatch AutoHitch.
Installing Ballast
Follow implement operator manual instructions for installing implement ballast.
Using iMatch™ Quick-Hitch
Installing Hitch
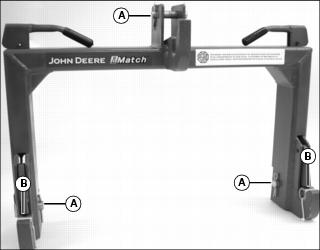
1. Remove three drilled pins (A) and two bushings (B) from hitch.
2. Use machine rockshaft control lever to fully lower 3-point hitch draft links.
3. Park machine safely. (See Parking Safely in the SAFETY section.)
4. Position hitch near draft links and adjust 3-point hitch sway links to align draft links with hitch.
5. Install hitch on draft links using drilled pins.
6. Install 3-point hitch center link on hitch using center link quick-lock pin and drilled pin.
Install iMatch™ AutoHitch™
1. Follow Using iMatch Quick-Hitch instructions to install iMatch Quick-Hitch on tractor.
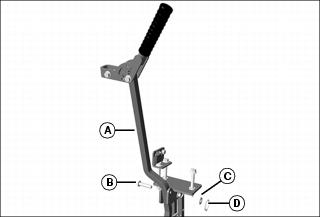
2. Secure AutoHitch arm (A) in place with pin (B), washer (C), and locking ring (D).
3. Position AutoHitch handle between iMatch Quick-Hitch and tractor.
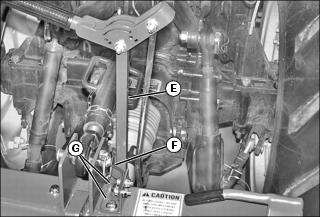
4. Position handle lockout mechanism (E) on top right side of iMatch Quick-Hitch with locking spring (F) toward tractor. Insert two M10 bolts (G) through handle lockout mechanism and hitch.
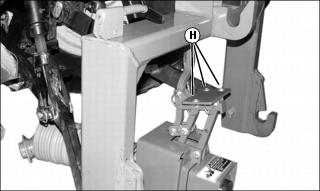
5. Place three washers (H) between mounting bracket and bottom of iMatch Quick-Hitch.
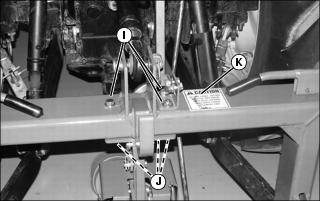
6. Install mounting bracket on iMatch Quick-Hitch with three M10 bolts (I) and nuts (J).
7. If iMatch Quick-Hitch CAUTION label (K) is not fully visible after mounting bracket installation, contact your John Deere dealer to order a new label and install new label on top of iMatch Quick-Hitch in fully visible location.
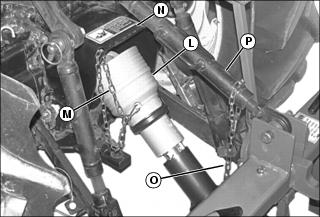
8. Connect driveshaft (L) to tractor.
9. Install driveshaft guard chain (M) on tractor PTO guard (N).
10. Loosely install driveshaft guard chain (O) on tractor 3-point hitch (P).
11. Raise tractor 3-point hitch approximately half way. Position AutoHitch arm in locking mechanism by pushing arm fully rearward and tighten hardware on locking mechanism so that spring secures arm.
12. Spray interior of coupler with white lithium grease.
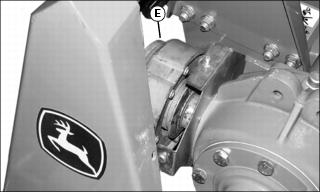
Install Clutch on Tiller
1. Remove nut (A) and tiller PTO driveline guard (B) if installed.
2. Remove driveshaft if installed.
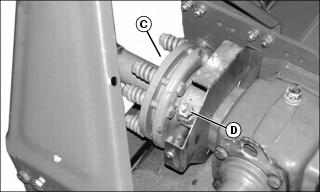
• Model 647: Install clutch (C) with bolt, lockwasher, and nut (D).
• All other models: Position clutch (E) and lock into place with collar.
Installing Implement on iMatch™ AutoHitch™
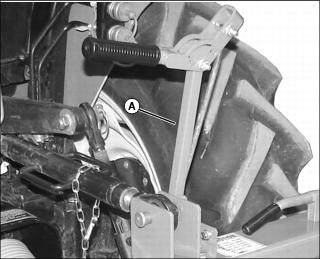
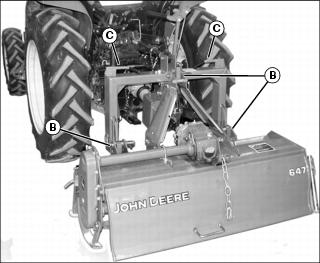
NOTE: These instructions show Tiller installation. Follow same procedure for installation of Rotary Cutter or other implements.
1. Check to be sure AutoHitch arm (A) is pushed fully rearward.
2. Lower 3-point hitch and back tractor up to implement, aligning iMatch Quick-Hitch with three lift points (B) on implement.
3. When iMatch Quick-Hitch is pressing against implement, fully raise hitch, lifting implement off ground.
4. Ensure locking handles (C) on both sides iMatch Quick-Hitch are fully down (locked).
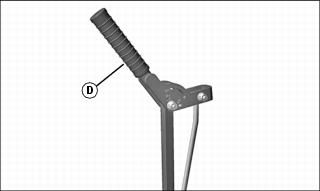
5. Unlock AutoHitch quick coupler by rotating locking lever (D) up.
6. Pull locking lever forward using a quick, smooth motion. The coupler should move fully onto implement shaft. If coupler does not move fully onto shaft, check vertical position of coupler relative to implement shaft. If not aligned, adjust washer count between mounting bracket and iMatch Quick-Hitch.
a. Remove implement from iMatch Quick-Hitch.
b. If AutoHitch coupler is too high, add three washers.
c. If AutoHitch coupler is too low, remove three previously installed washers.
7. Hold locking lever forward and rotate downward.
8. With engine running at low RPM and PTO selector set in rear position, pull PTO knob on and press it off quickly, allowing PTO to turn slightly, to make coupler align with shaft on implement. Repeat as necessary. When coupler is fully engaged, implement will turn when PTO is turned on. When coupler is not engaged, it will rattle and implement will not turn.
9. If a tiller is being used, shut off tractor and lower tiller to ground. Engage parking brake, dismount tractor and raise parking feet on tiller to fully up position.
