
Removing
Removing Tiller
NOTE: Before removing the tiller for long term storage, move the tiller skid shoes to lowest position to support the tiller weight. Put blocks under the skid shoes when needed to keep tiller weight off the tines.
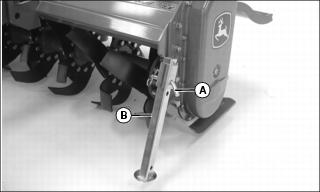
2. Remove locking pin (A) and move the tiller front park stand (B) to lowest position.
3. Install locking pin and cotter pin as shown. Some models have a locking pin which does not use a cotter pin.
4. Move the rear park stand (not shown) and lock it in lowest position.
Picture Note: Optional quick-attach hitch shown.
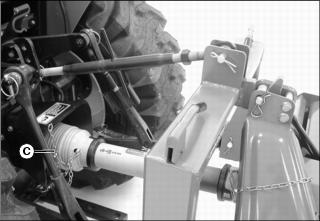
5. Remove tiller PTO driveshaft from machine:
a. Disconnect driveshaft guard chain (C) from machine PTO guard.
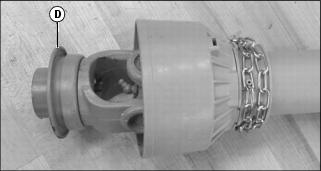
b. Pull collar (D) back and pull driveshaft off machine PTO shaft.
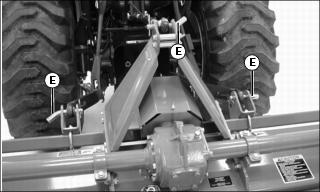
6. Remove three cotter pins and hitch pins (E) from tiller center link bracket and draft link brackets.
7. Install 3-point hitch center link in storage position.
8. Install hitch pins and cotter pins in tiller center link and draft link brackets for storage.
When the attachment is removed, also remove any ballast that was added to the machine. Use only attachments and accessories recommended by the manufacturer. |
9. If machine will be driven, remove front weights installed for tiller ballast.