
Removing
Removing Attachment
1. Park machine safely. (See Parking Safely in the SAFETY section.)
2. Move hydraulic control levers back and forth to relieve hydraulic pressure.
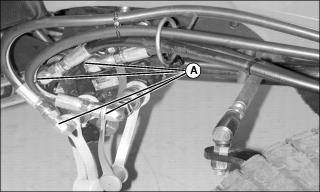
3. Disconnect hydraulic hoses from hydraulic couplers and and remove hoses from machine.
4. Install dust caps on hydraulic hoses and hydraulic ports.
5. Install angling kit hoses to ports if installed on machine.
6. Turn lift dial on mower to 5 to bring the mower and 3-point hitch to full-lift position.

7. If machine is equipped a with lockout valve (B), turn valve counterclockwise until open to allow use of mower and rear hydraulic implement lift.

8. Pull coupler (C) to disconnect driveshaft from machine.
9. Put driveshaft on support rod.

10. Move lever (D) to the unlatched position shown.
12. Slowly back machine away from attachment.
Driving machine with extra weights when attachment is removed can cause steering problems. Remove weights from machine when you remove the attachment. |
13. Remove any weights that were installed when preparing the machine.
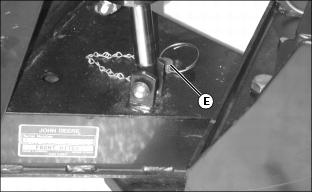
14. Remove locking pin (E) from front hole on front hitch, insert in storage hole and fasten with spring locking pin.