
Assembly
Charge and Connect Battery
1. Remove and discard the red (+) positive, and black negative (-) protective caps from the battery terminals.
3. Clean both battery terminals and battery cable ends with a wire brush until bright.
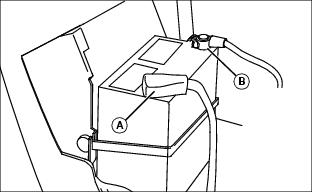
4. Connect red positive (+) cable (A) to battery. Apply petroleum jelly or silicone spray to terminal to prevent corrosion. Make sure connection is tight. Install the red terminal cover.
5. Connect black negative (-) cable (B) to battery. Apply petroleum jelly or silicone spray to terminal to prevent corrosion. Make sure connection is tight.
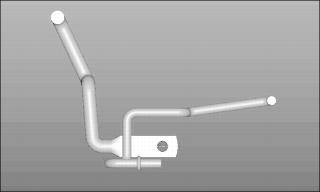
Install Steering Wheel
1. Put John Deere Multi-Purpose lubricant or an equivalent on the steering shaft.
2. Install steering wheel with John Deere logo in the upright position.
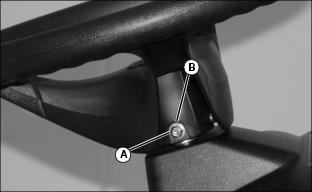
3. Install shoulder bolt (A). Drive bolt in until head of bolt contacts steering wheel.
4. Install washer and nut (B).
5. Tighten lock nut until it is snug. Do not pull washer or head of bolt into steering wheel.
Install Mower Gauge Wheels (48C Deck)
NOTE: Gauge wheels are located inside machine hood and attaching hardware is installed on mower deck for shipping. Hardware is not installed in correct hole position for operation.
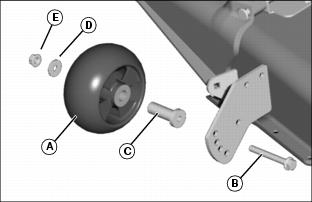
1. Install four mower gauge wheels (A) to the mower brackets using one bolt (B), bushing (C), washer (D), and nut (E). (See Adjusting Mower Deck Wheels in Operating section.)
2. Tighten nut to 37 N·m (27 lb-ft.).
3. Adjust mower level before operation.
Install Mower Discharge Chute (48C Deck)
1. Hold chute firmly to mower deck when installing.
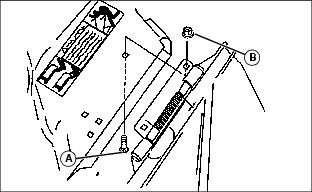
2. Install mower discharge chute to mower deck with two M8 x 16 bolts (A) and lock nuts (B).
3. Tighten nuts to 25 N·m (18 lb-ft.).
4. Check hinge action by opening and releasing the chute. The chute must spring back completely to the lowered position.
Install Belt Guide (For Machine Without Deck)
NOTE: If you purchased a machine and deck separately, you will need to install a belt guide on the machine. This belt guide will come packaged with the deck.
If you switch decks, you will need to install the appropriate belt guide (38-inch/42Freedom, 42C, or 48C) that will come with that deck.
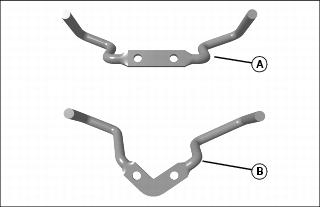
Picture Note: Top belt guide (M126531) for 38-inch or Freedom42 deck; bottom belt guide (M144520) for 42C deck
Picture Note: Belt guide for 48C deck
1. Select appropriate belt guide for your deck: 38-Inch or Freedom42 (A), or 42C (B), or 48C.
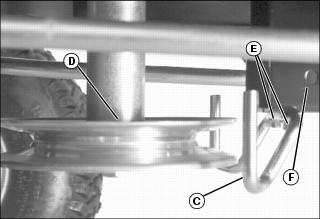
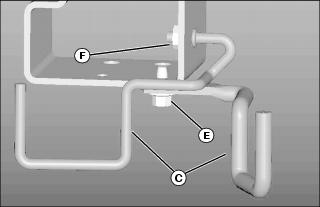
2. Align belt guide (C) at front of machine with U-hooks facing jacksheave (D).
· For 48C, align belt guide as shown above.
3. For 38-inch, Freedom42, or 42C install two screws (E) and tighten.
· For 48C, install one screw (E) and one nut (F) and tighten.