Assembly
Remove Hood
MX13551
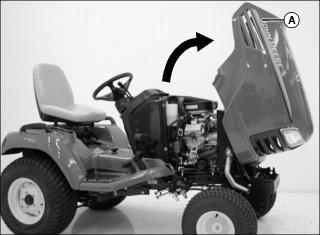
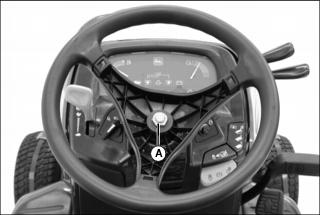
1. Lift rear of hood (A) and tilt to fully upright position.
IMPORTANT: Avoid damage! Disconnect headlight harness before removing hood.
|
MX13552
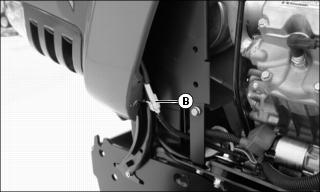
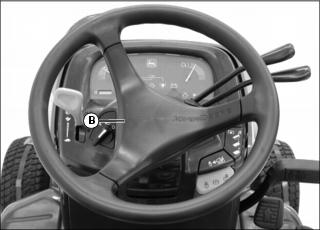
2. Disconnect headlight harness (B) on left side of machine.
MX13551
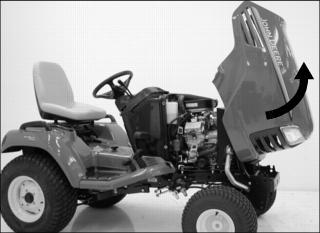
3. Pull hood forward and roll hood up and out of rail.
Charge and Connect Battery
 c CAUTION: Avoid injury! Prevent battery explosions:
· Keep sparks, lighted matches, and open flame away from the top of battery. Battery gas can explode.
· Never check battery charge by placing a metal object across the posts. Use a voltmeter or hydrometer.
· Do not charge a frozen battery; it may explode. Warm the battery to 16°C (60°F).
|
Battery is filled with acid and charged when it left the factory. To extend battery life, charge battery prior to delivery.
Check battery voltage. Battery should be charged if voltage is below 12.3 volts. Battery is fully charged at 12.6 volts.
MX13642
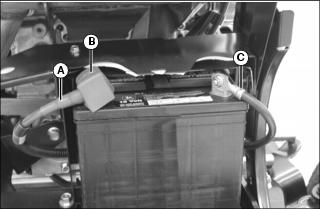
1. Connect red positive (+) cable (A) to battery. Apply petroleum jelly or silicone spray to terminal to prevent corrosion. Make sure connection is tight. Push cover (B) over positive terminal.
2. Connect black negative (-) cable (C) to battery. Apply petroleum jelly or silicone spray to terminal to prevent corrosion. Make sure connection is tight.
Install Steering Wheel
1. Install steering wheel on shaft.
MX13546
2. Install and tighten nut (A) to 34 to 41 N·m (25 to 30 lb-ft).
MX13547
3. Install cover (B).
Install Seat (X485)
MX13548
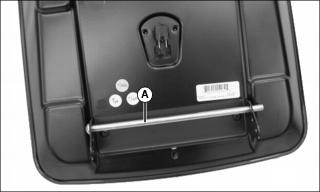
1. Remove rod (A) from seat pan bracket.
MX13550,MX13549
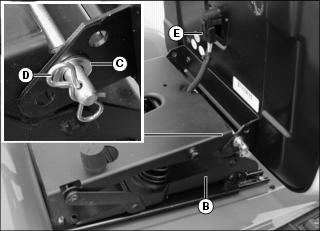
2. Install seat on suspension (B).
3. Install rod through suspension and middle hole in seat pan bracket.
4. Install washer (C) and cotter pin (D) on rod.
5. Connect seat switch harness (E).
Check Tire Pressure
|
c CAUTION: Avoid injury! Explosive separation of tire and rim parts is possible when they are serviced incorrectly:
· Do not attempt to mount a tire without the proper equipment and experience to perform the job.
· Do not inflate the tires above the recommended pressure.
· Do not weld or heat a wheel and tire assembly. Heat can cause an increase in air pressure resulting in an explosion. Welding can structurally weaken or deform the wheel.
· Do not stand in front or over the tire assembly when inflating. Use a clip-on chuck and extension hose long enough to allow you to stand to one side.
|
1. Check tires for damage.
2. Check tire pressure with an accurate gauge.
3. Add or remove air, if necessary.
|