
Assembly (Model 10P)
Parts in Kit
Parts in Box
Parts in Bag
Assemble Cart
When assembling cart, do the following
· Do not discard cardboard bed divider, it can be used as a template for making dividers for the cart.
· Place pieces of carton under cart box to help avoid scratching finish.
· Put all bolt heads to the inside of the cart box.
Install Axle Support
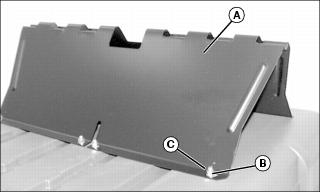
1. Place axle support (A) on box.
2. Install eight 5/16 x 1 in. round head machine screws and eight 5/16 in. flat washers, from inside cart box through axle support. Place eight 5/16 in. lock washers (B) and eight 5/16 in. hex nuts (C) on screws.
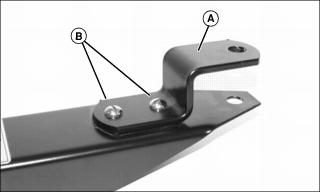
Install Lock Bracket
NOTE: Make sure notch on lock bracket is facing to the front of the cart.
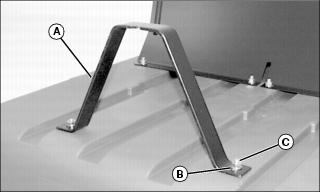
1. Place lock bracket (A) on cart.
2. Install two 5/16 x 1 in. round head machine screws and two 5/16 in. washers through cart box (from inside cart box) and lock bracket.
3. Secure with two 5/16 in. lock washers (B) and two 5/16 in. hex nuts (C).
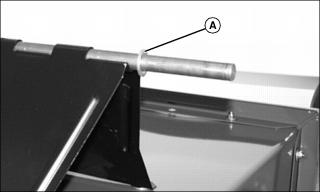
Assemble Cart Lock Bar
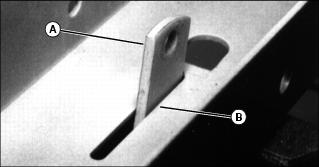
Picture Note: Bottom of drawbar shown
1. Place cart lock bar (A) through slot in drawbar with notch in lock bar (B) to rear of cart.
NOTE: Lock nuts with attached star washers should be installed on each side of the cart lock bar so it is centered.
Pull up on lock bar while installing bolt. This will help to align the bolt with the hole on the other side of the drawbar.
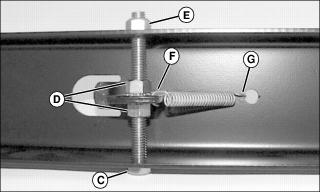
2. Install one 3/8 x 3-3/4 in. hex bolt (C) and two 3/8 in. lock nuts with attached star washers (D) through drawbar and lock bar.
4. Secure bolt with 3/8 in. hex lock nut (E) so lock bar moves forward and backward freely.
5. Hook one end of spring (F) in drawbar; stretch spring to hook other end in cart lock bar hole (G).
Install Clevis
1. Place clevis (A) on cart drawbar.
2. Install two 5/16 x 1 in. round head bolts (B) through clevis and cart drawbar.
3. Fasten with two lock washers and two hex nuts.
Install Cart Drawbar and Axle
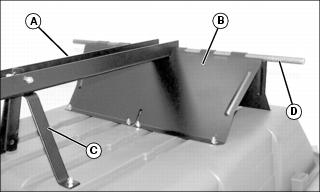
1. Place drawbar (A) on axle support (B) and lock bracket (C).
2. Slide axle (D) through axle support and drawbar.
Install Cart Wheels
1. Slide one large flat washer (A) on axle.
NOTE: Put a dab of grease on each end of axle, before installing wheels. This will make installing wheels on axle easier.
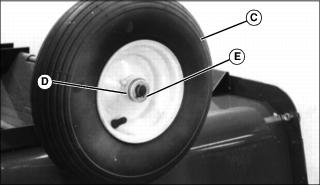
2. Put one wheel (C) (valve stem to the outside) on axle.
3. Put one 3/4 in. flat washer (D) and one E-ring (E) on axle.
4. Repeat steps for other wheel.
5. Inflate tires to correct tire pressure.
6. Grease wheel bearings with John Deere multipurpose grease or an equivalent.