Service
Service Intervals
5 Hours
10 Hours
• Lubricate drive sheave bearing.
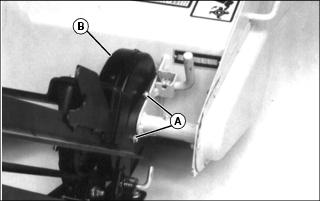
Checking Belt Tension
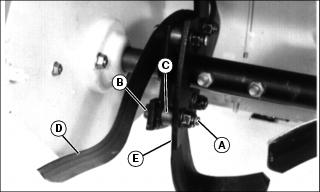
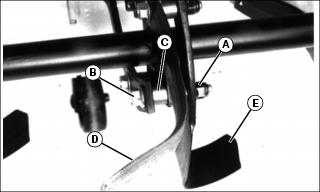
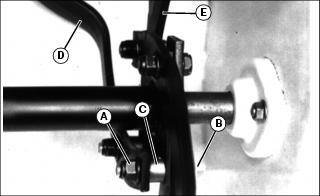
1. Check position of belt tension rod (A):
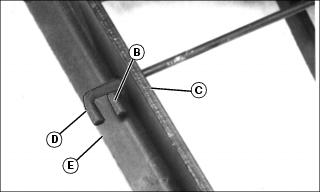
• If rod end is in position (B), against the vertical frame rail (C), the belt is too tight and must be loosened.
• If rod end is in position (D), extends beyond horizontal frame rail (E), the belt is too loose and must be tightened.
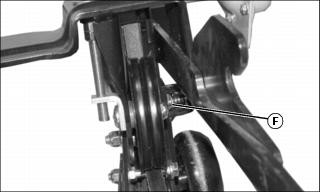
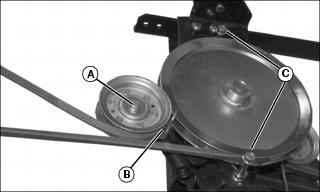
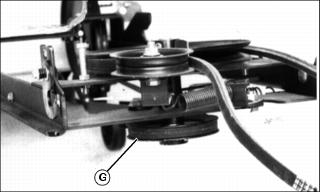
• Loosen nut (F) on the idler pulley.
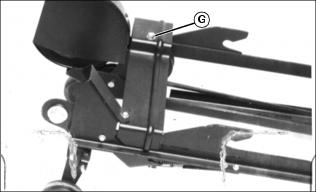
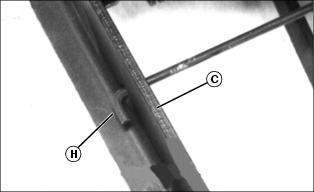
• To tighten belt, turn bolt (G) counter-clockwise until 3 mm (1/8 in.) clearance exists between rod end (H) and vertical frame rail (C).
• To loosen belt, turn bolt (G) clockwise until 3 mm (1/8 in.) clearance exists between rod end (H) and vertical frame rail (C).
3. Tighten nut on the idler pulley after adjustment.
Cleaning Under Belt Shield
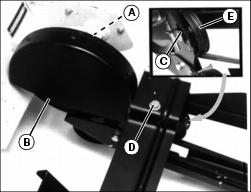
1. Remove screws (A) and belt shield (B).
2. Clean dirt from sheave with water pressure.
Removing and Installing Primary Drive Belt
Removing Primary Drive Belt
1. Remove tiller from tractor.
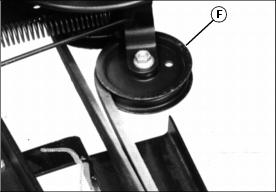
2. Loosen nut on bolt (A). Move belt guide (B) away from belt.
Installing Primary Drive Belt
1. Install belt on drive sheave.
3. Install belt between belt idler and belt guide (B).
4. Push the arm to the right. Point belt guide toward drive sheave, as shown. Tighten nut on capscrew (A).
Removing and Installing Secondary Belt
Removing Secondary Belt
1. Remove two self tapping screws (A) and belt shield (B).
3. Turn bolt (D) so idler (E) moves up in the slot.
4. Remove secondary belt from front idler (F).
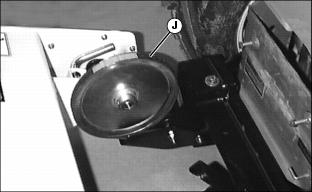
5. Remove secondary belt from front drive sheave (G).
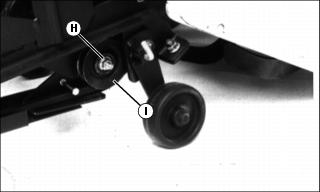
6. Remove nut (H) and V-idler (I).
Installing Secondary Belt
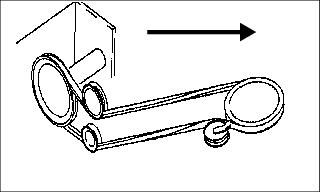
1. Install new secondary drive belt as shown.
2. Install V-idler (I) and nut (H).
3. Turn bolt (D) so idler (E) is seated as far down as possible in slot.
5. Install belt shield (B) and fasten with two self tapping screws (A).
Replacing Tines
• Tines are sharp. Wear heavy gloves when working around tines. • Do not work under raised attachment unless it is safely supported. |
2. Raise tiller as high as it will go.
NOTE: For ease in replacing tines, you can remove tiller from the tractor and turn it completely upside down.
3. Put tiller in the transport position.
4. Put blocks under the tiller.
NOTE: Each cluster of tines must have two left tines (D) and two right tines (E):
• Alternate left and right tines in each cluster.
• A bolt with no spacer is an M10x35 bolt.
• A bolt with one spacer is an M10x45 bolt.
• A bolt with two spacers is an M10x60 bolt.