
Operating
Tilling Tips
• Pick up rocks and foreign objects.
• Mow tall weeds and grass to keep them from wrapping around tines or tine shaft.
• Check tines. Loose, bent, broken, or missing tines reduce operating efficiency. If necessary, replace tines.
• Test soil by squeezing it in-hand. If soil forms a ball, it is too wet to till. If soil does not compress easily or falls apart, it is ready to till.
• Do not till when soil is wet. Wet soil will stick to tines and tine shaft. Wet soil will also dry out and become hard, making it hard to work with during growing season.
• Do not back up or make sharp turns with tiller in ground.
• Move PTO lever to on when tiller is out of ground. Move tractor forward and lower tiller into ground.
• When tilling hard ground or sod, till at a shallow depth on first pass. Increase depth on each pass.
• If lateral work cannot be avoided, work from top to bottom in order to limit any terracing effect.
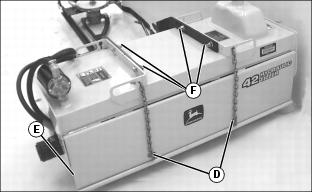
Adjust Rear Shield Height
|
• Always set shield above its vertical plane. • Do not allow shield to hang vertically (straight) or inward towards tines. • Do not back the tractor when tiller shield is touching the ground. |
1. Lower tiller until tines touch the ground.
2. Adjust rear shield height for desired tilling operation, allowing for till depth.
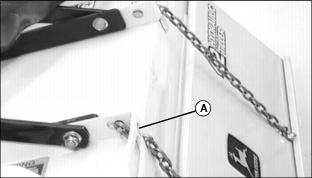
3. Fasten desired chain link in key hole slot (A) on one side, then take up slack on other chain and hook it.
For Making a Seed Bed:
• Lower tiller until tines touch the ground.
• Adjust shield to rest close to the ground, allowing for till depth. Tilled soil with shield in this position will be fine and level.
For Mulching or Tilling Sod:
• Adjust shield as high as possible so chain links stay locked in their key hole slots. Tilled soil with shield in this position will be coarse.
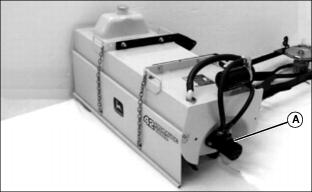
Select Tilling Depth
NOTE: Adjust optional skid shoes the same on each side.
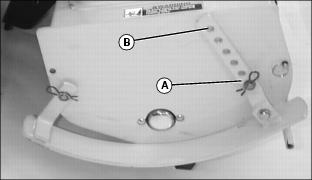
• Use a low skid shoe position (A) for deep tilling.
• Use a high skid shoe position (B) for shallow tilling.
Raising and Lowering Tiller
To Raise Tiller

• Pull hydraulic lift lever (A) up to raise tiller.
To Lower Tiller
• Push hydraulic lift lever (A) down to lower tiller.
Select Forward or Reverse Tine Rotation
NOTE: Unit is shipped from factory with tines in the reverse rotation position.
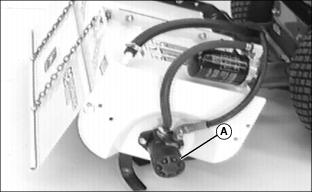
Reverse Tine Rotation

• Hydraulic motor (A) is on left side.
• Tines turn in opposite direction as tractor tires when tractor travels forward.
• For tilling hard soils or sod.
Forward Tine Rotation
• Hydraulic motor (A) is on right side.
• Tines turn same direction as tractor tires when tractor travels forward.
• For most soil conditions, including soil already tilled and soft soil.
Changing to Forward Rotation:
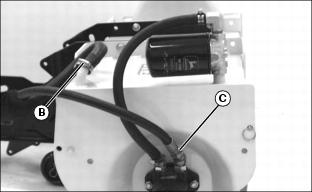
1. Loosen hose clamp (B) and fitting (C).
2. Remove rear shield chains (D).
5. Move frame assembly to opposite side of tiller so hydraulic motor (A) is now on right side.
6. Install four bolts and tighten.
7. Make sure hoses are not kinked.
9. Install rear shield support chains.
10. Tighten all hose clamps and fittings.
Operating Tiller
IMPORTANT: Avoid damage! For best performance, operate engine at full throttle when using attachment. |
NOTE: For tractors with RIO (Reverse Implement Option), the tiller will stop when the tractor is put in reverse.
2. Pull hydraulic control lever (A) back to raise tiller as high as it will go.
3. Drive to tilling area and stop tractor.

4. Rotate transport lock lever (B) to lower tiller into the tilling position.
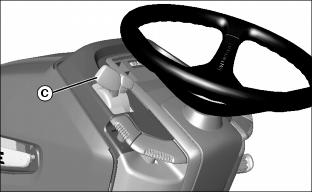
5. Put throttle lever (C) at 1/4 position.
6. Pull PTO handle (D) up to engage.
7. Move throttle lever to the full throttle position.
8. Push hydraulic control lever forward to lower tiller to the ground.
9. Till ground at a safe travel speed.
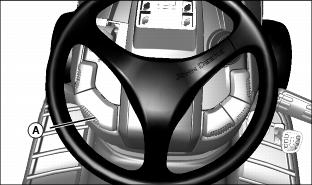
Using Depth Control Knob
Adjust the depth control knob to set tilling depth. The tiller will return to the same depth each time you lower it.
1. Raise tiller as high as it will go.
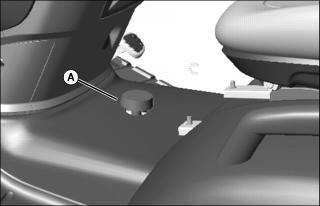
2. Turn knob (A) clockwise to raise the tiller depth or counter-clockwise to lower the depth.
Inspect, Unplug, or Park Attachment Safely
2. Lower attachment to the ground.
7. Wait for engine and all moving parts to stop before leaving operator’s seat.
Transporting
1. Rotate tiller to the transport position.
2. Drive tractor and tiller onto heavy-duty trailer.
3. Lower tiller to trailer deck.
6. Fasten tractor and tiller to deck with straps, chains, or cables.