
Removing and Storing Attachment
Removing Tiller
1. Park safely. (Refer to Parking Safely in the Safety section.)
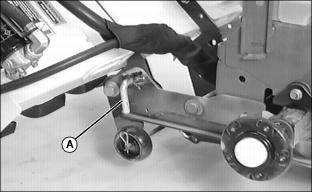
2. Rotate tiller forward, do not lock into position with transport lock lever (A). Set depth stop to zero.
3. Lower tiller to the ground.
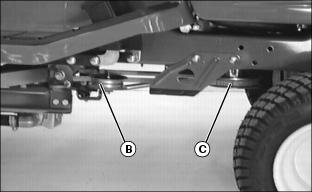
4. Move idler sheave (B) to the right and remove belt from PTO sheave (C).
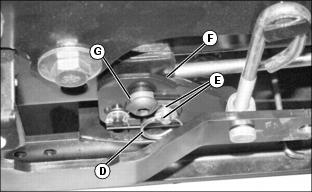
5. Remove locking ring (D), pin and washer (E) from clip latch (F). Open clip latch to lift off mounting stud (G). Retain hardware.
6. Remove wheels from storage position and install one on each side of tiller frame axle.
7. Lower tiller with the hydraulic lift.
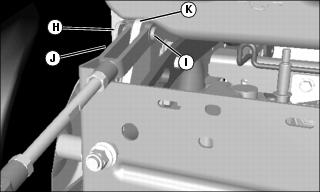
8. Remove locking ring (H) from drilled pin (I). Remove lift rod yoke (J) from tractor lift bracket (K). Install the hardware to the yoke for storage.
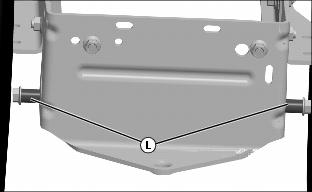
9. Pull tiller off rear mounting bolts (L).
10. If removing tiller on uneven ground, it may be necessary to block the front wheels of tractor and raise rear wheels high enough to clear front clip-clamps.
11. Slide tiller out from under tractor, lower rear tractor wheels to ground and move tractor.
Storing Attachment
NOTE: Some of the following steps may not apply to your attachment.
1. Remove attachment from machine.
2. Clean attachment and driveline, if equipped.
3. Remove any shields if needed to clean out all debris.
4. Repair or replace worn, bent, or damaged parts. Tighten loose hardware.
5. Apply paint to painted surfaces where needed to prevent rust.
6. Apply thin coat of grease to blades to prevent rust.
7. Lubricate any pivot points with engine oil to prevent rust.
8. Lubricate any grease points.
IMPORTANT: Avoid damage! Abrasive surfaces can damage attachment. Store attachment on non-abrasive surface or on wooden blocks. |
9. If storing attachment outdoors, block up attachment if possible and place a waterproof cover over it.