
Assembly
Assemble Bagger
IMPORTANT: Avoid damage! Hopper should be assembled on a non-abrasive surface to prevent scratching the hopper case. |
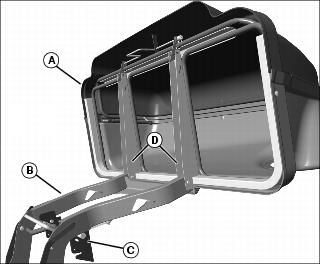
1. Place hopper (A) on a non-abrasive surface with the lid facing up.
2. Position frame (B) so latches (C) face downward.
3. Slide frame into bottom of hopper channel supports (D).
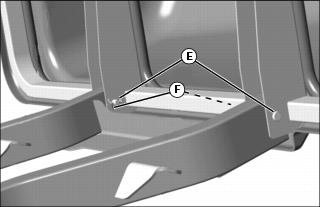
4. Align holes in frame with holes in channel supports. Install two drilled pins (E) from outside of channel supports.
5. Install two cotter pins (F) into holes in drilled pins. Secure the cotter pins by bending the ends with a pliers.
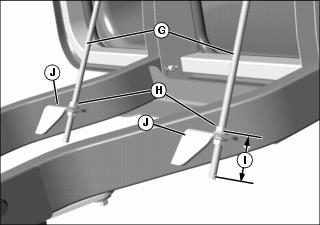
6. Obtain hopper support rods (G). Install one M10x1.5 flange nut (H) onto each rod so flange faces down toward threaded end of rod. Turn the nuts onto the rods a distance (I) of 40 mm (1-9/16 in.) from nut flange to bottom of threaded rod.
7. Insert the hopper support rods into brackets (J). Install one M10x1.5 flange nut onto each rod end so flange faces bracket. Do not tighten the nuts.
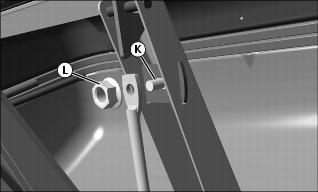
8. Secure other end of each support rod to the hopper support channel using carriage bolt (K) and M8x1.25 flange nut (L). Tighten the nuts completely.

9. Maintain the preset position of top flange nuts (H). Tighten lower flange nuts (M) completely.