
Service
Replacing Tines
• Tines are sharp. Wear heavy gloves when working around tines. • Do not work under raised attachment unless it is safely supported. |
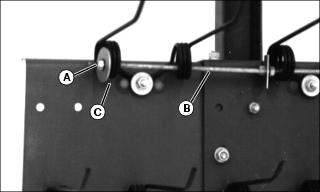
1. Remove locknut and washer (A) from end of retention safety rod (B). Keep nut and washer.
2. Slide rod (B) from damaged tine set (C).
3. Remove hex nut, carriage bolt, lockwasher, and flat washer (D). Remove and discard damaged tine set (C).
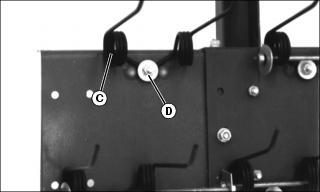
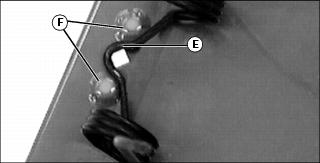
NOTE: Offset (E) in tine wire should be between two frame extrusions (F) for proper assembly.
4. Attach new tine set, making certain tine tips face same direction as other tines on thatcher. Secure new tine set with original carriage bolt, flat washer, lockwasher, and hex nut. Tighten completely.
5. Insert retention safety rod through all tines sets. Secure with original washer and locknut. Tighten completely.