
Installing
Installing Thatcher
Install Thatcher
1. Park machine safely. (See Parking Safely in the SAFETY section.)
2. Align thatcher mounting frame with mounting bracket at front of tractor.
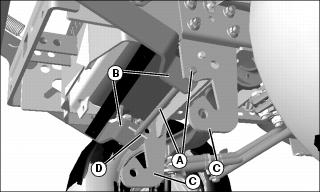
3. Install mounting rod (A) through mounting brackets (B) and through frame (C).
• Pull back on spring pin (D) and place opposite end through mounting frame and tractor frame.
• With the spring pulled back insert that end through the other side of tractor through mounting frame and tractor frame.
NOTE: Notch (E) in lift handle must face downward.
For transporting use hole (F).
Front of tractor indicated by (G).
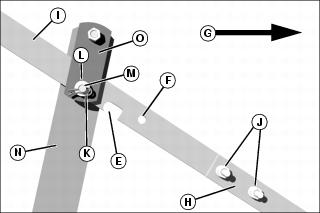
4. Attach lower lift handle (H) to upper lift handle (I) with two 5/16x1 in. carriage bolts, lockwashers, and hex nuts (J). Tighten nuts completely.
5. Remove spring locking pin (K), washer (L), and drilled pin (M). Slide lift handle between lift lock extension (N) and lock bracket (O). Install drilled pin (M), washer (L) and secure with spring locking pin (K).
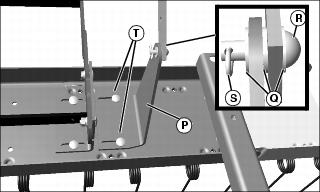
6. Attach lift handle to lift handle bracket (P) with three 0.344x0.688x.065 in. washers (Q), drilled pin (R), and clip pin (S).
7. Align bracket (P) so lift handle remains straight as it leaves lift lock extension mounted at tractor frame. Tighten carriage bolt (T) hardware completely.
8. Lift and lock thatcher in transport position.
9. Level and center the thatcher. (See Level and Center Thatcher in Operating Section.)
Install Springs (X300 Select Series)
NOTE: The thatcher must be in the transport position to install springs.
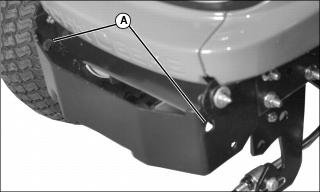
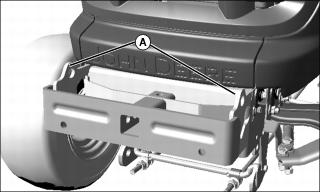
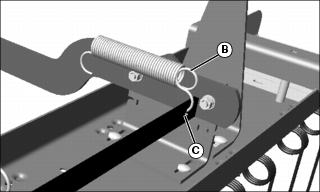
1. Hook the end without the finger pull loop to the front bracket (A) on the tractor.
2. Pull the spring using the finger pull loop (B) to the bump hole (C) on the lift bracket. Repeat for the other spring.
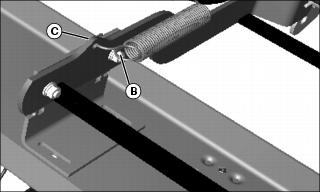
Install Springs (X500 Select Series)
NOTE: The thatcher must be in the transport position to install springs.
1. Hook the end without the finger pull loop to the weight bracket (A) on the tractor.
2. Pull the spring using the finger pull loop (B) to the cross bracket (C) on the attachment assembly.