
Preparing Vehicle
Installing MC519 Cart Hardware
1. Move tractor and cart to level ground.
4. Remove rear suitcase weights, if tractor is so equipped. These weights are not compatible with cart. Rear wheel weights are used if ballast is required.
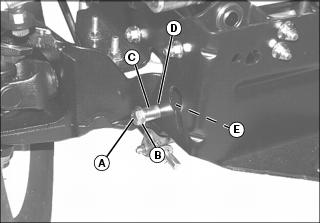
5. Insert 1/2 x 2 in. hex head bolts (A), washer (B), and spacer (C) through lower holes (D) on both sides of tractor rear frame.
6. From the inside of frame, install 1/2 in. lockwashers and 1/2 in. nuts (E). Tighten hardware securely.
Material Collection Cart Adjustments
NOTE: Making sure cart box is level with ground will:
• Make dumping of load easier.
• Distribute load more evenly.
• Make cart more level with ground.
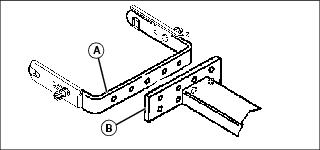
The vertical adjustment is a 2-position adjustment. This adjustment is made on the drawbar hitch plate (B) and quik-tatch bracket (A).
The side-to-side adjustment is a 3-position adjustment. This adjustment is made on the quik-tatch bracket (A) and drawbar hitch plate (B).
Side-To-Side and Vertical Adjustments:
1. Remove bolts, lockwashers, and nuts.
2. Position cart drawbar hitch plate as close as possible to center of tractor. Make sure to allow clearance for the power-flow discharge to cart chute with the tractor's fender deck and right tire.
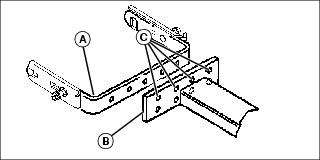
4. Move quik-tatch bracket (A) to appropriate hole (C) on drawbar hitch plate (B).
5. Install bolts, lockwashers, and nuts removed previously. (Nuts go to the inside of bracket.)