
Installing
Installing Proper Ballast
NOTE: Ballast is extra weight that can be added to the machine to provide additional stability. Typical ballast for your machine may be wheel weights or suitcase weights. See your authorized service center for recommended weights on your machine.
Install the proper front ballast to help counter-balance the total weight of the bagger. Remove ballast when the bagger is removed. This will ensure proper operation of the machine when not bagging.
Installing Hopper Top and Bags
Installing Mounting Post and Bagger Support Rod
1. Park machine safely. (See Parking Safely in the Safety section.)
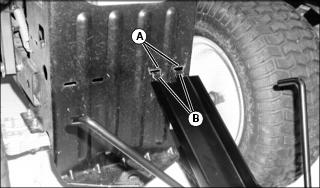
3. Fit tabs (B) on end of mounting post into slots (A) on right side of rear hitch plate of tractor.

4. Raise mounting post upward toward tractor and insert bagger support rod ends (C) into the small holes in CargO Mount™ brackets at rear of tractor.
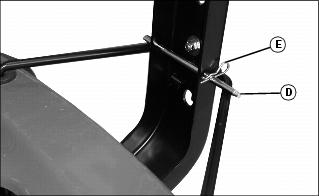
5. Install drilled cargo pin (D) through holes in mounting post and secure with spring locking pin (E).
Installing Bags
1. Install grass bags (A) onto tabs (B) at top of mounting post.
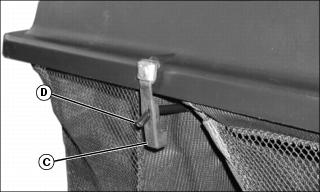
2. Close hopper top and fasten hood hold-down strap (C) over latch rod (D).
3. Check hood hold down tension. When attaching and removing strap (C), measure strap tension. Tension on strap should be approximately 19 - 25 mm (3/4 - 1 in.). Over extension on strap can lead to premature failure. (See “Adjusting Hopper Top Latch” in the SERVICE section for adjustment procedure.)
Installing Lower Discharge Chute (42 and 48 in. Cut and Throw Mower Decks)
NOTE: The mulch plate, if installed, must be removed before installing the bagger discharge chute.
1. Raise and hold plastic discharge chute on mower deck.
NOTE: To raise inner metal deflector, pull outward at rear of deflector then pull up.
2. Raise inner metal deflector, and position lower bagger discharge chute in front of mower deck discharge opening.
NOTE: Bagger discharge chute must fit on the outside of the mower deck discharge opening.
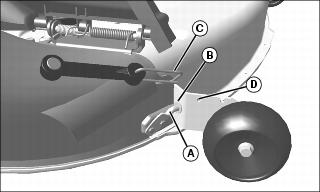
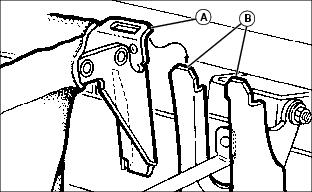
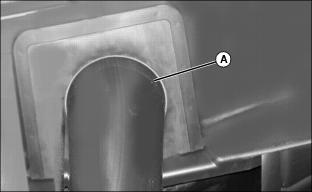
3. At the front of the discharge opening, slide pin (A) through hole (B) in gage wheel bracket.
4. Hook front rubber strap hook (C) over the top of the gage wheel bracket and insert through hole (D).
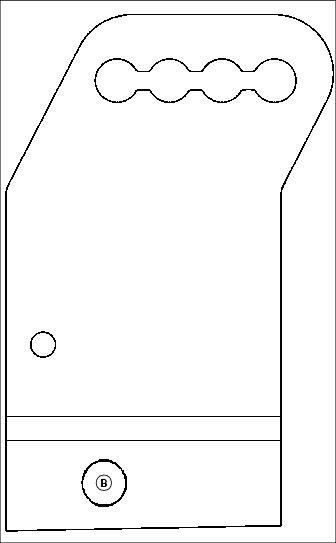
NOTE: If your mower deck does not have the 12.7 mm (1/2 in.) hole (B) in gage wheel bracket, cut out and use template below to mark and drill a 12.7 mm (1/2 in.) hole (B) into gage wheel bracket. This hole is necessary to mount the front of the discharge chute.
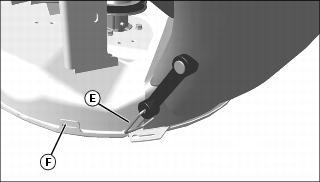
5. Rotate rear side of lower discharge chute toward mower deck, and insert rear strap hook (E) on discharge chute into slot (F) on deck.
Installing Upper Bagger Discharge Chute
1. Slide top (A) of upper discharge chute into opening in hopper top.
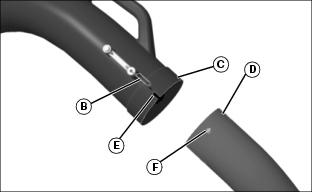
2. Slide bottom (C) of upper discharge chute over top (D) of lower chute, aligning notch (E) with bolt (F).
3. Hook rubber strap latch (B) onto bolt (F) in lower chute.