
Service
Service Intervals
Before Each Use
Beginning of Season
• Adjust and lubricate drive chain
Every 25 Hours
• Check auger gearbox oil level
Grease
The following greases are preferred:
• John Deere Multi-Purpose SD Polyurea Grease
• John Deere Multi-Purpose HD Lithium Complex Grease
If not using any of the preferred greases, be sure to use a general all-purpose grease with an NLGI grade No.2 rating.
Wet or high speed conditions may require use of a special-use grease. Contact your Servicing dealer for information.
Gear Oil
Use oil viscosity based on the expected air temperature range during the period between oil changes.
John Deere GL-5 Gear Lubricant is recommended.
Other oils may be used if they meet one or more of the following:
• API Service Classification GL-5.
• Military Specification MIL-L-2105D.
• Military Specification MIL-L-2105C.
• Military Specification MIL-L-2105B.
Oils meeting Military Specification MIL-L-10324A may be used as arctic oils.
Checking Auger Gearbox Oil Level
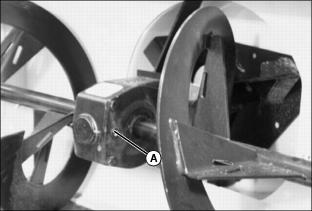
2. Remove plug (A). Oil should be even with bottom of hole.
Lubricating
Auger Shaft
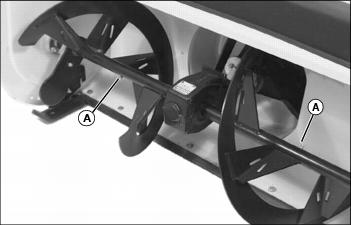
Lubricate fittings (A) with recommended grease.
Driveshaft
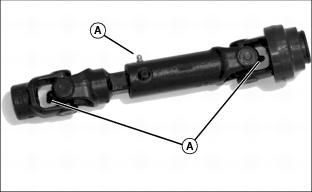
Lubricate fittings (A) with recommended grease.
Discharge Chute and Cable Pulleys
• Apply grease under chute before every use.
• Apply light grease to cable pulleys.
Drive Chain
1. Lubricate chain with John Deere Chain Lube Spray or equivalent.
2. Start engine. Run snowblower briefly to distribute oil.
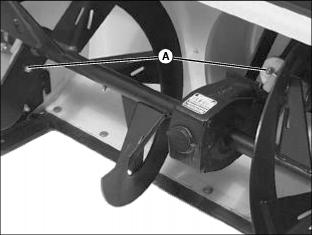
Adjusting Drive Chain
2. Disconnect driveshaft from machine.
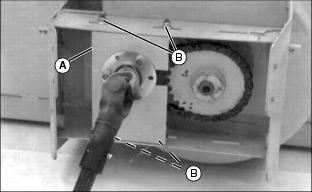
3. Move chain shield (A) left to provide tension on the chain. Deflection should be 4.7–10 mm (3/16–3/8 in.)
4. Adjust chain, if necessary:
• Loosen four locknuts (B) on chain shield.
• Slide chain shield right or left until deflection measurement is correct.
• Hold chain shield in place and tighten nut.
5. Rotate auger several turns and make sure chain has at least 4.7 mm (3/16 in.) deflection at all times.
6. Check condition of chain and sprockets. Replace if necessary.
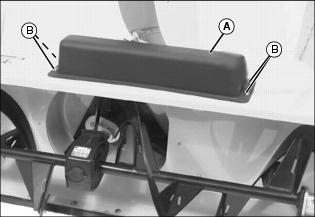
Replacing Shear Bolt
1. If you hit a solid object, stop implement immediately.
2. Stop engine. Lock park brake. Lower implement.
3. Remove broken shear bolt (A), one from each end, or one from impeller.
4. Turn auger or blower impeller to line up holes in shaft. Remove spare shear bolt (B).
5. Install bolt and nut. Tighten so the two paddles the shear bolts connect are touching. Do not overtighten.
6. Find and correct the cause for shearing.
Servicing Scraper Blade
NOTE: Reverse the blade when one edge becomes worn, rough, or bent. If both edges are worn, rough, or bent, replace the blade.
2. Put blocks under both sides of snowblower.
4. Stop engine and remove key.
5. Lower snowblower onto blocks.
7. Turn blade (B) end-for-end or replace blade.
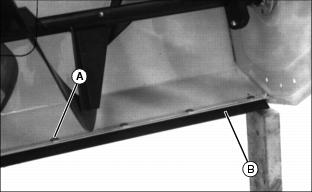
Replacing Discharge Chute Cables
NOTE: When removing cable shield (A), an angle bracket will fall from underneath the snowblower. Install bracket again when shield is installed.
2. Remove four locknuts, bolts (B), cable shield (A) and angle bracket.
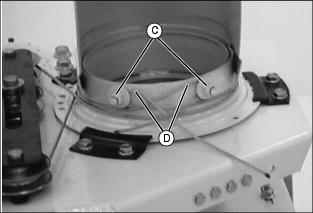
3. Loosen two locknuts (C) from threaded studs on discharge chute.
NOTE: For ease of assembly and proper cable routing, remove one cable at a time.
4. Remove each cable (D) from snowblower.
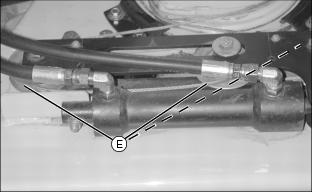
5. Remove cables from pulleys (E).
Replacing Right Cable
NOTE: For ease of assembly and proper cable routing, replace one cable at a time. Route right cable around snowblower first.
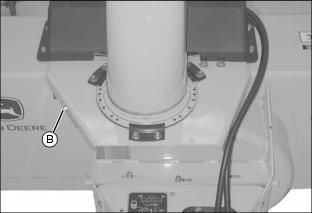
1. Rotate discharge chute to the right (as viewed from machine seat) to retract hydraulic cylinder rod.
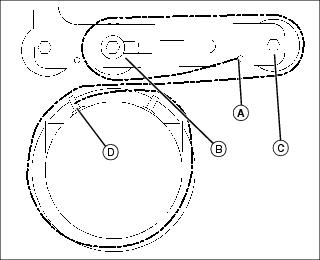
2. Standing at rear of snowblower, put cable through hole (A).
3. Wrap cable around middle pulley (B), and around right pulley (C).
4. Wrap cable counterclockwise around discharge chute and put it around threaded stud and behind washer and locknut (D).
Replacing Left Cable
NOTE: For ease of assembly and proper cable routing, replace one cable at a time. Route right cable around snowblower first, then route left cable.
1. Rotate snowblower discharge chute to the right (as viewed from machine seat) to retract hydraulic cylinder rod.

2. Standing at rear of snowblower, put cable through hole (A).
3. Wrap cable around middle pulley (B), and around left pulley (C).
4. Wrap cable clockwise around discharge chute and put it around threaded stud and behind washer and locknut (D).
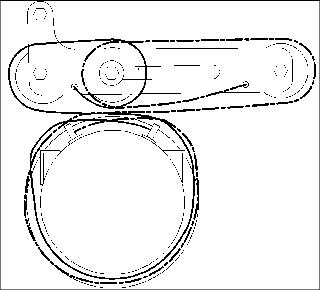
Picture Note: Both cables installed.
IMPORTANT: Avoid damage! When installing cable shield, install the longer bolts through the shield and bracket. |
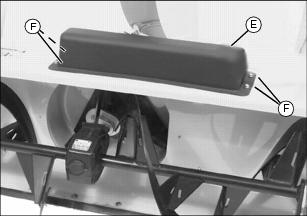
5. Install cable shield (E) and angle bracket with four bolts (F) and locknuts.