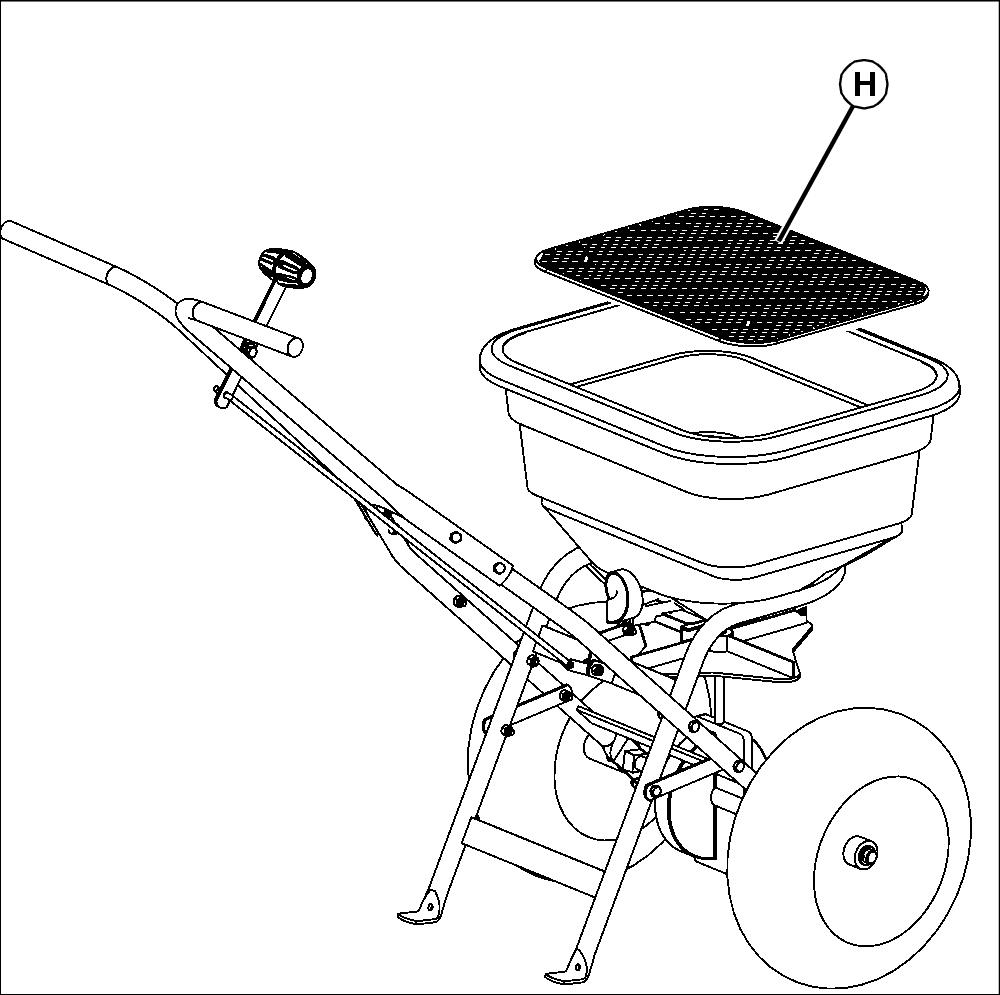
Assembly
Identify Parts
50 lb Spreader
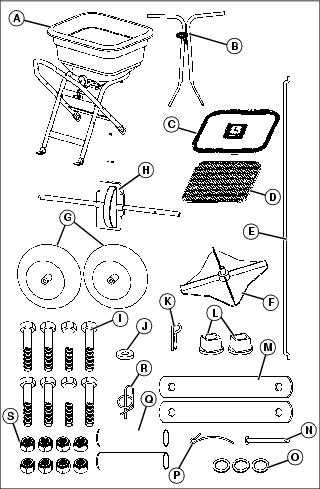
80 lb Spreader
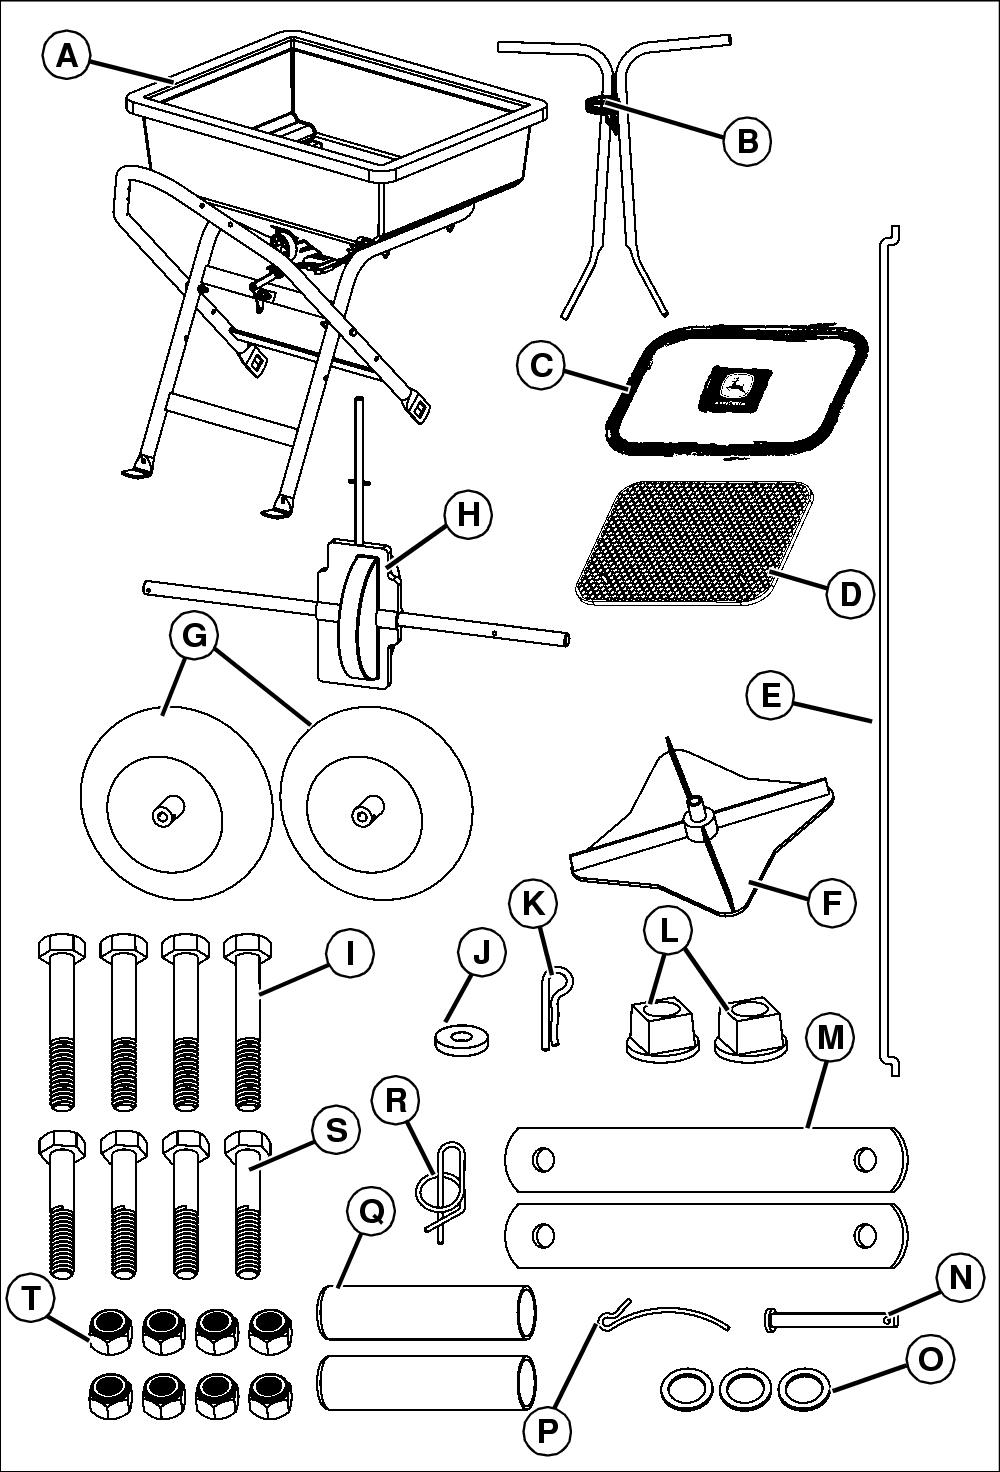
Assemble Spreader
NOTE: 50 lb spreader is shown in this assembly section. 80 lb spreader assembly is similar.
Assemble Axle and Gear Housing to Frame
NOTE: You may need to lightly tap spinner with a rubber mallet to engage roll pin into slot on spinner.
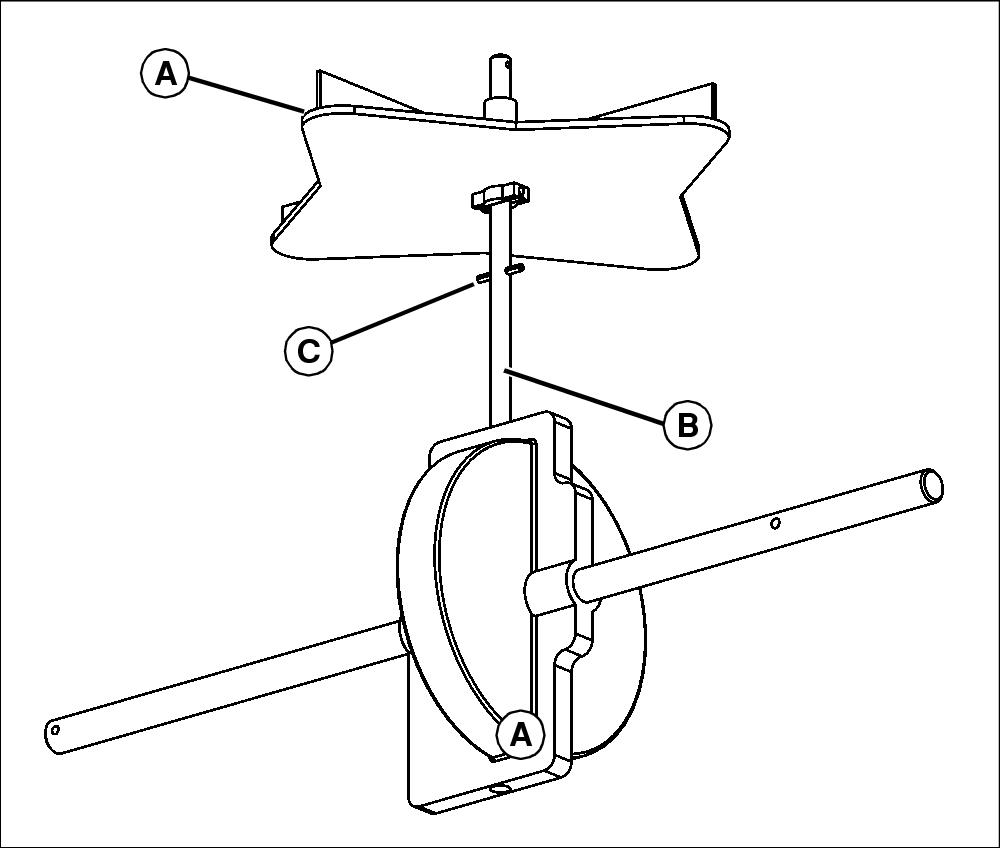
1. Install spinner (A) onto spinner shaft (B) as shown. Make sure roll pin (C) in spinner shaft engages with slot on spinner.
NOTE: Grease fitting (H) on gear housing must be facing forward.
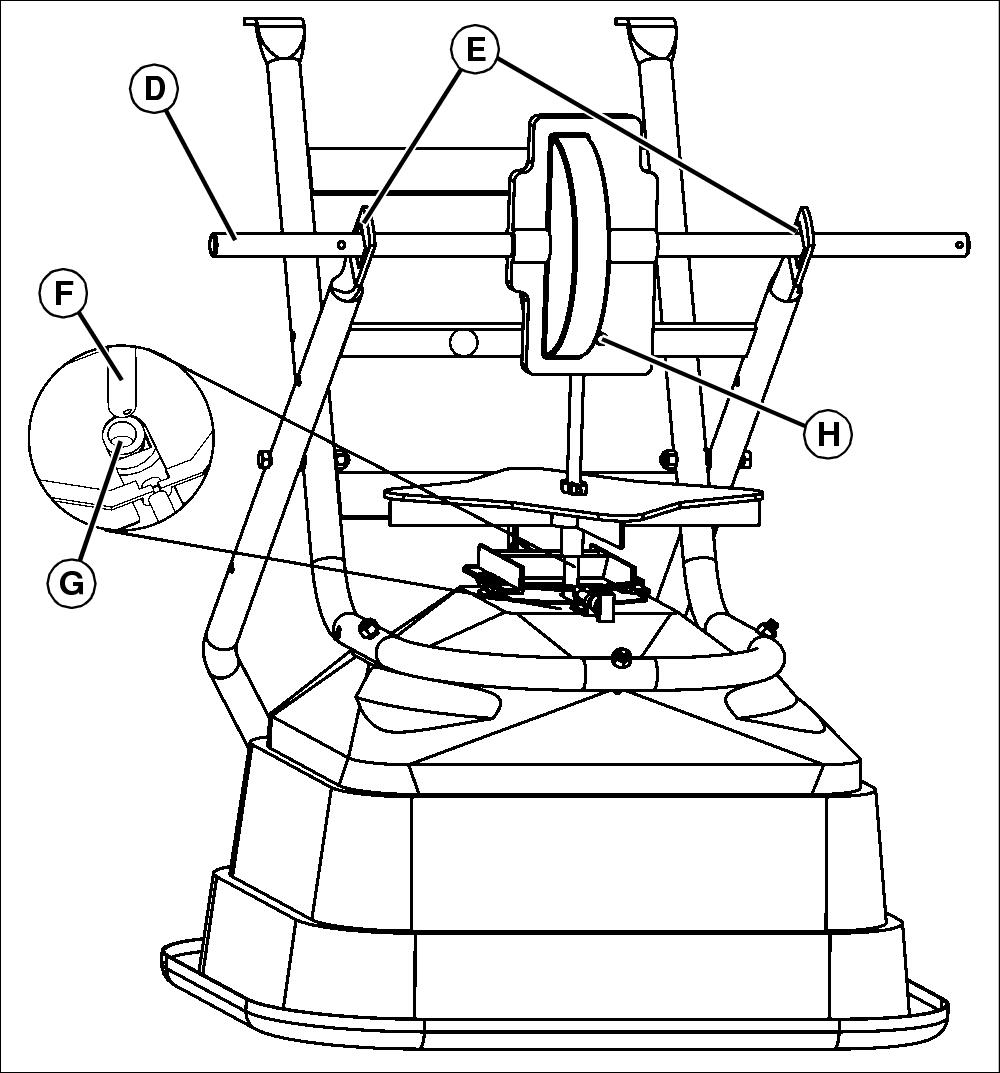
2. Install axle (D) into square holes (E) on the frame. Align spinner shaft (F) with spinner shaft bearing (G) on bottom of hopper and push through bottom.
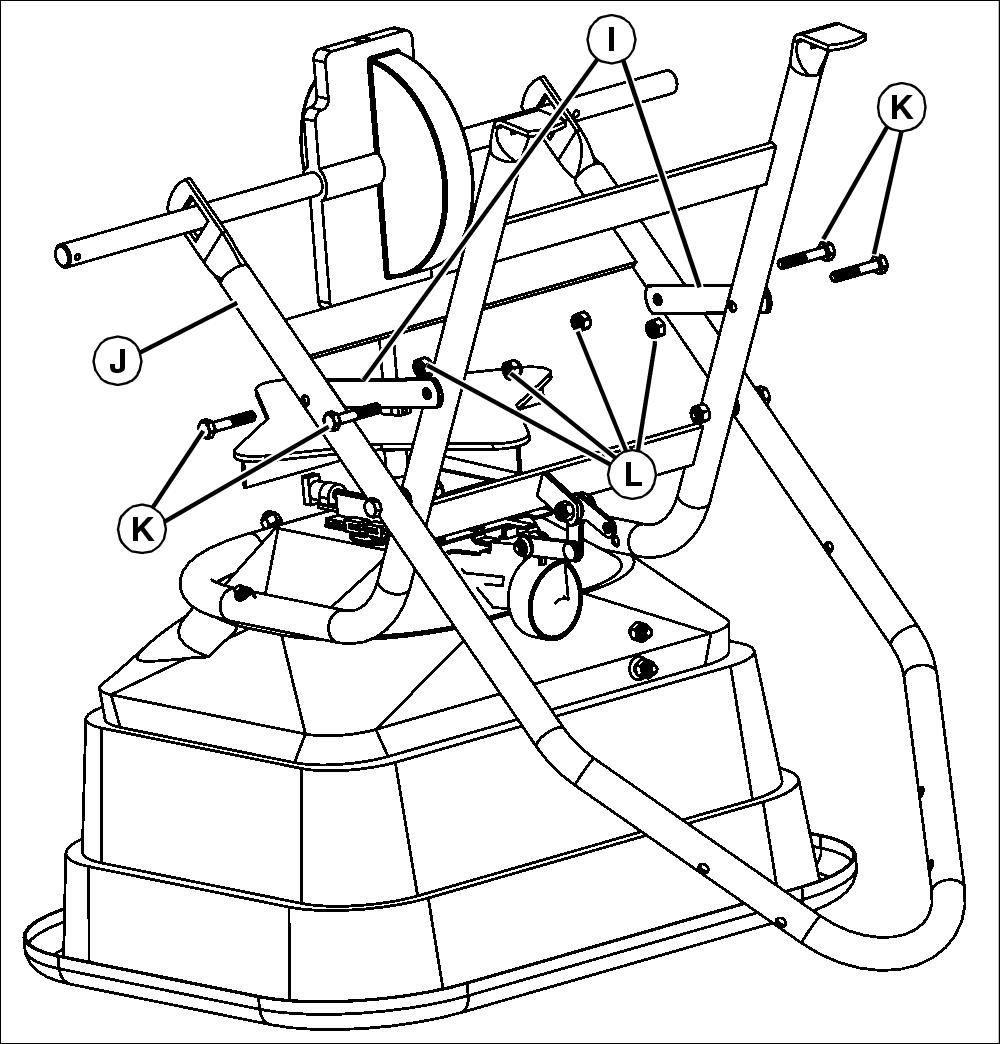
3. Align the cross braces (I) to the hopper frame (J), and secure using four 1/4 x 1-1/2 in. bolts (K) and four 1/4 in. locknuts (L). Tighten hardware securely.
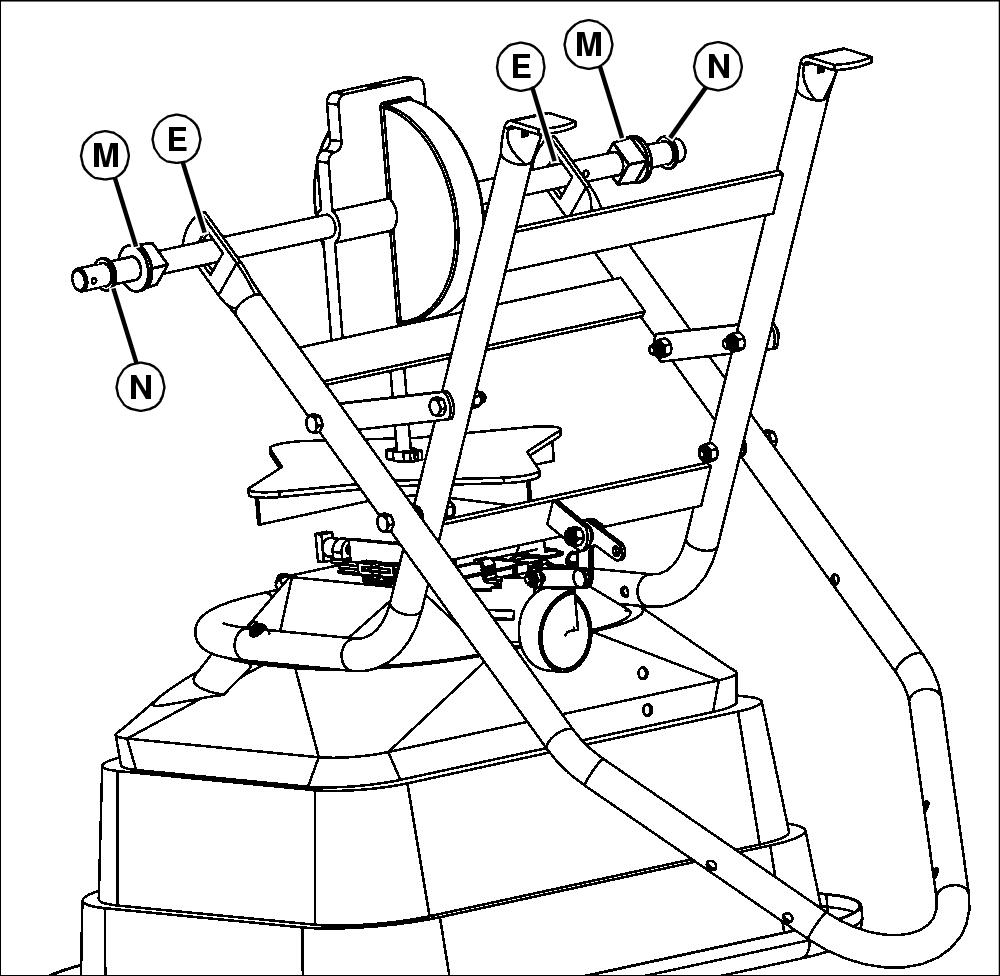
4. Install both axle bushings (M) into the square holes (E).
5. Install one axle washer (N) onto each side of axle.
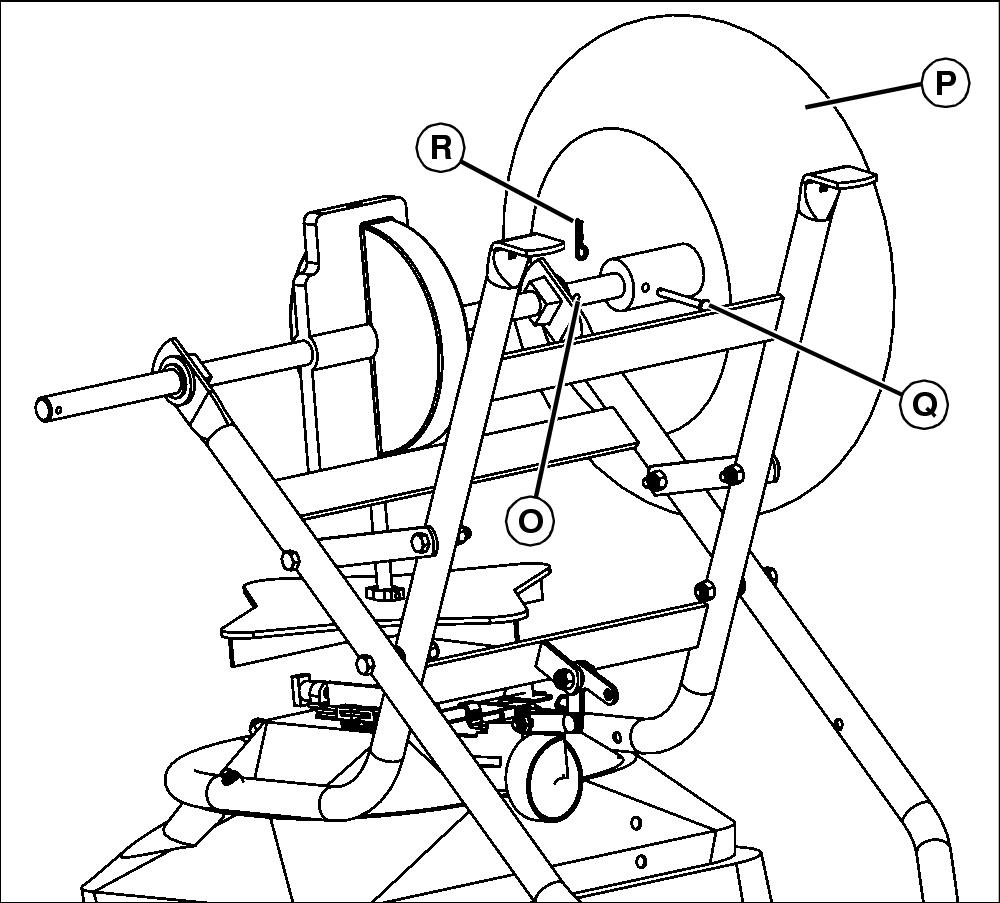
6. On axle, locate hole (O) that is closest to the axle bushing. Install wheel (P) (valve stem out) onto axle. Line up the hole on the wheel with hole on the axle shaft (O). Push clevis pin (Q) through the hole and pin in place using the spring locking pin (R).
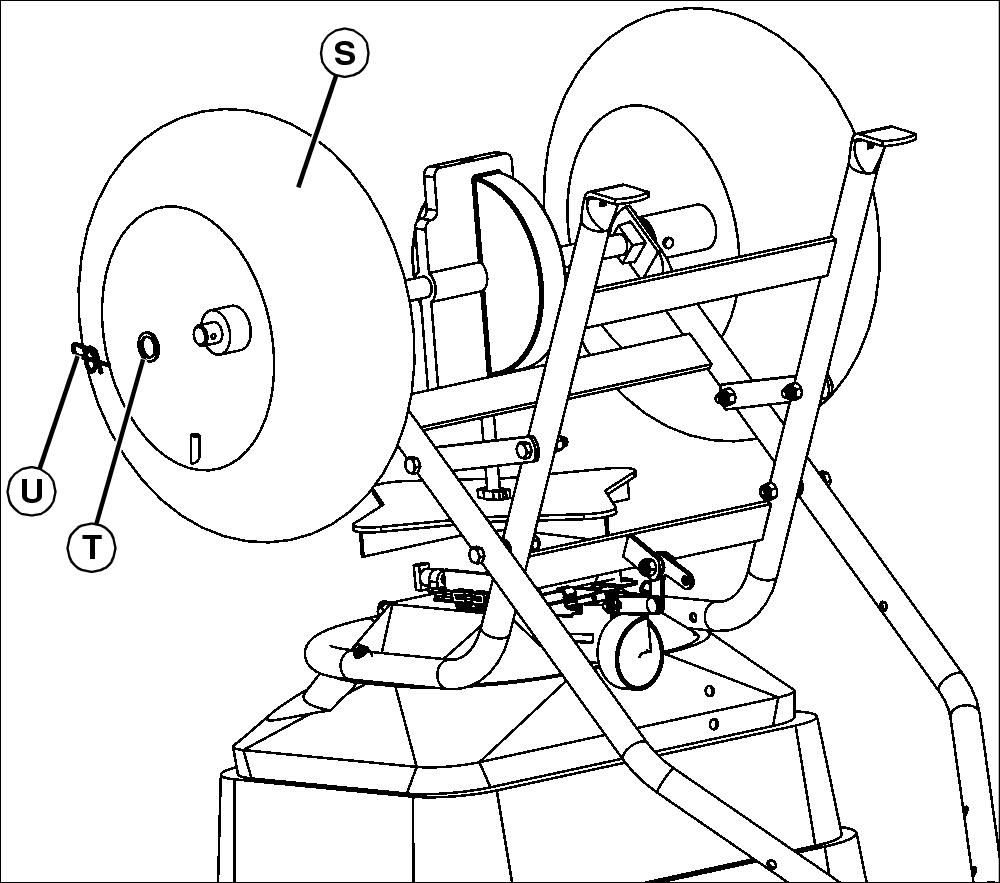
7. Install wheel (S) on the opposite side of the axle (valve stem out) until it touches axle bushing and washer. Install axle washer (T) onto axle. Push locking clip (U) through axle hole. Turn spreader over and place on ground.
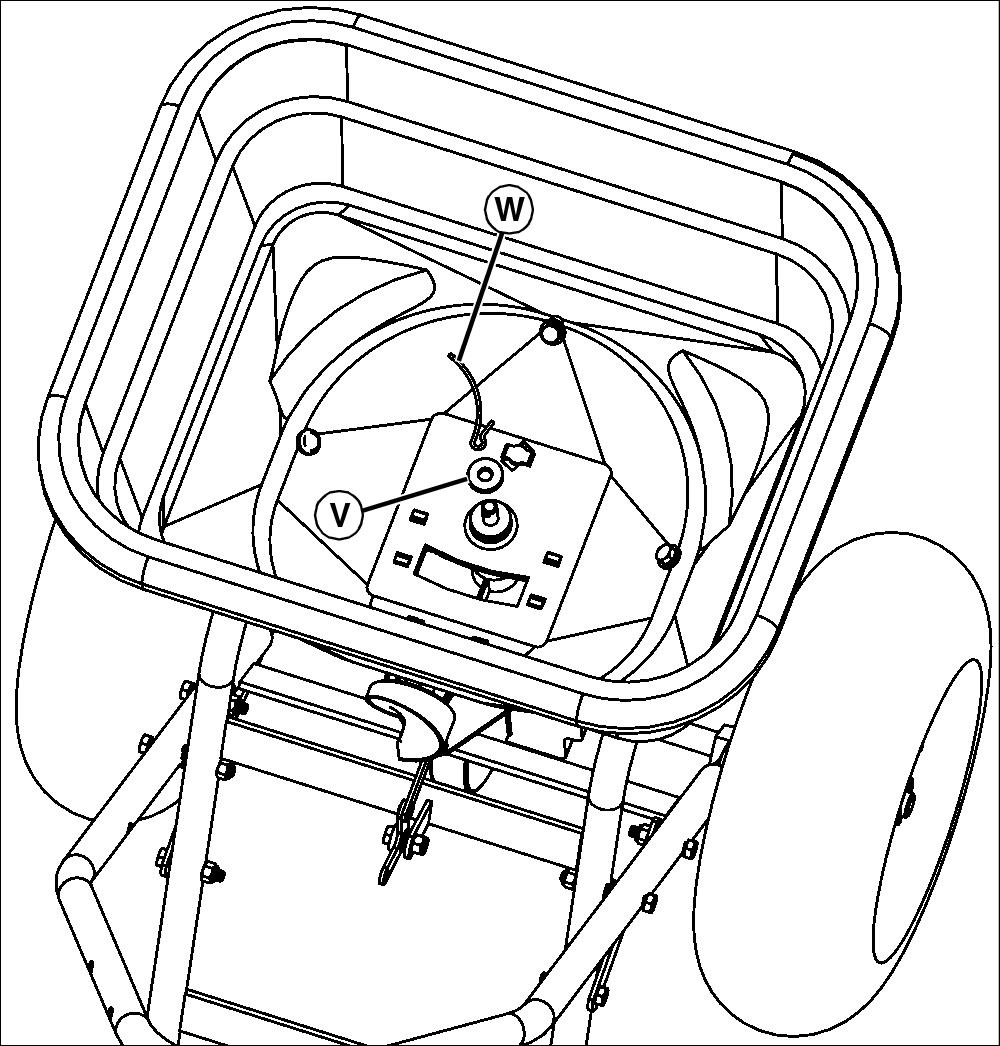
8. Inside the hopper, assemble the felt washer (V) and agitator wire (W) onto the spinner shaft as shown.
Assemble Handle
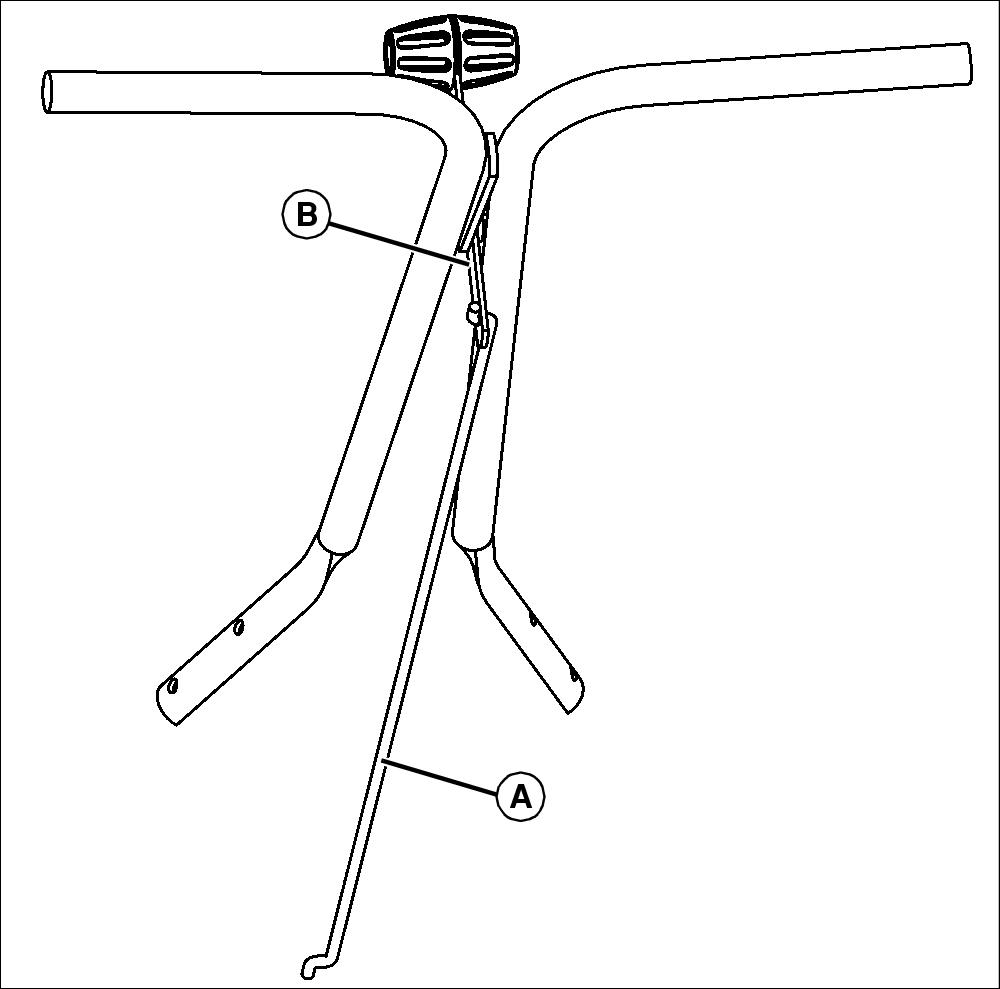
1. Install control lever rod (A) to control lever (B).
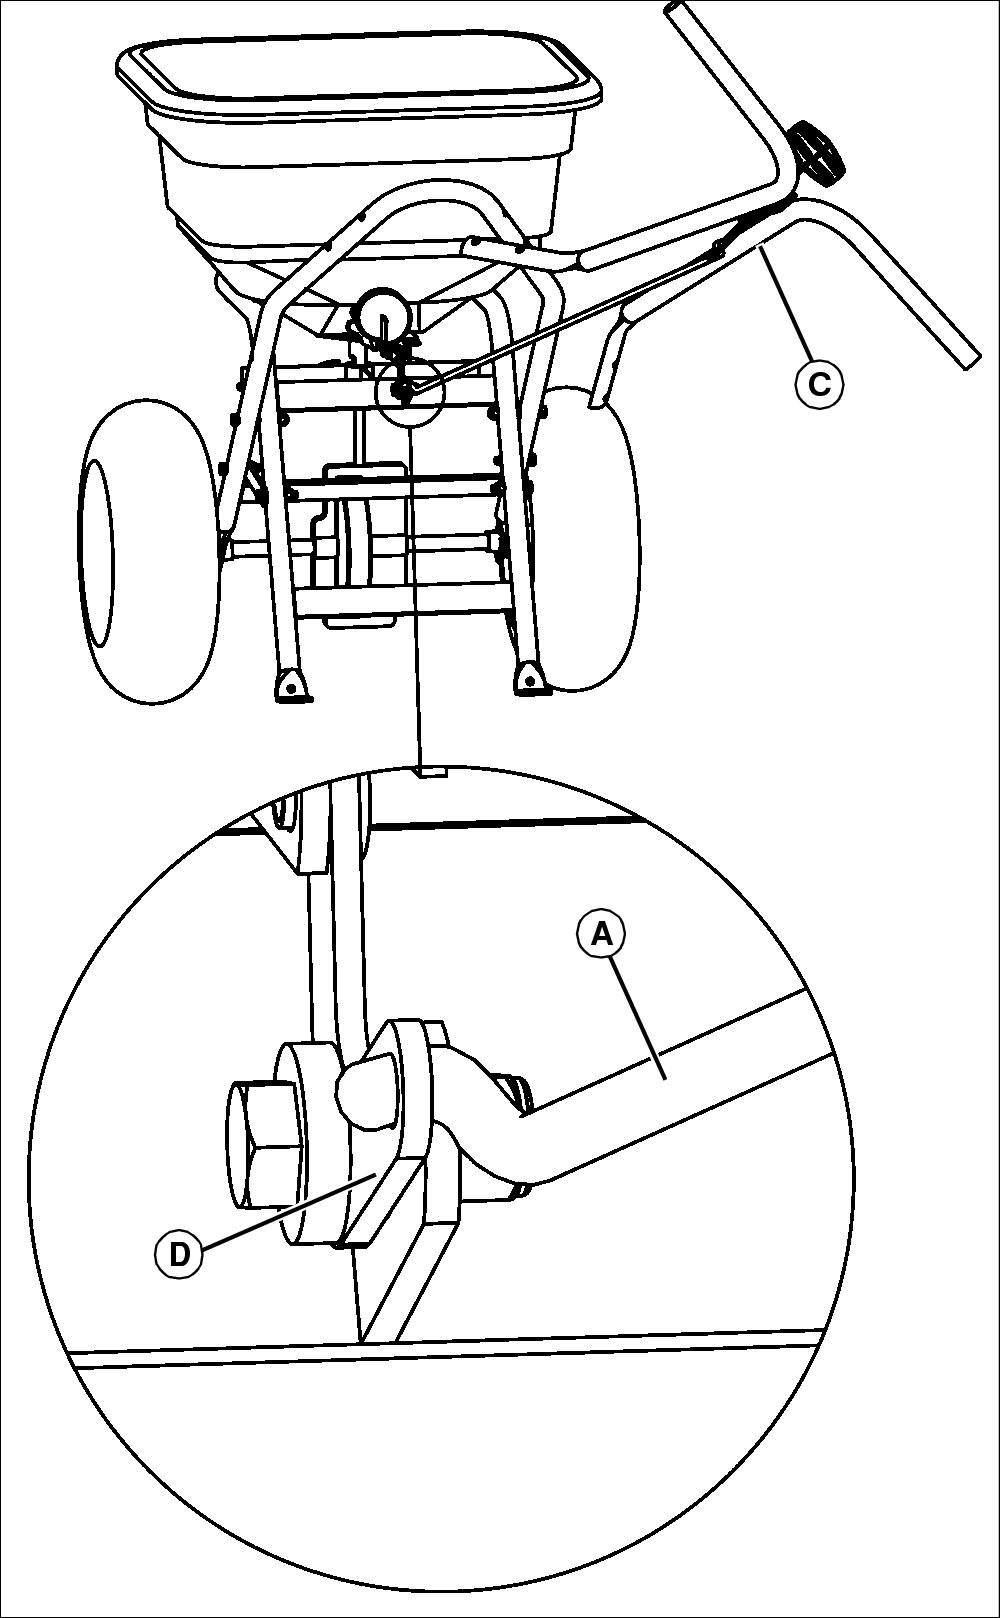
Picture Note: 50 lb spreader shown.
2. Turn handle assembly (C) sideways and install bottom of control lever rod (A) into rate gate lever (D).
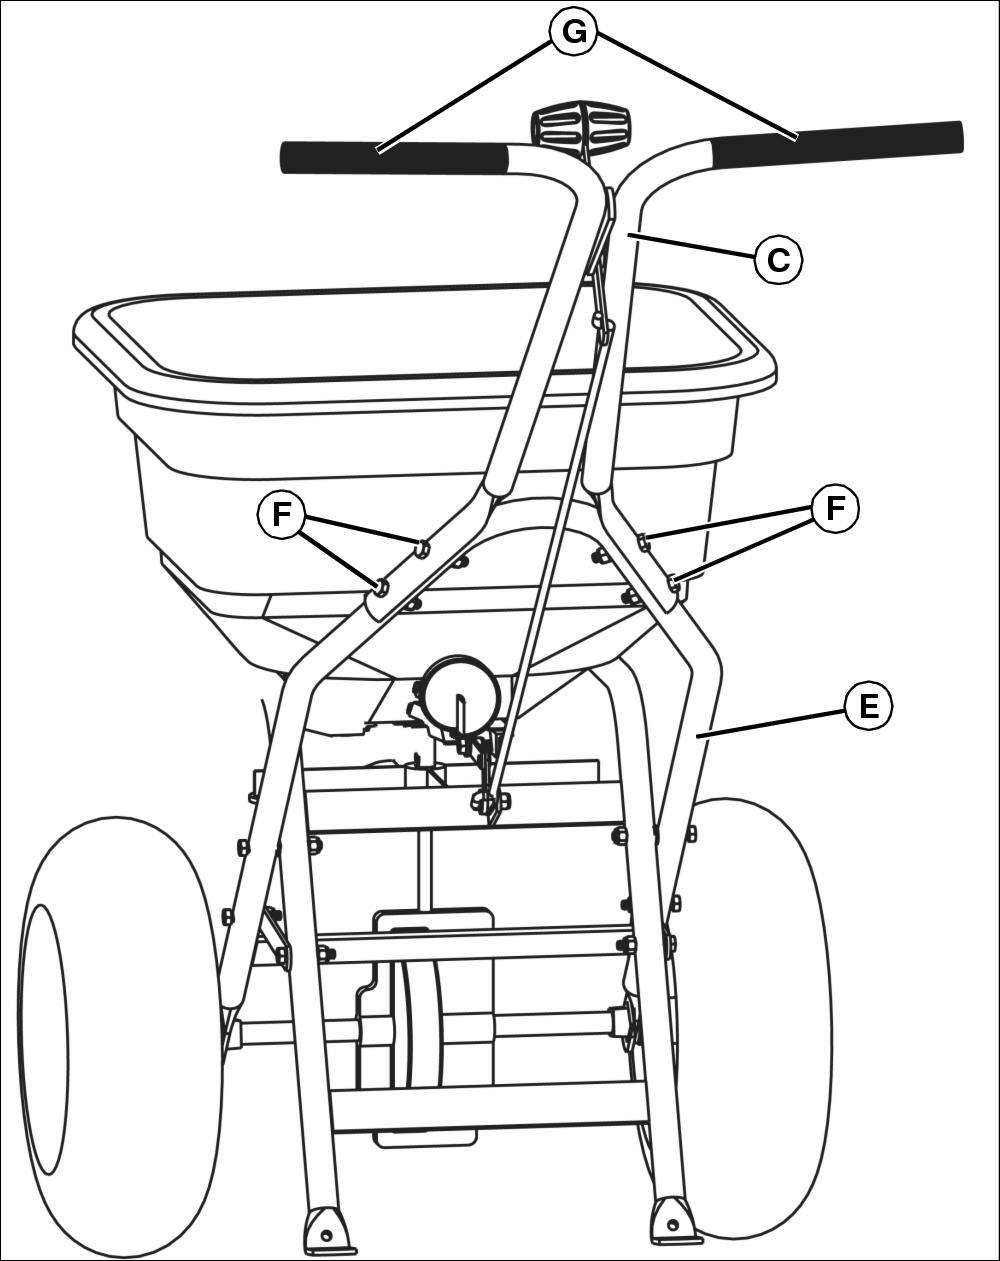
3. Attach handle assembly (C) to frame (E):
• For 50 lb Spreader use four 1/4 x 1-1/2 in. bolts (F) and 1/4 in. locknuts.
• For 80 lb Spreader use four 1/4 x 1-3/4 in. bolts (F) and 1/4 in. locknuts.
NOTE: For easier assembly, use soap and water on handle bars before installing grips.