
Preparing Vehicle
Remove Mulch Kit
The mulch kit is not compatible with the installation of the POWER FLOW Bagger. If a mulch kit is installed on your mower, you must remove the mulching insert, cover plate, and mulching blades. (See the installation instructions shipped with your mulch kit.) The front lip sections provided with the mulch kit may remain on the deck and will improve bagging performance.
The standard blades shipped with your mower must be installed to the mower deck for use when bagging.
Install Double Sheave
IMPORTANT: Avoid damage! Perform all steps in this procedure exactly as described. Failure to complete the steps or ignore the given torque specifications could result in serious equipment damage. |
1. Put mower deck in the lowest position.
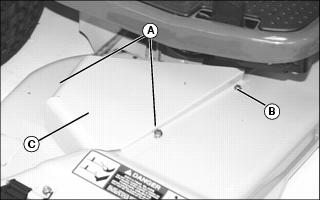
2. Remove and discard two cap screws (A). Remove and save cap screw (B) and right deck shield (C).
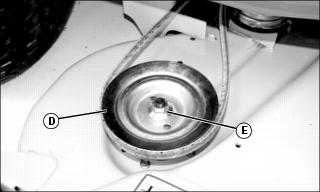
3. Remove mower belt from sheave (D).
4. Remove and save sheave nut (E) and sheave.
IMPORTANT: Avoid damage! Hexagon-shaped hole in double sheave must align with hexagon portion of shaft of deck. Push up on blade to see hex of shaft. |
5. Install double sheave (G) with sheave nut (F).
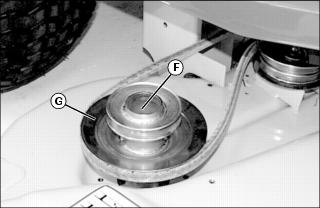
6. Put mower belt on bottom sheave of double sheave.
7. Install block of wood between blade and deck to keep blade from turning.
8. Tighten sheave nut to 82 N•m (60 lb-ft).
IMPORTANT: Avoid damage! To avoid machine damage to spindle, blade nut must be loosened and tightened to specification for proper spindle operation. |
9. Loosen nut and tighten nut to 82 N•m (60 lb-ft).
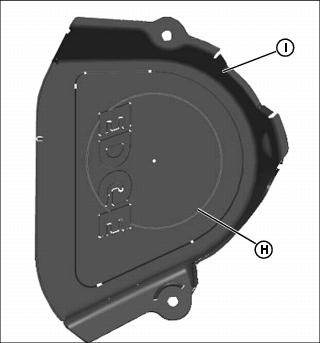
10. Locate embossed cutout line (H) on bottom of right deck belt shield.
11. Cut out area inside embossed line.
NOTE: If the shield on your deck does not have the knockout feature, see your John Deere Dealer.
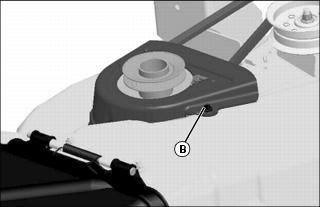
Picture Note: Deck removed for illustration purposes only.
12. Install shield on deck with original flange cap screw (B). Leave cap screw finger tight.
Install Power Flow Mounting Bracket
1. Raise and hold plastic discharge chute on mower deck.
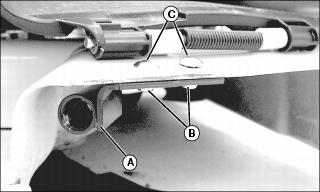
2. Install rear bracket (A) on deck with two M8 carriage bolts (C) and M8 lock nuts (B).
Install Belt Shield Support and Belt Shield
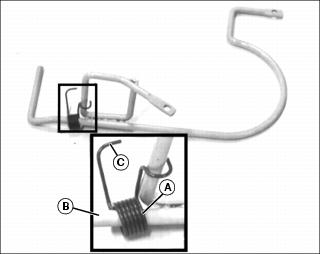
• Install spring (A) on belt shield support (B).
NOTE: Spring leg (C) MUST be on top side of belt shield.
Picture Note: Bottom side of belt shield shown.
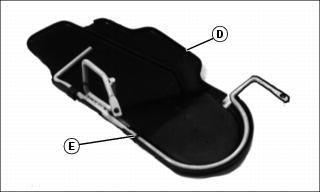
• Fasten wire support assembly to plastic belt shield (D) with tie strap (E). Cut off excess end of tie strap.
IMPORTANT: Avoid damage! Always leave belt shield in place to prevent sheave from hitting tractor fender deck. |
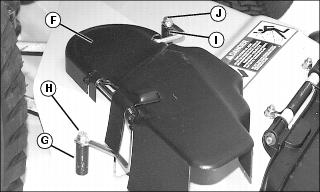
• Install plastic belt shield assembly (F) on deck using one long spacer (G), one M8x60 flange cap screw (H), one short spacer (I), and one M8x40 flange cap screw (J). Tighten cap screws.


