
Service Hydraulics
Transmission and Hydraulic Oil
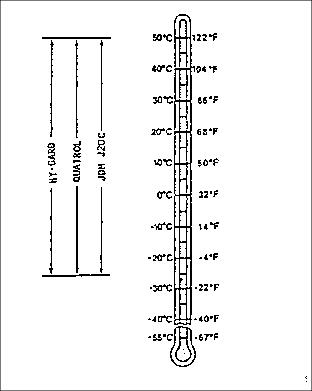
NOTE: Greensmower is filled with John Deere HY-GARD® (J20C) Transmission and Hydraulic Oil at the factory. DO NOT mix oils. DO NOT use type "F" automatic transmission fluid or J20D Low Viscosity HY-GARD®.
Use oil viscosity based on the expected air temperature range during the period between oil changes.
John Deere HY-GARD® Transmission/Hydraulic Oil is recommended.
Other oils may be used if they are QUATROL® oils or if they meet John Deere Standard JDM J20C.
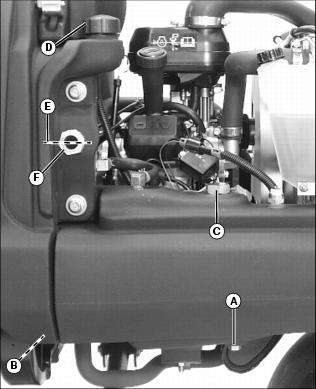
Checking Hydraulic Oil Level
IMPORTANT: Avoid damage! Hot hydraulic oil will expand and show incorrect oil level. Check reservoir tank: |
1. Park the machine safely. (See Parking Safely in the SAFETY section.)
NOTE: Check hydraulic oil level when oil is cold.
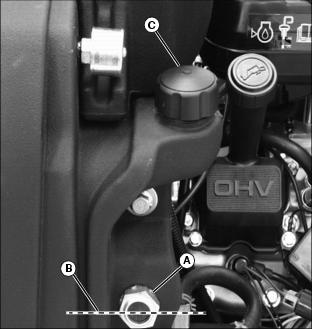
3. Check oil level on sight glass (A). Oil should be maintained to a mid-level range (B) on the sight glass.
IMPORTANT: Avoid damage! Dirt and debris in hydraulic oil may cause damage to the hydraulic system. · Do not open oil reservoir cap unless absolutely necessary. |
· Carefully clean area around oil reservoir fill cap (C).
· Remove reservoir cap. Add oil at reservoir fill cap location until oil level reaches mid-level range on the sight glass.
5. Install and tighten reservoir cap.
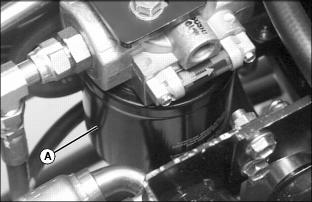
Checking Hydraulic Oil Filter Status Indicator
IMPORTANT: Avoid damage! Hydraulic fluid may begin to break down sooner under severe or unusual conditions. Operating in these conditions may require more frequent service intervals. |
1. Park the machine safely. (See Parking Safely in the SAFETY section.)
2. Secure operator seat in the raised position.
3. Locate and check hydraulic oil filter status indicator (A) just above oil filter.
· When plunger (B) inside indicator moves in direction shown by arrow on indicator and is visible inside the indicator red zone, hydraulic oil filter requires immediate service.
Changing Hydraulic Oil
IMPORTANT: Avoid damage! Dirt and debris in hydraulic oil may cause damage to the hydraulic system. · Do not open oil reservoir cap unless absolutely necessary. |
1. Park the machine safely. (See Parking Safely in the SAFETY section.)
2. Allow engine and hydraulic oil reservoirs to cool.
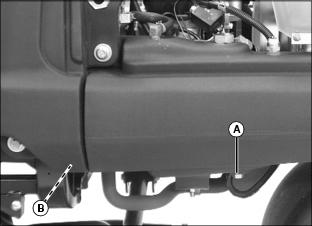
4. Locate drain plug (A) under left side of main oil reservoir. Locate drain plug (B) under left side of auxiliary oil reservoir.
5. Remove main drain plug and auxiliary tank drain plug.
6. Drain oil into a drain pan with at least a 21 L (6 gal) capacity.
7. Clean hydraulic oil reservoir strainer before adding oil to hydraulic system.
8. Apply thread sealant to drain plug threads.
9. Install and tighten drain plug (A) and drain plug (B).
NOTE: Total oil capacity of hydrostatic and reel drive system is 28.8 L (7.6 gal). Capacity of hydraulic oil reservoir only is 20.4 L (5.4 gal).
· Clean area around reservoir fill plug (C).
· Fill reservoir with oil. Do not overfill.
· Apply thread sealant to main fill plug threads.
· Install and tighten fill plug.
11. Fill auxiliary oil reservoir.
· Clean area around auxiliary oil reservoir fill cap (D). Remove cap.
· Add oil at reservoir fill cap location until oil level reaches mid-level range (E) on the sight glass (F).
13. Cycle hydraulic controls for one or two minutes. Check for leaks.
15. Check oil level. Add oil as necessary.
16. Close rear engine cowling.
Changing Hydraulic Oil Filter
1. Park the machine safely. (See Parking Safely in the SAFETY section.)
2. Allow engine and hydraulic oil filter to cool.
3. Secure operator seat in the raised position.
4. Locate hydraulic oil filter (A) under right side of greensmower.
5. Turn filter counterclockwise to remove.
6. Apply a film of clean oil on gasket of new filter.
7. Turn filter clockwise until gasket makes contact with the mounting surface. Tighten 1/2 to 3/4 turn after gasket contact.
9. Cycle hydraulic controls for one or two minutes. Check for leaks.
11. Check oil level. Add oil as necessary.
Cleaning Hydraulic Oil Reservoir Strainer
NOTE: Clean hydraulic oil reservoir strainer when changing the hydraulic oil and filter. Service strainer when the hydraulic oil reservoir is empty.
1. Change hydraulic oil and filter.
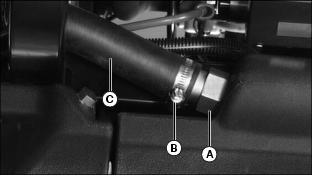
2. Locate hydraulic oil reservoir strainer (A) under left side of greensmower.
3. Loosen adjustable hose clamp (B).
NOTE: Use drain pan to catch dripping oil.
4. Remove rubber hose (C) from strainer.
5. Loosen and remove strainer from reservoir housing.
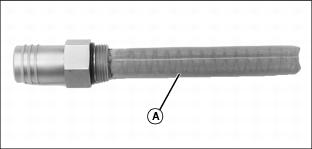
6. Clean strainer (A) with solvent or mineral spirits.
8. Apply thread sealant to strainer threads.
9. Install strainer into reservoir housing and tighten.
10. Install rubber hose (C) onto strainer.
11. Install and tighten adjustable hose clamp (B).
Cleaning Backlap/Mower Valve Screen
1. Park the machine safely. (See Parking Safely in the SAFETY section.)
2. Allow hydraulic oil to cool.
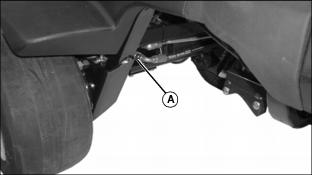
3. Locate backlap/mow valve under left side of greensmower.
NOTE: Use drain pan to catch dripping oil.
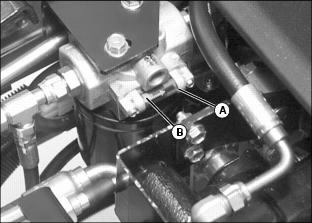
4. Remove hose and fitting from "P" port (A).
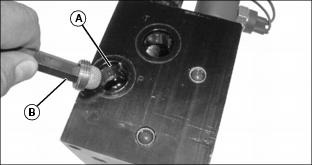
Picture Note: Valve shown removed for illustration purposes only.
6. Clean screen with solvent or mineral spirits.