
Installing
Checking Tire Pressure
Check tire pressure of machine before installing bagger. See your machine operator’s manual.
Installing Proper Ballast
NOTE: Ballast is included with this attachment. If ballast was not shipped with the rear bagger and POWERFLOW, see your authorized dealer.
Install the proper front ballast to help counter-balance the total weight of the bagger. Remove ballast when the bagger is removed. This will ensure proper operation of the machine when not bagging.
Install Ballast (All Models)
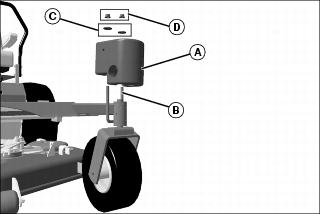
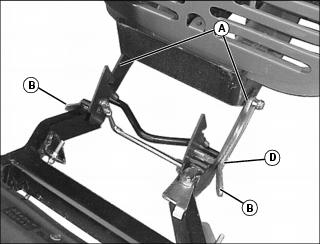
1. Install the front caster wheel weight (A) on each caster wheel support.
2. Secure the weights with U-bolt (B), washers (C) and nuts (D) as shown.
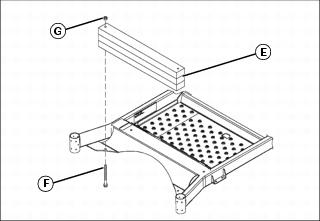
3. Install three weights (E) between the caster wheel support arms as shown.
4. Secure the weights to the machine on each side with a bolt (F) and nut (G).
Installing Proper Mower Blades
For maximum performance from your POWER FLOW, install the correct mower blades for your application:
• Mulching Blades - Not for use with POWER FLOW.
• Standard Blades - Standard blades are designed for bagging, side discharging, and all mowing conditions.
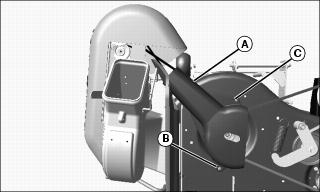
Installing POWER FLOW
1. Install short end (A) of long front support rod in front mounting bracket (B).
2. Install POWER FLOW on long end (C) of front support rod.
3. Move tension lever (D) to release position.
Picture Note: Parts removed for clarity.
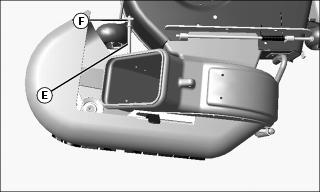
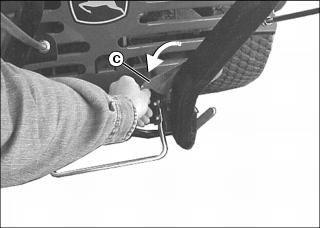
4. Fully raise mower deck discharge chute, and pivot POWER FLOW toward deck. Insert pin (E) into hole (F) in right rear gage bracket.
5. Hold POWER FLOW securely against mower deck discharge area.
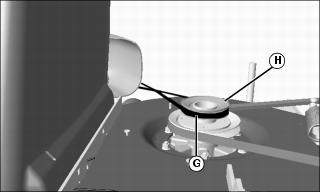
6. Install drive belt (G) to top sheave (H) with belt “V” in groove.
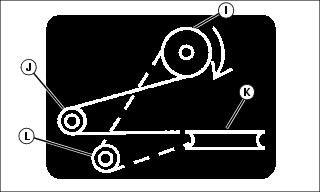
7. Verify correct drive belt installation. The drive belt must run:
a. from mower deck top sheave (I),
e. back to mower deck top sheave (I).

8. Move tension lever (D) to lock position.
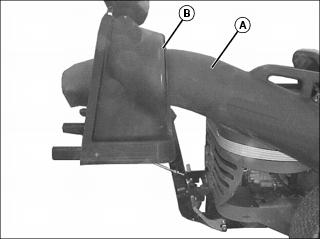
Installing Blower Belt Shield
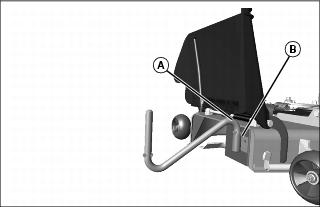
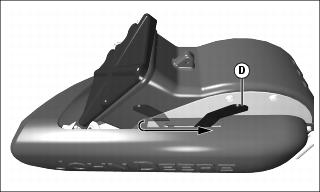
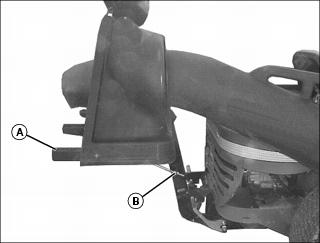
1. Install blower belt shield (A) on head pin (B) and drilled stud (C).
2. Secure blower belt shield by inserting a spring locking pin through drilled stud.
Installing Hopper Assembly
1. Park the machine safely. (See Parking Safely in the SAFETY section.)

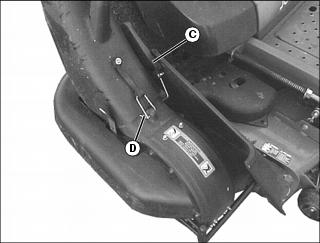
2. Position hopper assembly behind the machine. Make sure frame arms (A) are aligned with bagger mounting hardware at rear frame of machine.
3. Lift open latch levers (B) and lock lever (C).
4. Place frame arms (A) around bagger mounting hardware at rear frame of machine.
5. Push latch levers (B) down and below roll pins (D) to secure.

6. Pivot entire hopper assembly up toward machine until latches (E) engage top edge of rear frame (F).
7. Move lock lever (C) down to secure hopper assembly to machine frame.
8. Install the grass bags. Leave hopper open to install bagging chute.
Adjusting Hopper
NOTE: Machine must be parked on a level surface with tires inflated to the correct air pressure before adjusting the hopper.
2. Stand to the side of the hopper. Support frame (A) should be angled 2 - 3° forward of level. Adjust hopper if necessary:
a. Loosen flange nuts (B) on hopper support rods.
b. Adjust nuts until support frame is angled slightly forward.
Installing Bagging Chute
1. Insert round end of chute (A) into hopper opening (B). Guide chute into hopper far enough to provide clearance for connection to the POWER FLOW.
2. Lift and hold open exhaust door (C) on the POWER FLOW.
3. Slide chute completely onto blower outlet.