
Installing
Installing Blower
NOTE: The blower assembly weighs approximately 32 kg (70 lb).
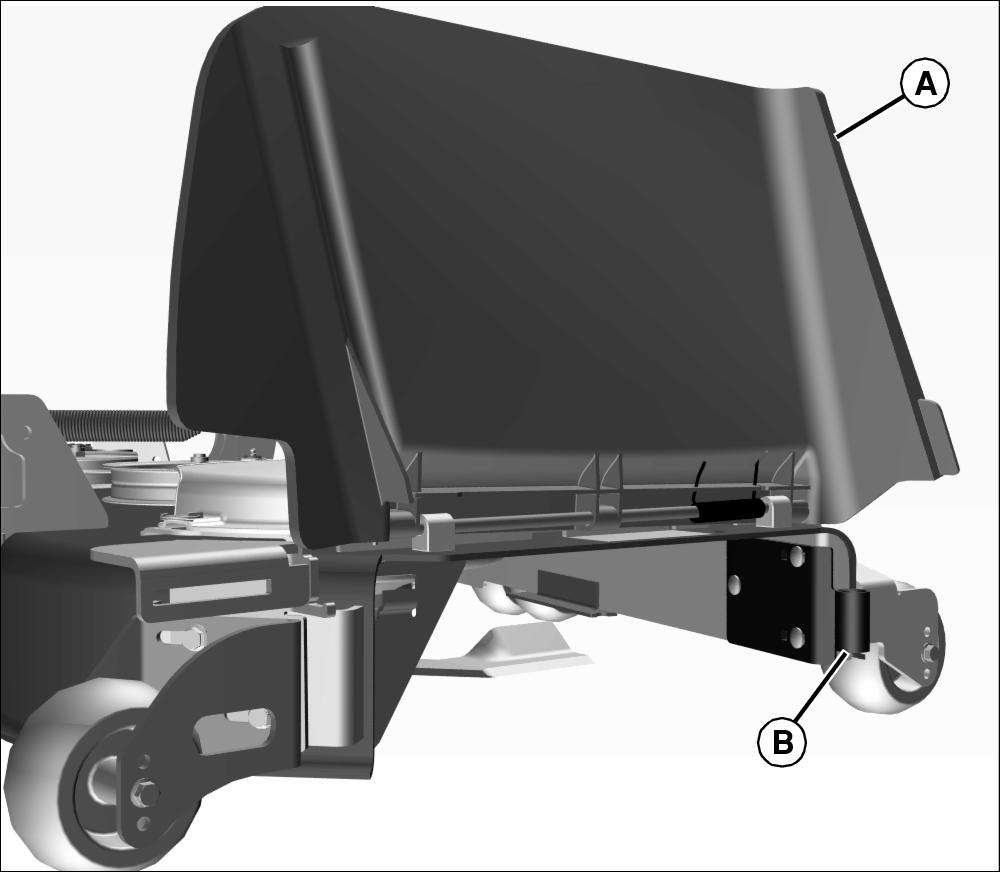
1. Lift discharge chute (A) and locate front mounting bracket (B).
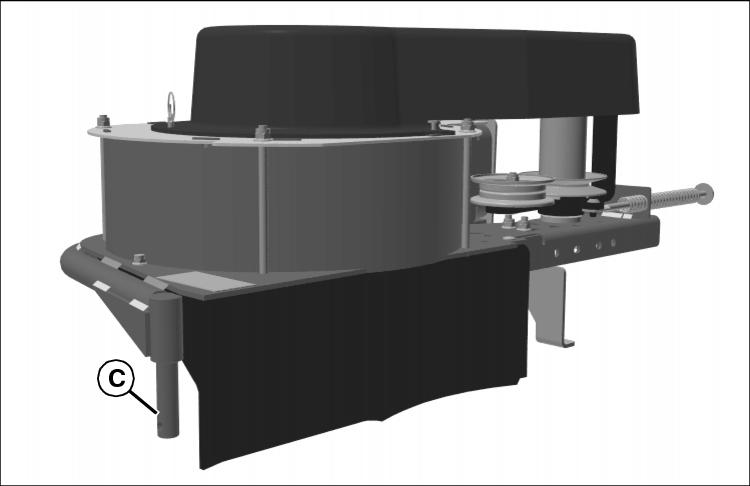
2. Insert front pivot pin (C) of blower into front bracket (B).
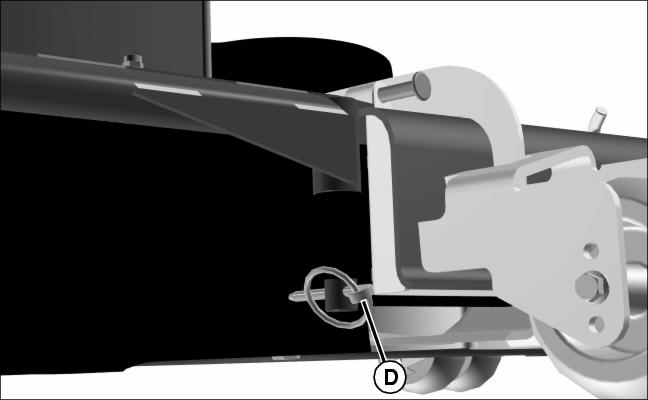
3. Install front lynch pin (D).
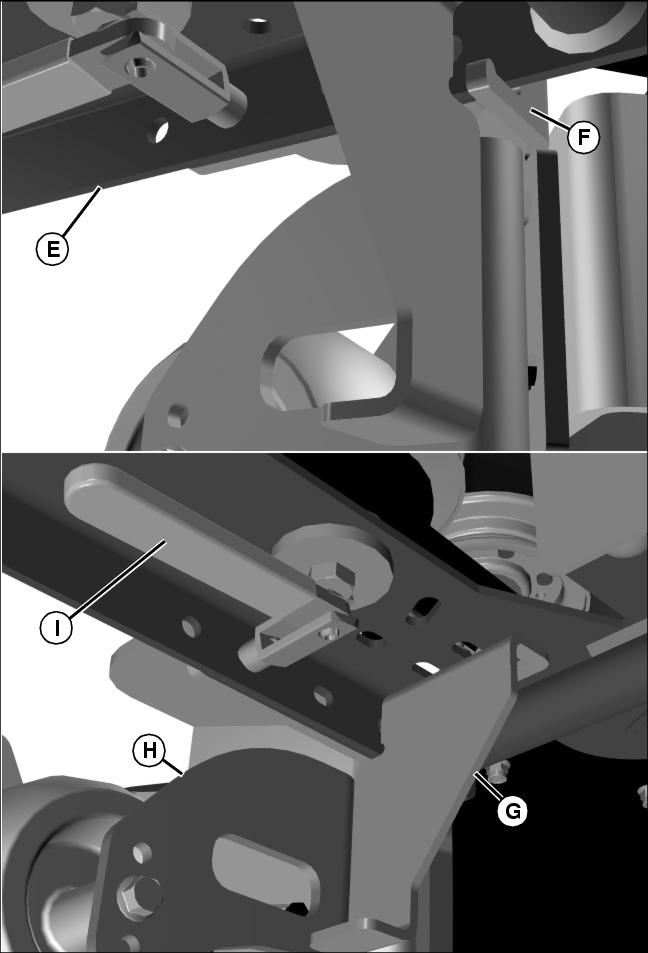
4. Rotate blower in position so that bottom blower plate (E) rests on top of mounting bracket (F) at rear of blower. Mounting bracket (G) should meet anti-scalp wheel assembly (H).
5. Secure in place with mode change release handle (I) and M8x25 carriage bolt.
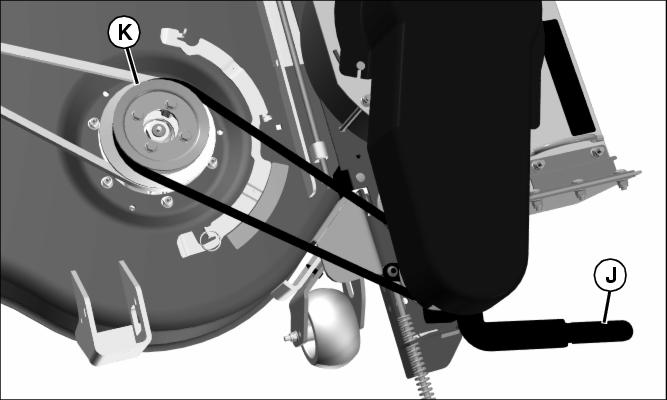
Picture Note: Parts have been removed for clarity.
6. Use tension lever (J) to allow belt to slip over sheave (K).
7. Install correct blower belt shield for application.
Installing Blower Belt Shield
1. Park machine safely. (See Parking Safely in the SAFETY section.)
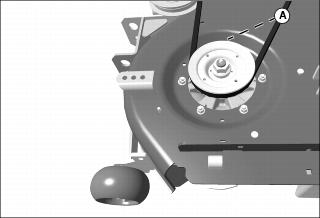
a. Remove the spindle mounting bolt from location (A).
b. Insert long spindle mounting bolt up through spindle and deck.
c. Install spacer on spindle mounting bolt.
d. Secure spindle mounting bolt with nut.

Picture Note: 54 in. deck shown.
3. Install blower belt shield (B) on hat pins (C).
Installing Hopper Seal
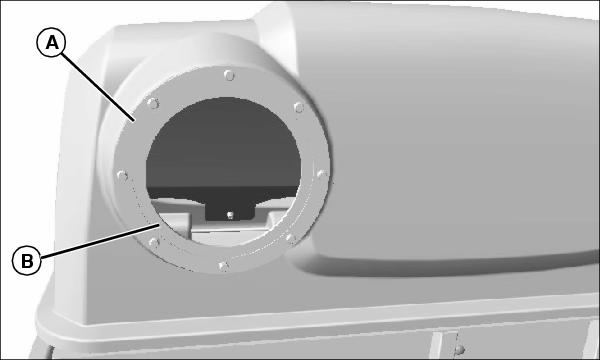
Picture Note: Your hopper may differ from one shown.
1. Align the seal plate (A) evenly with the opening of the hopper.
2. Using the seal plate as a guide, drill proportional holes into the hopper.
3. Line up the seal (B) and seal plate (A) and install eight M6 bolts and locknuts.
Installing Chute
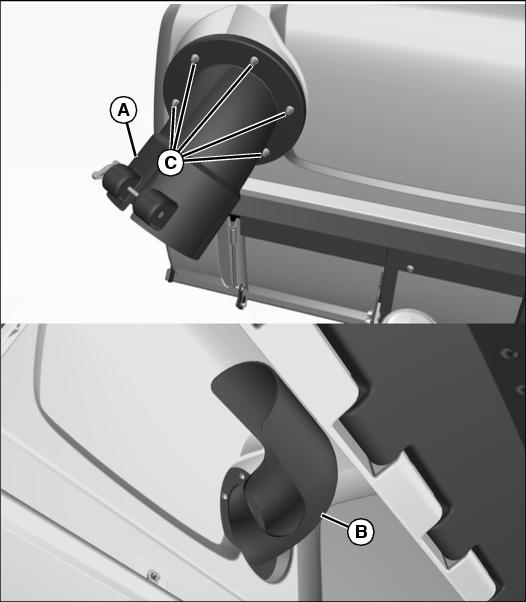
1. Install the outer (A) and inner (B) upper chute assembly to hopper using five M8x45 hex head bolts and locknuts (C). Tighten all hardware.
Installing Lower Chute and Hose Assembly
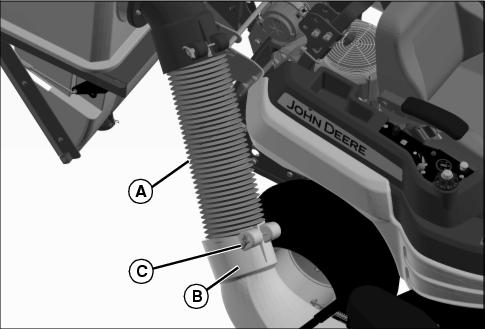
Picture Note: Exhaust flap has been removed for clarity.
1. Lift and hold open exhaust flap on blower.
2. Slide chute (A) completely onto blower outlet (B).
3. Secure chute to blower outlet with lower duct pin (C).
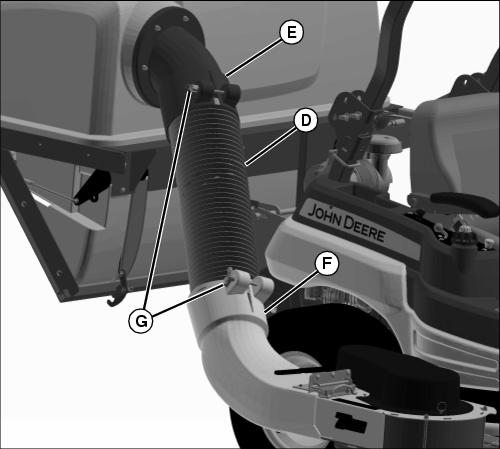
4. Connect hose assembly (D) to upper chute assembly (E) and lower chute assembly (F).
5. Tighten knobs (G) on upper and lower chutes to hold hose assembly in place.