
Service
Cleaning Hopper Exhaust Screen
1. Park machine safely. (See Parking Safely in the SAFETY section.)
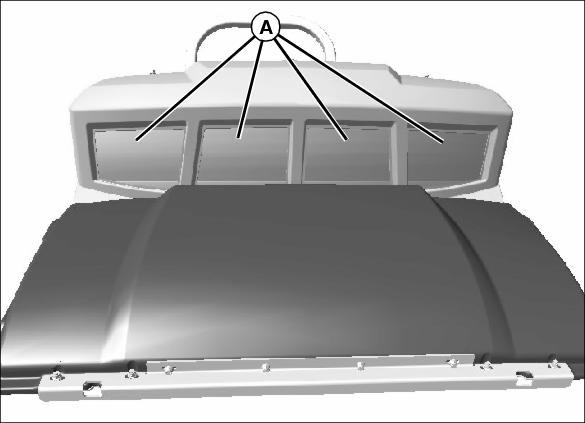
3. Clean the four exhaust screens (A) with a brush or water from the outside of hopper. Screens are located on the inside of the hopper.
4. Close hopper and secure latch.
Removing Drive Belts
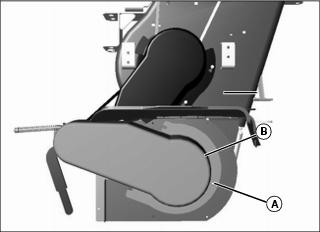
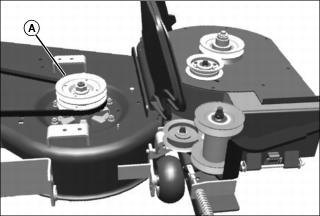
1. Remove lock ring (A) and then the secondary belt shield (B).
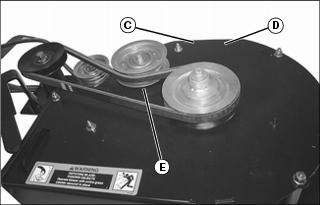
2. Loosen nut (C), slide pulley (D) aside and remove secondary drive belt (E).
Picture Note: Parts have been removed for a clear illustration.
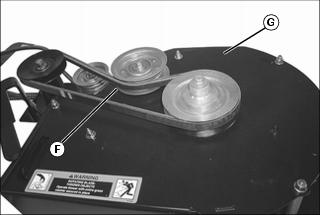
3. Remove primary belt shield (F).
4. Loosen nut (G) on tension pulley but do not remove.
NOTE: The use of the tension lever will be required to assist the removal of the belt.
6. Remove all grass accumulation around belt, idler and sheaves.
Installing Drive Belts
Picture Note: Parts have been removed for a clear illustration.
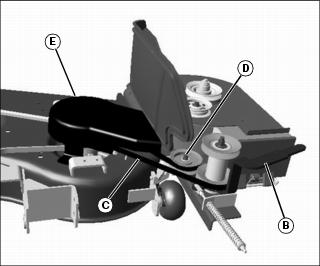
2. Using the tension lever (B), install the primary drive belt (C) and tighten nut on tension pulley (D). Check and adjust belt tension. (See Adjusting Primary Belt Tension in SERVICE section.)
3. Install primary belt shield (E).
4. Install secondary belt (F) and adjust belt tensioner (G). (See Adjust Secondary Belt Tension in SERVICE section.)

5. Install secondary belt shield (H).
Adjust Primary Belt Tension
IMPORTANT: Avoid damage! Check tension of new belts after first five hours of operation, adjust if needed. |

1. With belt installed tighten nut (A) on tension rod until spring (B) length is 150 mm +/- 10 mm (5.905 in. +/- 0.394 in.).
Adjust Secondary Belt Tension
IMPORTANT: Avoid damage! Check tension of new belts after first five hours of operation, adjust if needed. |
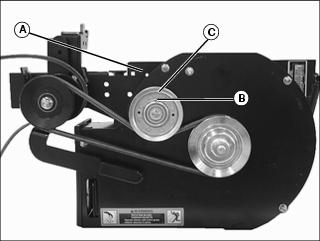
Picture Note: Belt guard not shown.
1. Remove secondary belt guard.
2. Press on belt at mid point of belt span (A). There should be 1/4 in. deflection with 3 lb of force.
3. Loosen cap screw (B) on belt tensioner (C). Adjust belt accordingly.
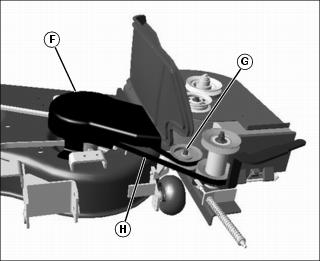
Adjusting Dump from Seat Hopper Linkage
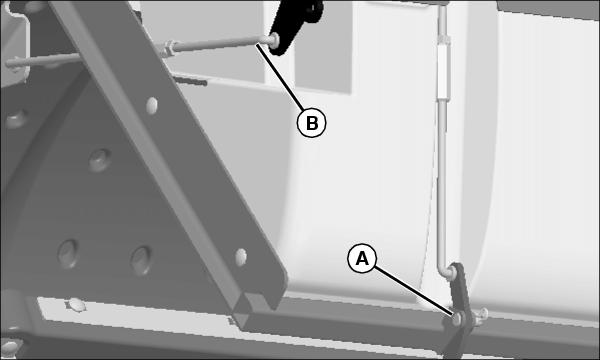
1. Disconnect both latch hook and rod assemblies from hopper frame by removing pivot pin (A). Allow latch hooks to hang from control shaft. Disconnect, but do not remove, right door link (B) from control shaft.
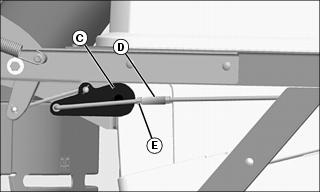
2. Fully close door by placing handle in down position and linkage over center of bellcrank (C).
3. Adjust left door link turnbuckle (D) until door will not close any further.
4. Actuate door by pushing down on the control shaft bellcrank by hand to check that force required to go over center is not too high. Lock jam nut (E).
5. Remove left door link from control shaft. Install right door link.
6. Adjust right door link as in steps 2 - 4.
7. Install left door link. Tighten jam nuts.
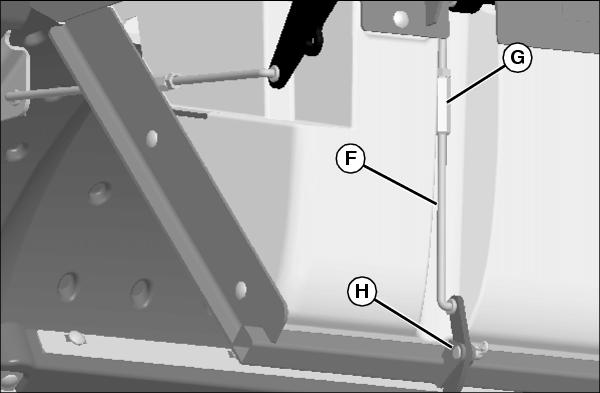
8. With door closed, install both latch hook and rod assemblies (F) to frame. Adjust link turnbuckles (G) as necessary to get pivots to line up so that pivot pin (H) may be inserted. Install cotter keys.
9. Adjust latch hook link turnbuckles so that the hooks rotate up and just touch the door catch bracket. Tighten both jam nuts.