
Removing and Storing
Removing and Emptying Grass Bags
1. Park the machine safely. (See Parking Safely in the SAFETY section.)
2. Remove and empty the grass bags.
Removing Hopper Chute
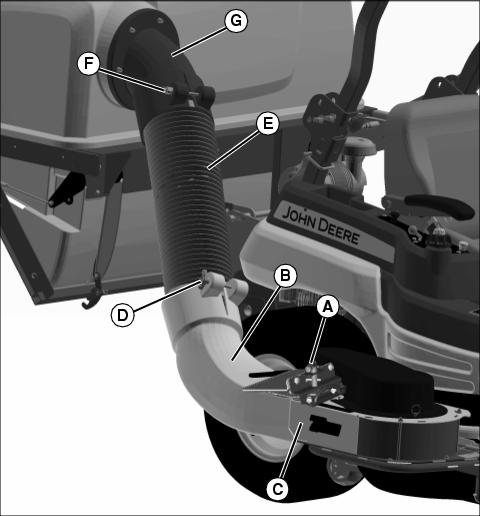
1. Pull upward on pin (A), then remove lower chute (B) from blower outlet (C).
2. Remove knob and bolt (D), then remove hose (E) from lower chute (B).
3. Remove knob and bolt (F), then remove hose (E) from upper chute (G).
Removing Hopper Assembly
1. Make sure hopper door is latched.
2. Disconnect hose assembly from upper chute.
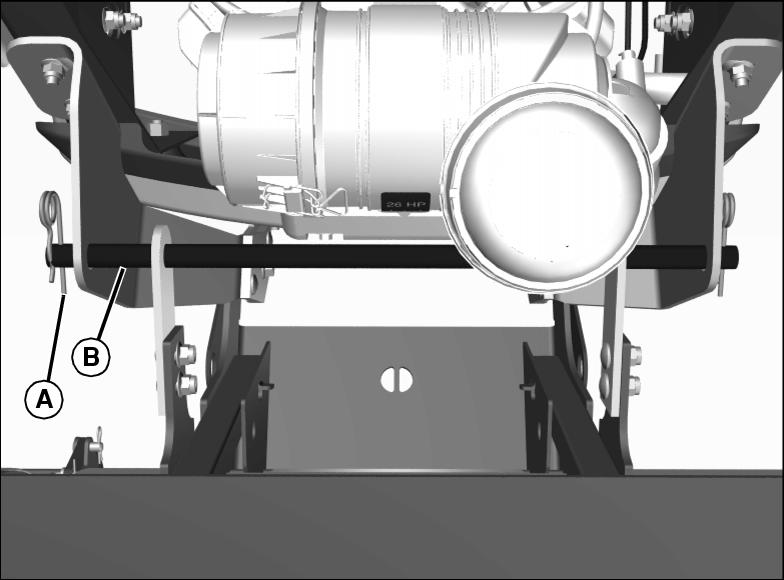
3. Remove spring pin clips (A) from both sides of upper support bar (B).
4. Hold hopper assembly securely.
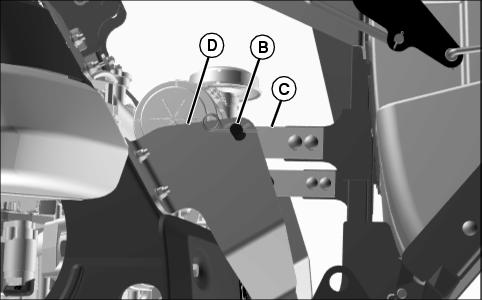
5. Remove upper support bar (B) from upper latches (C) and bracket (D).
6. Pivot hopper assembly down to the ground.
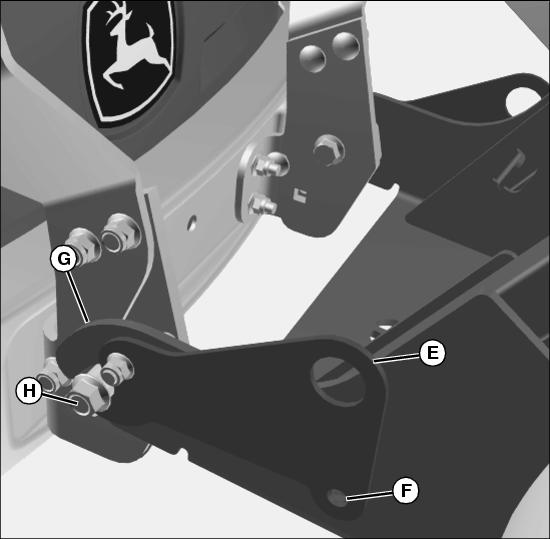
7. Disengage detents (F) to unlock lower latch and lift latch levers (E) up.
8. Lift assembly to clear frame arms (G) from hopper mounting pins (H) at rear frame of machine.
9. Pull hopper assembly away from machine.
When the attachment is removed, also remove any ballast that was added to the machine. Use only attachments and accessories recommended by the manufacturer. |
Removing Blower
1. Remove MCS deck belt shield.
NOTE: The blower assembly weighs approximately 32 kg (70 lb).
It is not necessary to remove the front mounting bracket from the mower deck when removing the blower.

Picture Note: Parts have been removed for clarity.
2. Use tension lever (A) to remove tension on belt. Remove belt from sheave (B).
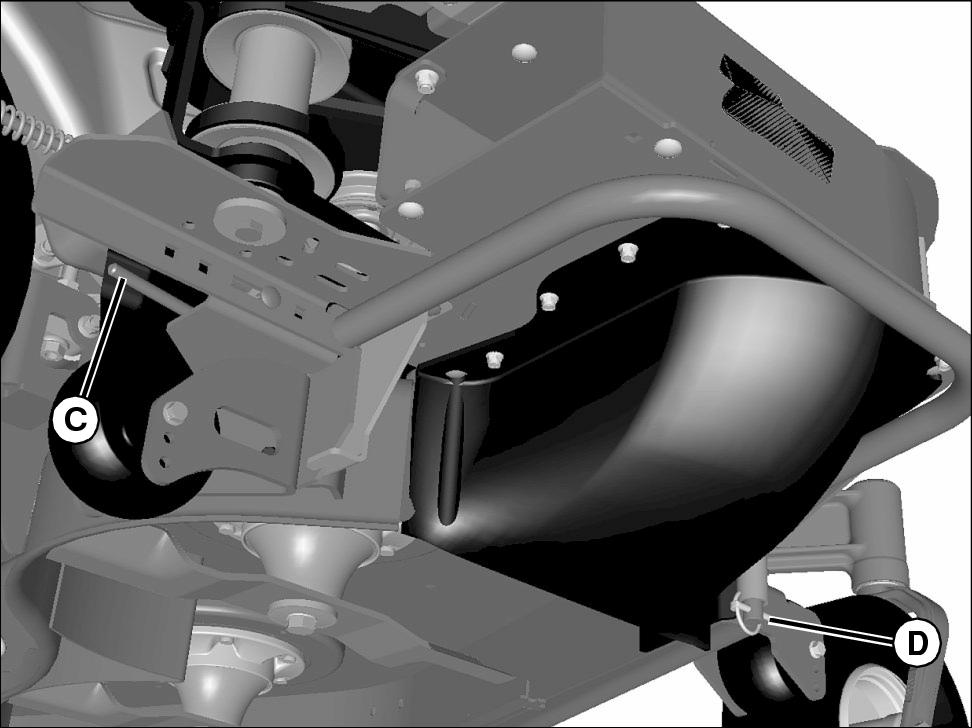
3. Loosen and remove mode change release handle (C) and supporting hardware.
NOTE: Discharge chute is spring loaded and will close automatically when blower is removed.
5. Swing rear end of blower out and lift pivot pin from bracket.
7. Adjust deck lift spring tension back to factory setting specification. Refer to the power unit operator’s manual for recommended factory settings.
Removing Ballast
Remove any added ballast from machine.
Storing Attachment
NOTE: Some of the following steps may not apply to your attachment.
1. Remove any grass clippings from MCS or hopper attachment.
2. Remove attachment from machine.
3. Clean attachment and driveline, if equipped, with water pressure from a hose.
4. Remove any shields if needed to clean out all debris.
5. Repair or replace worn, bent, or damaged parts. Tighten loose hardware.
6. Apply paint to painted surfaces where needed to prevent rust.
7. Apply thin coat of grease to blades or tines to prevent rust.
8. Lubricate any pivot points with engine oil to prevent rust.
9. Lubricate any grease points.
IMPORTANT: Avoid damage! Abrasive surfaces can damage attachment. Store attachment on non-abrasive surface or on wooden blocks. |
10. If storing attachment outdoors, block up attachment if possible and place a waterproof cover over it.