Install Dry Spreader Body
-
 CAUTION: Crane or hoist must have a rated lifting capacity of
at least 2268 kg (5000 lb.). Verify any additional lifting or connecting
devices, such as anchor shackles or clevises, are properly rated for
the job.
CAUTION: Crane or hoist must have a rated lifting capacity of
at least 2268 kg (5000 lb.). Verify any additional lifting or connecting
devices, such as anchor shackles or clevises, are properly rated for
the job.Faulty strap lift points or lift straps can allow dry spreader to fall causing severe injury or death to you or others. Inspect strap lifting points and lift straps for wear before attaching and lifting.
Approximate weight of dry spreader is 1469 kg (3240 lb.) for DN456, 1696 kg (3740 lb.) for DN485, and 431 kg (950 lb.) for second product bin insert.
NOTE: If machine is equipped with a liquid system, it must be removed before dry spreader body can be installed. (See Liquid System Removal and Installation section in John Deere R4030, R4038 and R4045 operator’s manual.)
If machine is equipped with bareback light bar it must be removed before dry spreader body can be installed. (See Remove Rear Light Bar in this section.)
Position chassis with adequate room around the unit. Make sure endgate or second product bin insert is securely installed.
-
IMPORTANT: Lifting tools available as part of conversion bundle. See your John Deere dealer to order lifting tools.
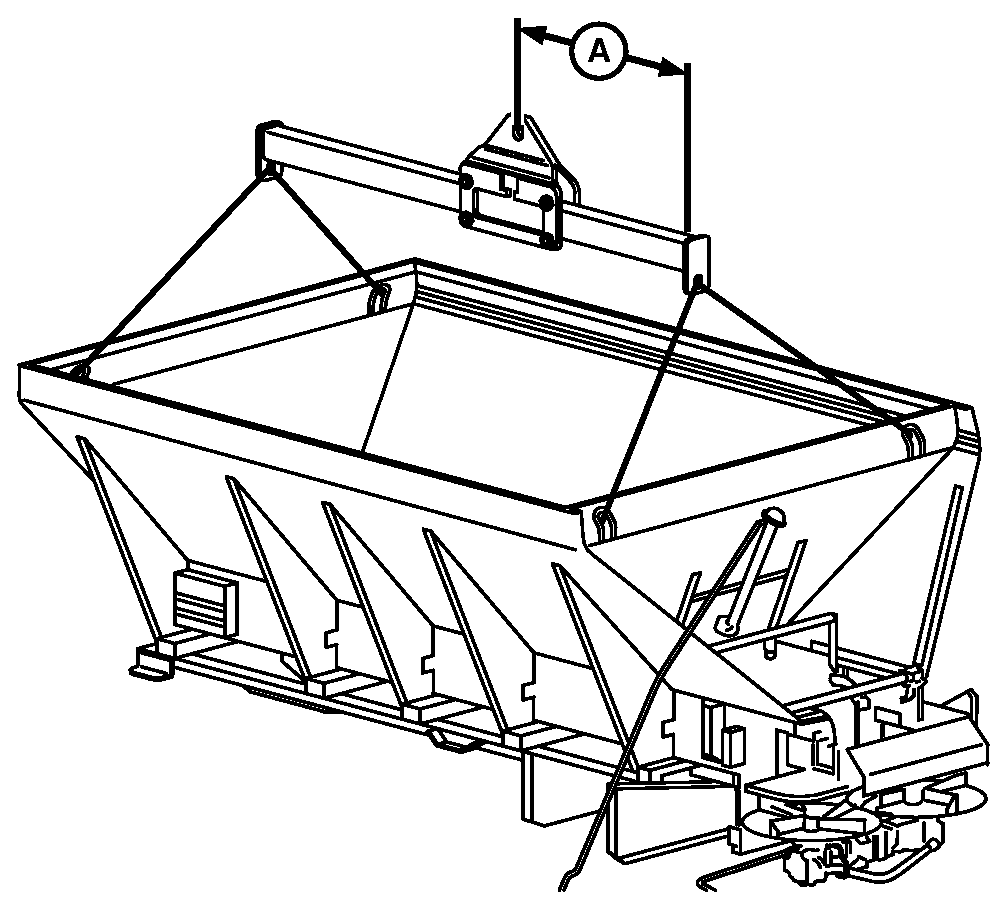
N88104-UN-10MAR10A - Dimension
Attach John Deere lifting device to each corner lift hook inside spreader. -
Adjust lifting device per dimension given in table.
Dry Spreader Body
Dimension A
With Second Product Bin
91.4 cm (36 in.)
Without Second Product Bin
101.6 cm (40 in.)
-
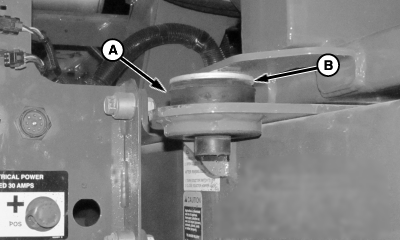
N97504-UN-14NOV12A - Rubber Mount
B - Washer
Install rubber mount (A) and washer (B) at front of chassis on both sides of machine. -
Position spreader with mounts located directly over chassis.
-
CAUTION: DO NOT WELD VEHICLE FRAME! Such welding can lead to
fatigue cracking and must be avoided.
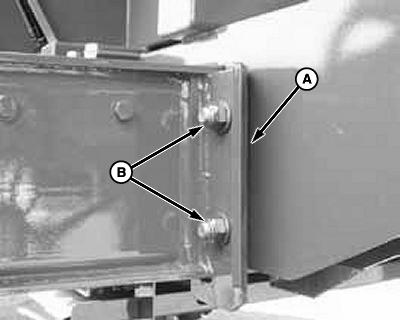
N97030-UN-27FEB12Rear Mounts (1st)
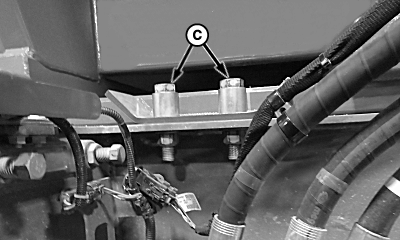
N97505-UN-14NOV12Center Mounts (2nd)
N101379-UN-26APR13Front Mounts (3rd)
A - Shims
B - Hardware, Rear Mount
C - Hardware, Center Mount
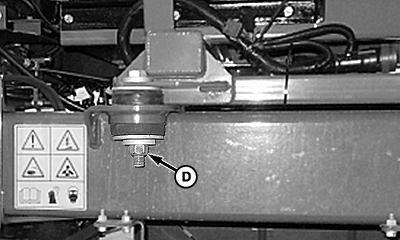
D - Hardware, Front Mount
Attach unit to chassis by loosely installing mounting hardware, starting at the rear and moving forward. Add shims to rear mount between box and chassis. -
Tighten mounting hardware as specified.
Item Measurement Specification Rear Mounts (1st) Torque 425 N·m (315 lb.-ft.) Center Mounts (2nd) Torque 425 N·m (315 lb.-ft.) Front Mounts (3rd) Torque 425 N·m (315 lb.-ft.)
|
BB83525,0000011-19-20140102 |