Install Hydraulic Hoses
IMPORTANT: If a threaded connection is tightened too tightly, the fitting or housing into which the fitting is placed could be distorted and an unstoppable leak could occur.
See HOSE INSTALLATION GUIDE in this section for proper hose assembly.
NOTE: Use thread sealer on all fittings, except O-ring and JIC adapters, O-ring valves and motors, etc. When using thread sealer, do not put it on the first three threads of the fitting. Too much on the fitting or on the first three threads will force it into the oil stream where it could damage the system.
See Metric Face Seal and O-Ring Stud End Fitting Torque Chart in the Specifications section of this manual for proper fitting torque values.
-
N101109-UN-26APR13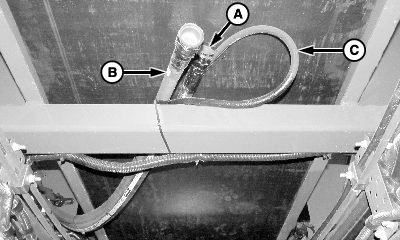
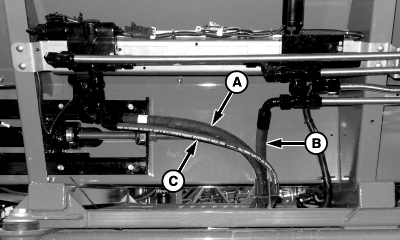
N101110-UN-14NOV12Behind Cab - Between Frame Rails
A - Pressure Line
B - Return Line
C - Load Sense Line
Identify hydraulic lines (A, B and C) on spreader. -
N101113-UN-14NOV12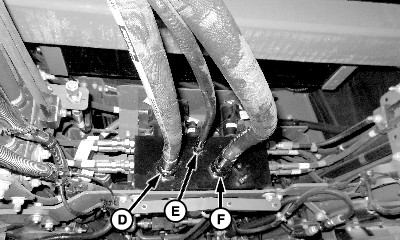
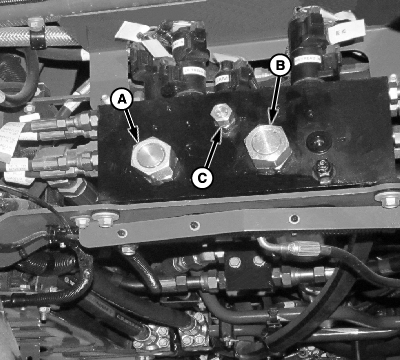
N101114-UN-14NOV12A - Pressure Port—M
B - Return Port—MT
C - Load Sense Port—BLS
D - Pressure Line
E - Load Sense Line
F - Return Line
Remove and retain caps from ports (A—C). -
Install pressure line (D) to M port.
-
Install load sense line (E) to BLS port.
-
Install return line (F) to MT port.
-
Tighten all connections to specification.
|
CS12167,000026B-19-20130103 |