Install Second Product Bin—Spreaders with Belt Over Chain Conveyors
-
 CAUTION: Stay out of the spreader. If it’s necessary to
enter the spreader, return to the shop, empty body, turn off all power,
set vehicle brakes, lock engine starting switch and remove keys before
entering. Tag all controls to prohibit operation. Tags should be placed,
and later removed, only by person working in the body.
CAUTION: Stay out of the spreader. If it’s necessary to
enter the spreader, return to the shop, empty body, turn off all power,
set vehicle brakes, lock engine starting switch and remove keys before
entering. Tag all controls to prohibit operation. Tags should be placed,
and later removed, only by person working in the body.Use only lifting devices that meet or exceed OSHA standard 1910.184. Never exceed work load limits or lift equipment over people. Empty spreader before lifting. Loads may shift or fall if improperly supported, causing injury.

N111111-UN-21MAR14A - Hardware
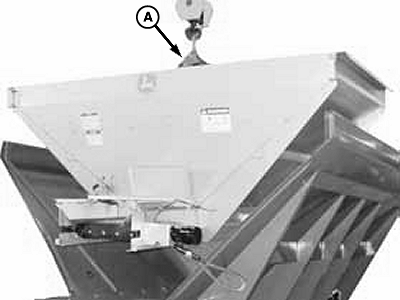
B - 38 mm (1-1/2 in.) Position
C - 51 mm (2 in.) Position
D - 76 mm (3 in.) Position
To adjust main bin’s feedgate opening when a second product bin will be installed: position front feedgate on second product bin as necessary to achieve a 38 mm (1-1/2 in.) (B), 51 mm (2 in.) (C), or 76 mm (3 in.) (D) opening. -
N101385-UN-02JAN13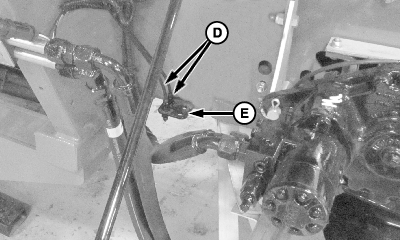
N101383-UN-02JAN13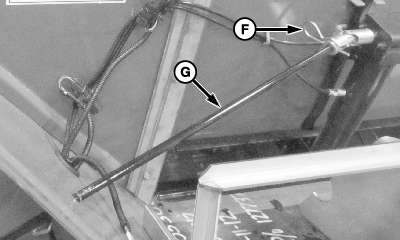
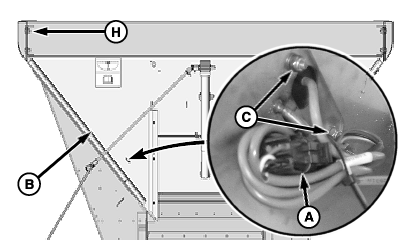
N101384-UN-02JAN13A - Bin Level Sensor Connector
B - Removable Endgate
C - Nut
D - Grease Line
E - Bracket
F - Spring Pin
G - Jack Rod
H - Cap Screw (4 used)
Disconnect bin level sensor (A) from harness on removable endgate (B). -
Remove and retain nuts (C) and bin level sensor.
-
NOTE: Retain grease line to prevent damage during endgate removal.
Remove grease lines (D) from bracket (E).
-
Remove and retain spring pin (F) and jack rod (G).
-
NOTE: Removable endgate weighs approximately 158 kg (350 lb.), use appropriately rated lifting equipment.
Remove cap screws (H), nuts and removable endgate.
-
N98626-UN-23MAY12A - Cap Screw
B - Hillside Divider
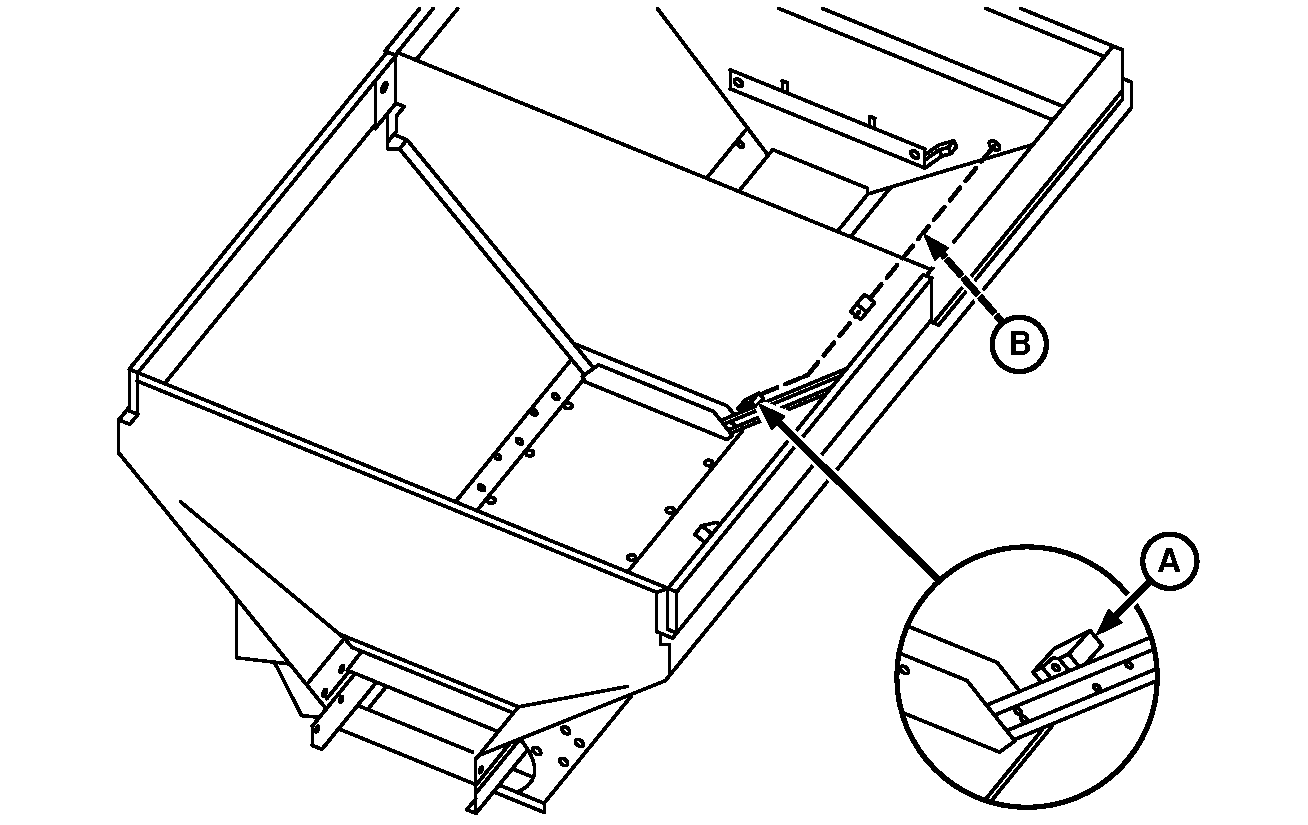
Remove and retain cap screws (A) and hillside divider (B). -
NOTE: Before placing the second product bin in hopper spray a light silicone film on hopper side sheets where insert seals will set.
N97126-UN-27FEB12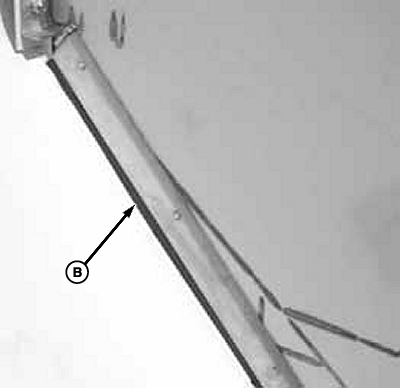
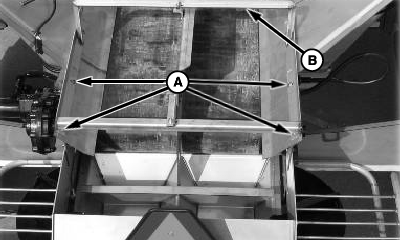
N97127-UN-27FEB12Second Product Bin Seal
A - 4-Point Lifting Device
B - Seal
Fasten a 4-point lifting device (A) to lift hooks. -
Hoist empty second product bin into spreader as shown.
-
Use a large drift punch or equivalent to align slots and attach hardware (see table). Tighten to recommended torque.
Needed Hardware
Description
Size
Quanity
Cap Screw
1/2 x 1-1/4 in. Grade 8
8
Flat Washer
1/2 in. Grade 8
16
Lock Washer
1/2 in. Grade 8
8
Hex Nut
1/2 in. Grade 8
8
-
Ensure a complete seal (B) is covering the gap between the second product bin and side sheets of spreader as shown. Tighten hardware.
NOTE: Leakage of material may occur if the sealer belts are not set properly on the front of the second product bin. Manufacturer is not liable for lost material due to improperly installed sealer belts.
See General Operating Procedures in operator’s manual for feedgate adjustment instructions.
-
Install previously removed bin level sensor in rear of second product bin.
-
NOTE:
N98583-UN-17MAY12Bin 1Extension Harness
N98584-UN-21MAY12A - Bin 1 Sensor (Sensor 2)
B - Extension Harness
C - Bin 1 Connector
D - Bin 2 Connector
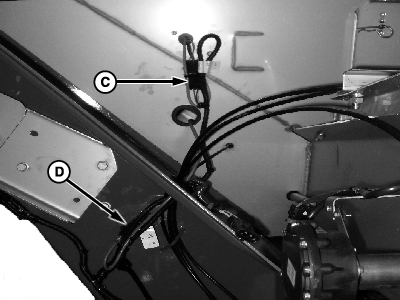
Bin 1 sensor (A) connects to an extension harness (B) routed along second product bin.Plug bin level sensors into appropriately marked wiring harness connector (C and D) at rear of machine.
-
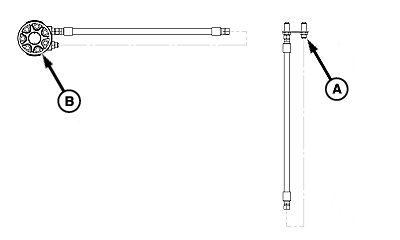
N109663-UN-30JAN14A - Lubrication Lines
B - Hole
C - Grease Bank
Route lubrication lines (A) through hole (B) as shown and install in grease bank (C). -
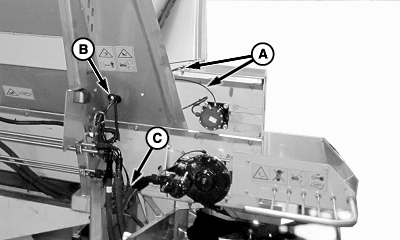
N103531-UN-15MAY13Detach Hoses
A - Spreader Connection
B - Second Product Bin Motor
Disconnect hoses at spreader connection (A) and second product bin motor (B) as shown. -
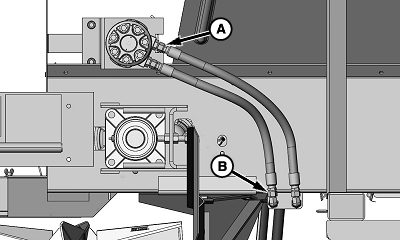
N101305-UN-26APR13Second Product Bin Hydraulic Connections
A - Female Connection from Speader
B - Female Connection from Motor
Attach second product bin hoses to spreader connection points as shown. -

N98625-UN-30MAY12A - Rate Controller
B - Connector
Plug in rate controller (A) using connector (B).
|
CS12167,000056F-19-20140320 |