Change Meter Wheels
-
Remove meter door assembly. See Remove Meter Door Assembly in Operating Machine—Meters section.
-
IMPORTANT: Mark drive sprocket end of shaft.
Remove drive sprocket from end of meter shaft.
-
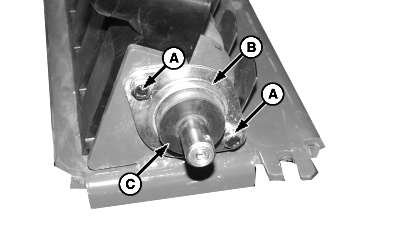
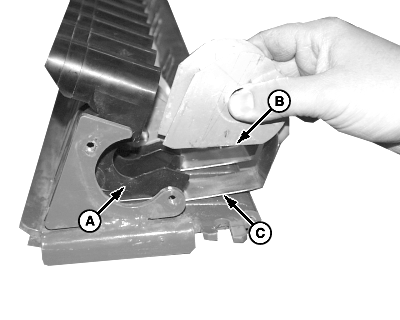
A51448-UN-10DEC02A - Cap Screws
B - Flanges
C - Bearing
Remove cap screws (A), flanges (B), and outer bearings (C). -
A51449-UN-10DEC02A - Cap Screws
Loosen cap screws (A) on center bearing and flanges. -
NOTE: Be aware of location of center bearing (D), flanges, brass bushings (B), and plastic center bushings (C) for reassembly.
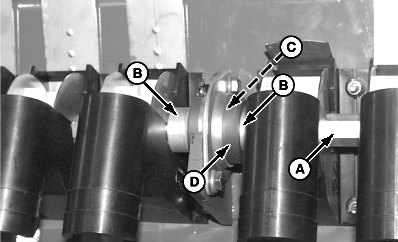
A51450-UN-10DEC02A - Meter Shaft
B - Brass Bushings
C - Plastic Center Bushing
D - Bearing
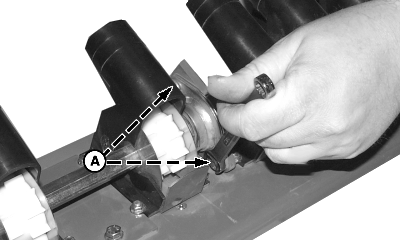
Slide meter shaft (A) out end of meter that did not have drive sprocket. -
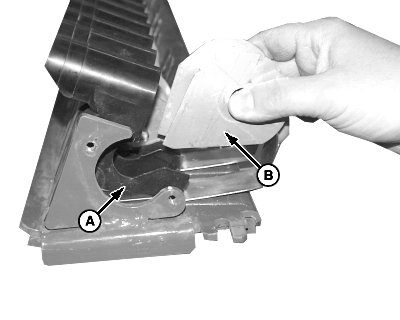
A51451-UN-10DEC02A - Meter Cup
B - Meter Wheel and Plates
Replace meter wheels.-
Pull wear plates with meter wheel (B) from meter cup (A).
-
NOTE: Wear plates are used between meter roll and meter cup with 32 mm black meter wheel and 32 mm white meter wheel. A thicker plate or spacer is used with 16 mm black meter wheel. Orientate plates so plates match bottom profile of cup.
A51452-UN-10DEC02A - Meter Cup
B - Long Edge
C - Meter Gate
Assemble meter wheel and plates with long edge (B) of plates towards meter gate (C). -
Install meter assembly into meter cup (A).
-
IMPORTANT: All meter wheels must be the same color or inaccurate seeding occurs.
Repeat steps A—C on rest of meter.
-
-
NOTE: Turning shaft back and forth while installing helps guide the shaft through the meter wheels.
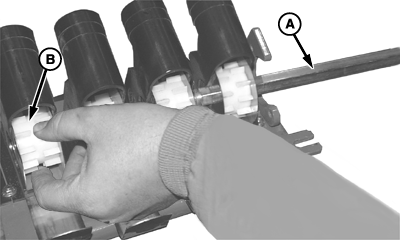
A51453-UN-10DEC02A - Meter Shaft
B - Meter Wheel
Guide meter shaft (A) back through meter wheels (B), plates, spacers, bushings, flanges, and bearings. -
NOTE: Long end of bearing (C) faces meter.
A51448-UN-10DEC02A - Cap Screws
B - Flanges
C - Bearing
Install flange (B) and bearing (C) to end of meter shaft with cap screws (A). -
NOTE: Meter shaft can be turned by hand when correctly installed.
Rotate meter shaft back and forth when tightening bearing hardware. This helps prevent bearing assemblies from binding.

A51455-UN-10DEC02End Bearing
A51449-UN-10DEC02Center Bearing
A - Cap Screws
Tighten cap screws (A) slowly. -
Install washers and cotter pin.
-
Install meter door assembly. See Install Meter Door Assembly in Operating Machine—Meters section.
|
LD45720,00005DA-19-20160303 |