Replace or Clean The BrushBelt™ Cartridge Components
-
NOTE: Periodically clean the seed sensor area inside BrushBelt™. Dusty conditions or heavily treated seed cause an excessive buildup of dust and seed treatment inside the BrushBelt™ ,which blocks the seed sensor. When the seed sensor becomes blocked, false low population counts or false low limit warnings appear.
A77772-UN-30APR13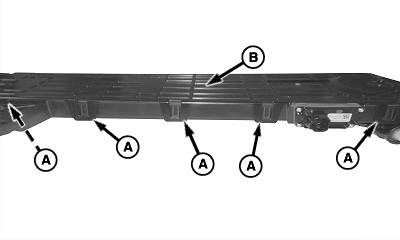
A79835-UN-22JAN14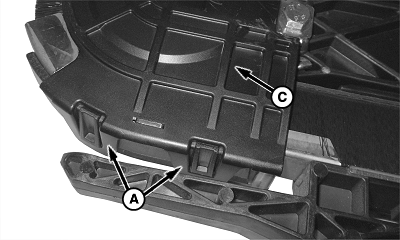
A89442-UN-01FEB16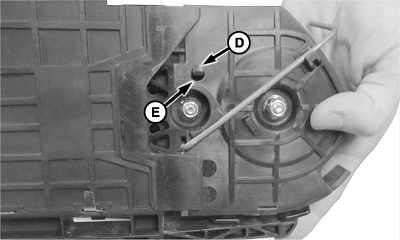
A89443-UN-01FEB16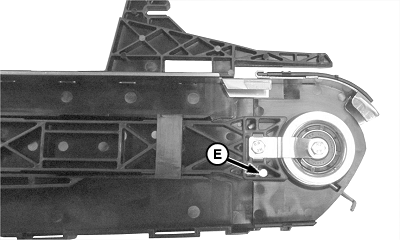
A89445-UN-01FEB16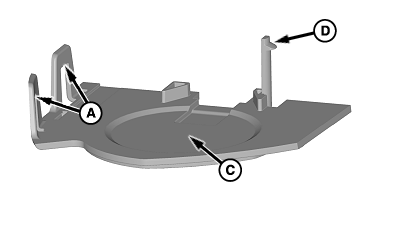
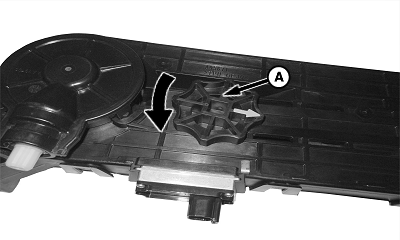
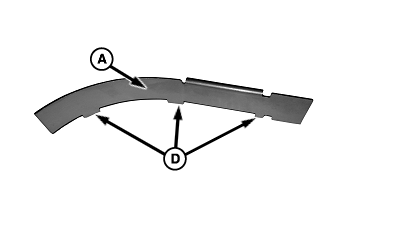
A89444-UN-01FEB16A - Tabs
B - Upper Cartridge Cover
C - Lower Cartridge Cover
D - Retaining Clip
E - Hole
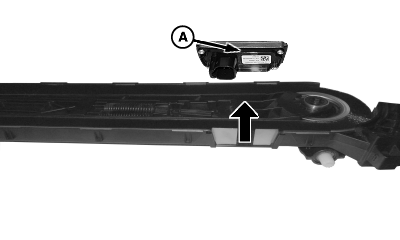
Remove the BrushBelt™ delivery cartridge. (See Remove and Install the BrushBelt™ Cartridge in this section.) -
Pull back the tabs (A) to remove the upper cartridge cover (B) on the BrushBelt™.
-
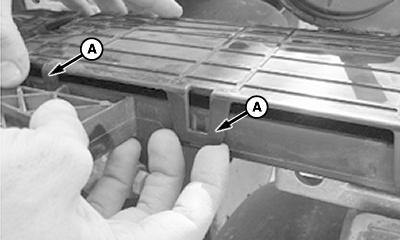
To start removing, pull back the tabs (A) of the lower cartridge cover (C) on the BrushBelt™.
-
While the tabs are still being pulled back, flip the cartridge housing over and push the retaining clip (D) until it slides into hole (E).
-
As the lower cartridge cover releases, flip the cartridge housing back over to complete removing the cover.
-
A79872-UN-22JAN14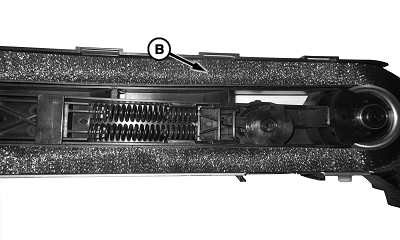
A79896-UN-22JAN14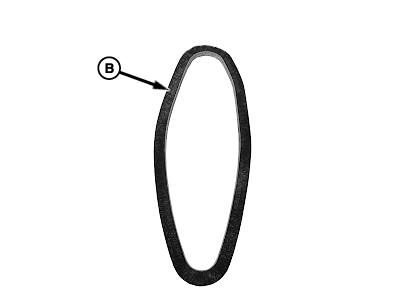
A82226-UN-09APR14A - BrushBelt™ Tensioner
B - BrushBelt™
Turn the BrushBelt™ tensioner (A) counterclockwise to remove the spring tension. Remove the BrushBelt™ (B) from the cartridge. -
IMPORTANT: Do not plant again until all of the interior seed belt surfaces are dry.
IMPORTANT: To avoid false readings from the seed sensors in the BrushBelt™ cartridge, the center wear liner tab must be inserted in the seed sensor slot as shown.
NOTE: If moisture enters the seed belt during a rain or when machine is washed along with dust in the seed belt, it becomes mud.
A79897-UN-22JAN14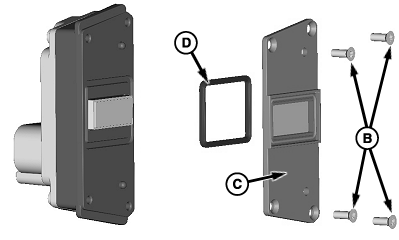
A79622-UN-13DEC13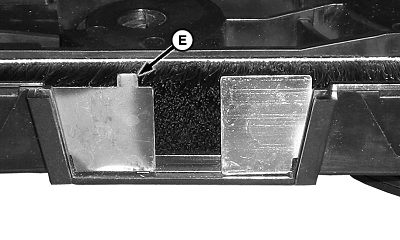
A82261-UN-09APR14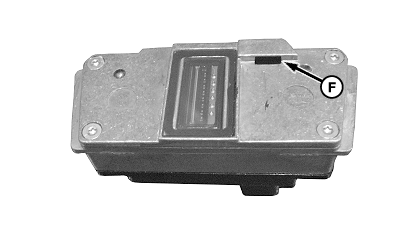
A82262-UN-09APR14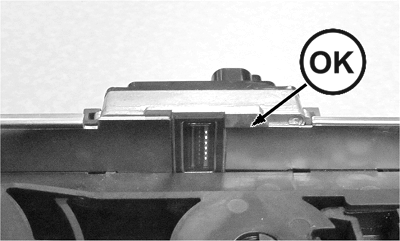
A89440-UN-01FEB16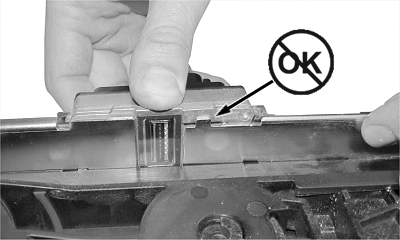
A89441-UN-01FEB16A - Seed Sensor
B - Screws (4 used)
C - Sensor Cover
D - Gasket
E - Center Wear Liner Tab
F - Seed Sensor Slot
Clean the area for the seed sensor (A). If moisture is present or dry residue is difficult to remove with a dry brush, use a mild detergent and water with a brush. The seed belt surfaces must be dry before use. -
Replace the seed sensor as needed using the following steps:
- Slide the seed sensor from the BrushBelt™ cartridge as shown.
- Remove and retain the screws (B) from sensor.
- Remove the sensor cover (C) from the sensor.
- Remove and retain the gasket (D) from inside the sensor. Replace the gasket as needed.
- Install the gasket and the sensor cover with the screws.
- Install the center wear liner tab (E) in the seed sensor slot (F) as shown, when sliding the seed sensor back into the BrushBelt™ cartridge.
-

A79899-UN-04FEB14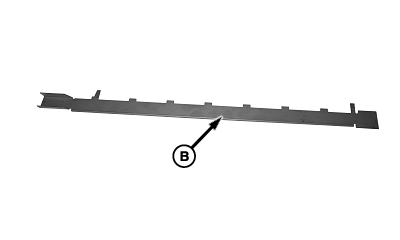
A79900-UN-04FEB14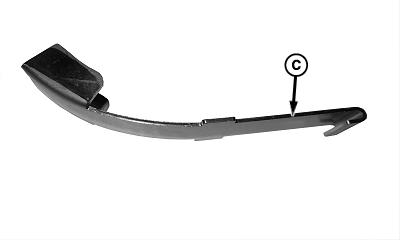
A79901-UN-04FEB14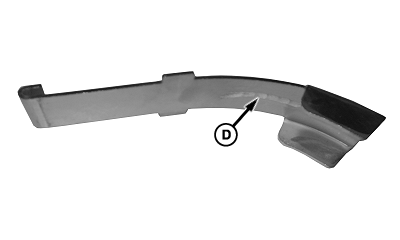
A79898-UN-04FEB14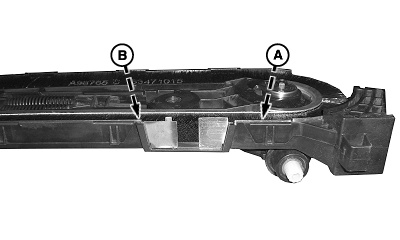
A82264-UN-09APR14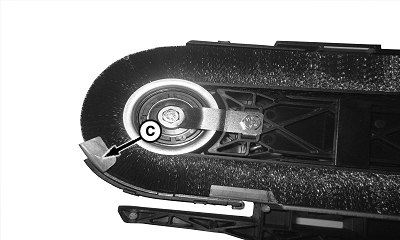
A79903-UN-04FEB14A - Upper Wear Liner
B - Center Wear Liner
C - Lower Wear Liner
D - Damage
Locate the upper wear liner (A), the center wear liner (B), and the lower wear liner (C) on the BrushBelt™ cartridge -
Check the wear liners for damage (D).
-
A79955-UN-04FEB14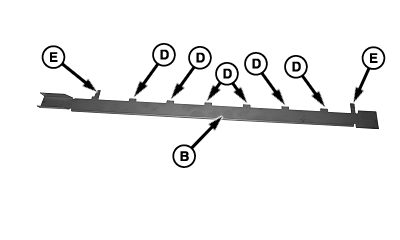
A79956-UN-04FEB14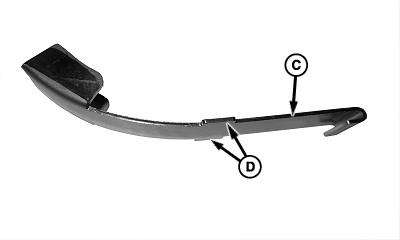
A79957-UN-04FEB14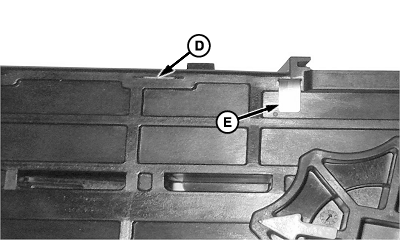
A79907-UN-04FEB14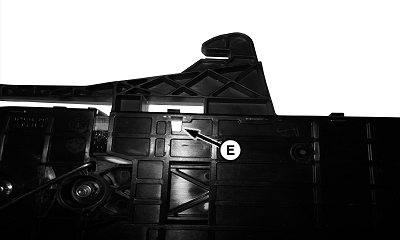
A79906-UN-04FEB14A - Upper Wear Liner
B - Center Wear Liner
C - Lower Wear Liner
D - Alignment Tabs
E - Retainment Tabs
Replace the inserts using the following process:- Pull the upper wear liner (A) or the lower wear liner (C) to remove them from cartridge position.
- Straighten the retainment tabs (E) on the center wear liner (B).
- To remove from cartridge position, pull the center wear liner.
- Press the retainment tabs and the alignment tabs (D) into the cartridge.
- Fold the retainment tabs on the center wear liner.
- Press the alignment tabs into the cartridge as shown.
-
A77776-UN-13DEC13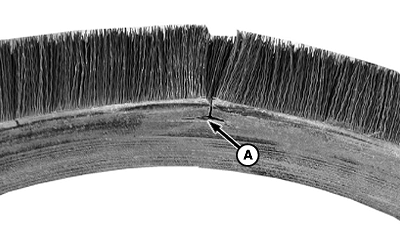
A77777-UN-13DEC13
A77778-UN-13DEC13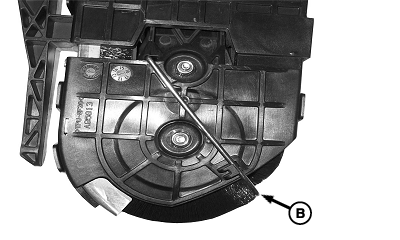
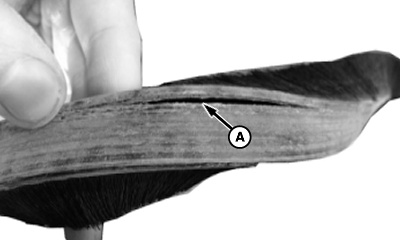
A79908-UN-04FEB14A - Wear or Damage
B - Brush Reconditioner
Check the BrushBelt™ for wear and damage (A). Replace the BrushBelt™ as needed. -
Check the brush reconditioner (B) for damage. Replace the reconditioner as needed.
-
Reinstall the BrushBelt™ into the cartridge.
-
Reinstall the upper and lower cartridge covers.
-
Reinstall the BrushBelt™ delivery cartridge. (See Remove and Install the BrushBelt™ Cartridge in this section.)
|
BrushBelt is a trademark of Deere & Company |
WP29706,0000407-19-20160303 |