Inspect and Adjust the Furrow Opener Blades
-
 CAUTION:
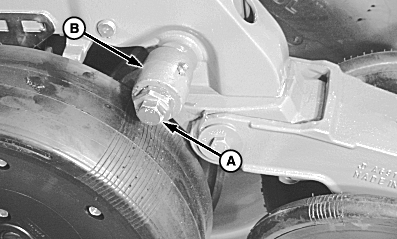
A53246-UN-29OCT03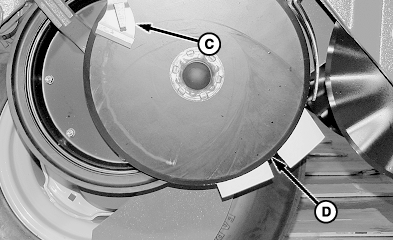
A53250-UN-29OCT03A - Cap Screw
B - Pivot Arm
C - Scraper
D - Contact Area
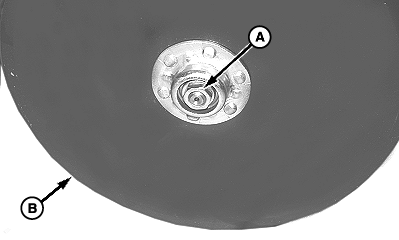
Avoid injury from sharp edges on the blades. Wear protective gloves and handle the blades carefully.Inspect the contact area (D) where the blades touch.
-
Insert two business cards (or similar items) between the blade opening and gently slide the cards together until the blade contact area is reached.
-
Measure the distance between the business cards and compare the measurement to the specification.
Item Measurement Specification Blade Edge Contact Area 38—64 mm (1.5—2.5 in) -
If the contact area does not fall within the specifications, proceed as follows:
-
-
Remove cap screw (A), pivot arm (B), and the gauge wheel.
-
Inspect the scrapers (C) for excessive wear and replace as necessary.
-
Inspect the blades for wear or damage.
Measure the blade diameter and compare that to the specification. If the diameter is below the specification, if the beveled edge is worn away, or if significant damage is apparent, replace the blades during this procedure.
Item Measurement Specification Opener Blades Minimum Diameter 35.5 cm (14 in) -
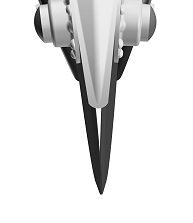
A89612-UN-17FEB16Centered Blades
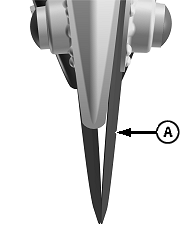
A89613-UN-17FEB16Blades Not Centered

A89611-UN-17FEB16A - Blade, Furthest
B - Row Unit
Determine the adjustment required. View the blades from the front of the row unit.- If the blades are centered, remove one blade to adjust the contact area.
- If the blades are not centered, adjust the blade that is furthest (A) from the row unit (B).
-
CAUTION:
A51112-UN-20NOV02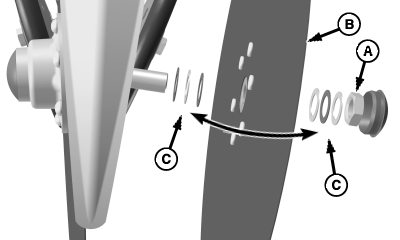
A89614-UN-17FEB16A - Nut
B - Blade
C - Shims
Avoid injury from sharp edges on the blades (B). Wear protective gloves and handle the blades carefully.IMPORTANT: Avoid spindle damage. The nut on the left side of the row unit has left-hand threads.
NOTE: While the blade is removed, inspect all of the components between the blades for wear and damage.
Do not discard the shims.
Remove the nut (A), and the blade (B).
-
Reposition one or more of the shims (C) from one side of the blade to the other to increase or decrease the contact area. Install the blade, inspect the adjustment, and repeat the shim placement as needed.
-
Tighten the blade nut to specification.
Item Measurement Specification Blade Nut Torque 122 N·m (90 lb·ft) -
Adjust the gauge wheels. (See Adjust The Gauge Wheels in this section.) Tighten the pivot arm cap screws to specification.
Item Measurement Specification Pivot Arm Cap Screws Torque 271 N·m (200 lb·ft)
|
WP29706,00007A2-19-20160510 |