Replace or Clean The Seed Guide
-
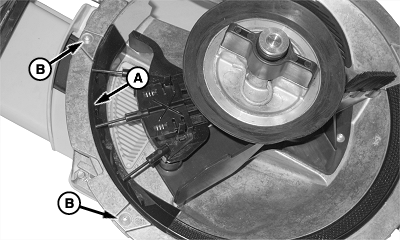
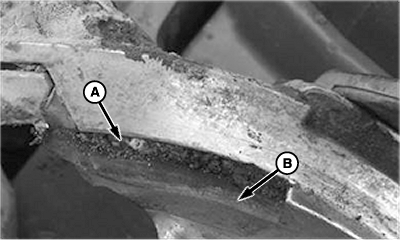
A87490-UN-02SEP15A - Outer Double Eliminator Assembly
B - Torx® Screws
Remove the meter from the row unit. (See Remove and Install The ExactEmerge™ Seed Meter in the ExactEmerge™ Meter Operation section.) -
Open the meter dome. (See Clean Out The Vacuum Meter in the ExactEmerge™ Meter Operation section.)
-
Remove the seed bowl. (See Clean Out The Vacuum Meter in the ExactEmerge™ Meter Operation section.)
-
Remove and retain the TORX® screws (B) and the plates.
-
Pull up to remove the outer double eliminator assembly (A).
-
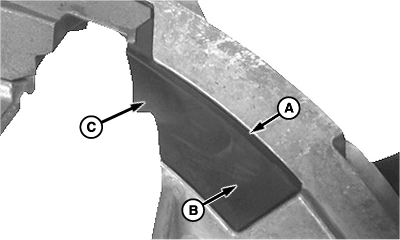
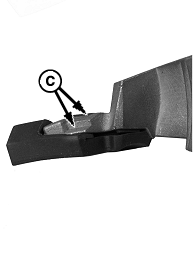
A87665-UN-16SEP15A - Edge
B - Flat Surface
C - Recessed Area
If the rubber boot is in good condition, the edges (A) and flat surface (B) are flush with the meter housing. The recessed area (C) is lower than the edges. -
A87663-UN-16SEP15Deteriorated Rubber Boot
A - Rubber Boot
B - Deterioration
If the rubber boot (A) has excessive deterioration (B), replace the rubber boot. -
A87664-UN-16SEP15Worn Rubber Boot
A - Rubber Boot
B - Edge
If the rubber boot (A) has worn enough to expose an edge (B) of the meter housing, replace the rubber boot. -
IMPORTANT:
A87662-UN-16SEP15Debris Buildup
A - Debris
B - Rubber Boot
Prevent debris from pushing the rubber boot out of position.Remove all debris (A) from the rubber boot (B) and from the boot seat in the meter housing.
-
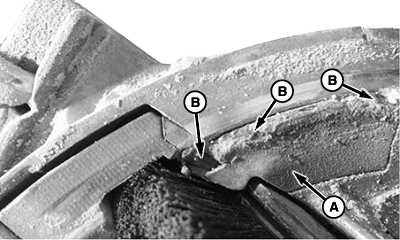
A87660-UN-22SEP15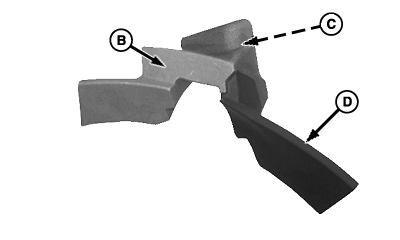
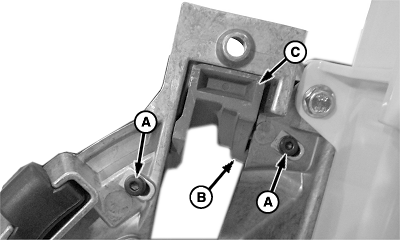
A87661-UN-22SEP15A - Torx® Screws
B - Seed Guide Assembly
C - Seed Guide Pocket
D - Rubber Boot
Remove and retain the two Torx® screws (A). -
To remove the seed guide assembly (B), lightly tap in the pocket (C) from the rear of the meter.
-
IMPORTANT:
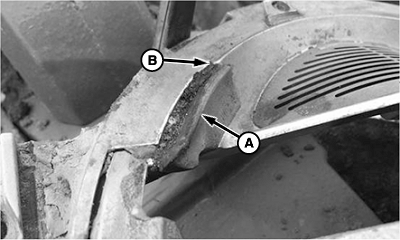
A87666-UN-16SEP15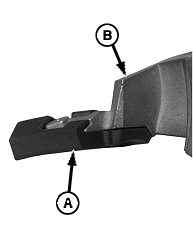
A87763-UN-22SEP15Correctly Installed
A87764-UN-22SEP15Incorrectly Installed
A - Rubber Boot
B - Seed Guide
C - Tabs
Verify that the tabs (C) on the rubber boot are seated in the notches of seed guide.When replacing the rubber boot, install the rubber boot (A) on the seed guide (B) as shown.
-
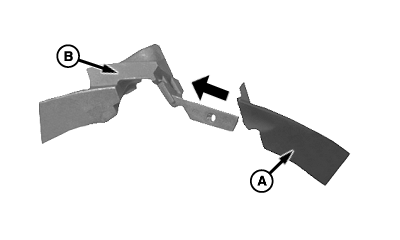
Install the seed guide assembly into the meter housing.
-
Install and tighten the previously removed Torx® screws.
-
Install the outer double eliminator assembly.
-
Install the previously removed plates and the Torx® screws for the outer double eliminator. Tighten the Torx® screws.
|
TORX is a trademark of Camcar/Textron |
WP29706,0000949-19-20160309 |