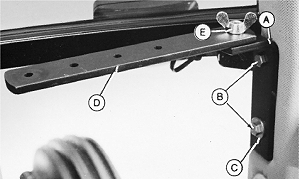
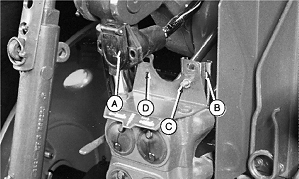
7000 Series Tractors-Console Installation1. Install "L" bracket (A) on front post with two M10 x 20 cap screws (B) with flat washer (C) on lower cap screw. 2. Install monitor strap (D) with M10 x 30 carriage bolt and wing nut (E). 3. Attach monitor to strap making certain to install rubber washer on top of strap at mounting. |
|
AG,OUO1074,863 -19-01MAR00-1/7 |
|
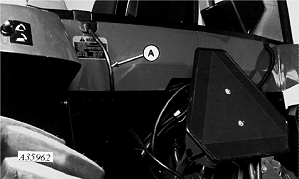
4. Route monitor harness (A) through left-hand grommet as illustrated.
|
|
AG,OUO1074,863 -19-01MAR00-2/7 |
|
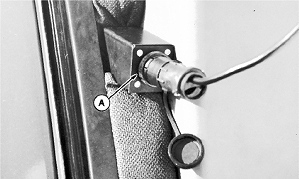
NOTE: Install monitor into rear outlet if tractor is NOT equipped with front outlet. 5. (Tractors With Front Convenience Outlet Only) Install monitor into front outlet (A).
|
|
AG,OUO1074,863 -19-01MAR00-3/7 |
|
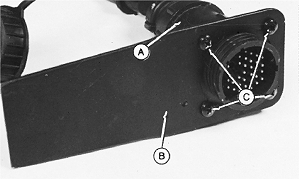
6. Attach harness connector (A) to mounting spade (B) using four self tapping screws (C).
|
|
AG,OUO1074,863 -19-01MAR00-4/7 |
|
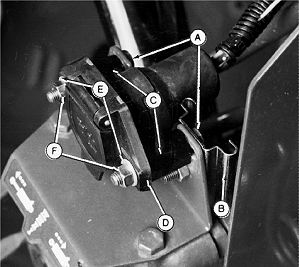
7. Remove two cap screws securing 7-pin connector (A) and discard. 8. Install socket (B) with carriage bolt and nut (C). Do NOT tighten until all hardware is in place. 9. If folding planter control is used, add second socket to opposite side of bracket (D).
|
|
AG,OUO1074,863 -19-01MAR00-5/7 |
|
10. Install cap screws (A) in top hole of socket (B). 11. Install spacers (C), 7-pin connector (D), flat washers (E) and nuts (F). TIGHTEN HARDWARE.
|
|
AG,OUO1074,863 -19-01MAR00-6/7 |
|
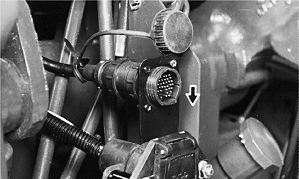
12. Install spade into socket and push down to seat. |
|
AG,OUO1074,863 -19-01MAR00-7/7 |
