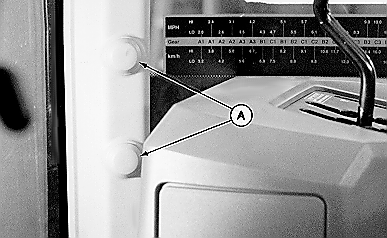
9000 and 9000T Series Tractors-Console Installation1. Remove threaded plastic covers (A) from right-hand front corner post.
|
|
AG,OUO1074,867 -19-01MAR00-1/10 |
|
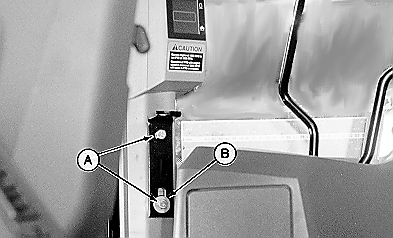
2. Install "L" bracket to front post using two M10 x 20 cap screws (A) with flat washer (B) on lower cap screw (slotted hole). 3. Install M10 x 30 cap screw in threaded hole in "L" bracket.
|
|
AG,OUO1074,867 -19-01MAR00-2/10 |
|
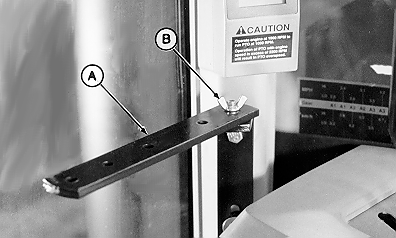
4. Attach monitor strap (A) using M10 wing nut (B).
|
|
AG,OUO1074,867 -19-01MAR00-3/10 |
|
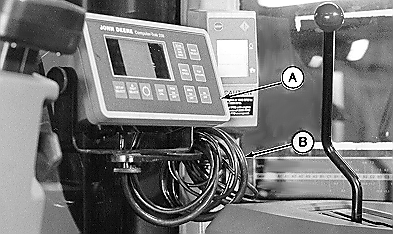
NOTE: For tractors with mechanical shift transmission (MST), position monitor so as not to interfere with shifter operation. 5. Attach monitor (A) to strap making certain to install rubber washer between monitor and strap. 6. Coil excess harness (B) around strap. 7. Route monitor harness along right-hand window and behind instrument panel.
|
|
AG,OUO1074,867 -19-01MAR00-4/10 |
|
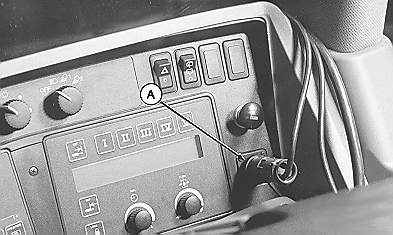
8. Connect monitor power harness to rear convenience outlet (A).
|
|
AG,OUO1074,867 -19-01MAR00-5/10 |
|
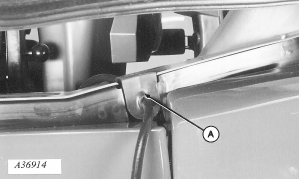
9. Remove existing right-hand side grommet. Install harness in NEW grommet (provided) and install grommet (A). 10. Connect extension harness to monitor harness from cab.
|
|
AG,OUO1074,867 -19-01MAR00-6/10 |
|
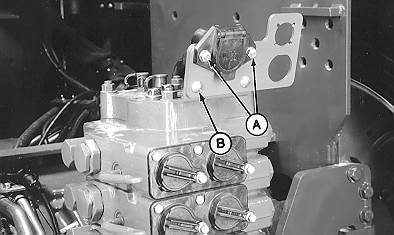
11. Remove two cap screws (A) attaching 7-pin connector and discard. Remove round head bolt (B) and save.
|
|
AG,OUO1074,867 -19-01MAR00-7/10 |
|
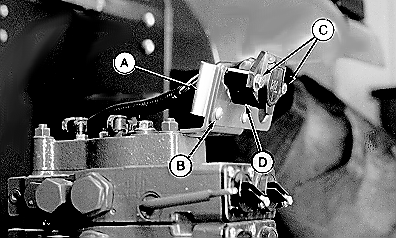
12. Install socket (A) using M8 x 16 round head bolt (B), washer and nut removed in step 11. 13. Install two M8 x 60 cap screws (C), spacer (D) and 7-pin connector with flat washers against connector plastic, and nuts. Tighten hardware.
|
|
AG,OUO1074,867 -19-01MAR00-8/10 |
|
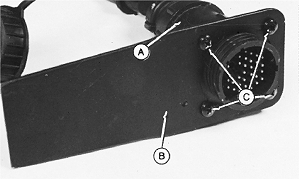
14. Attach harness connector (A) to mounting spade (B) using four self-tapping screws (C).
|
|
AG,OUO1074,867 -19-01MAR00-9/10 |
|
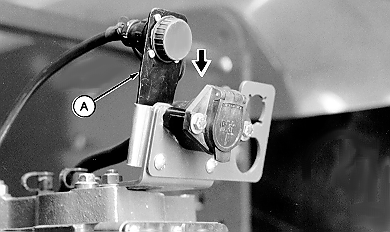
15. Install connector spade (A) into socket and push down to seat. 16. Route extension harness along existing harnesses or hydraulic lines. Be certain harness is clear of moving parts (e.g. PTO shaft, tractor hinge etc.). 17. Tie band harness as required.
|
|
AG,OUO1074,867 -19-01MAR00-10/10 |
