Air Cart Set-Up Mode-Configure Seeding Tool and Air System
|
AG,OUO6023,1099 -19-21JUL00-1/3 |
|
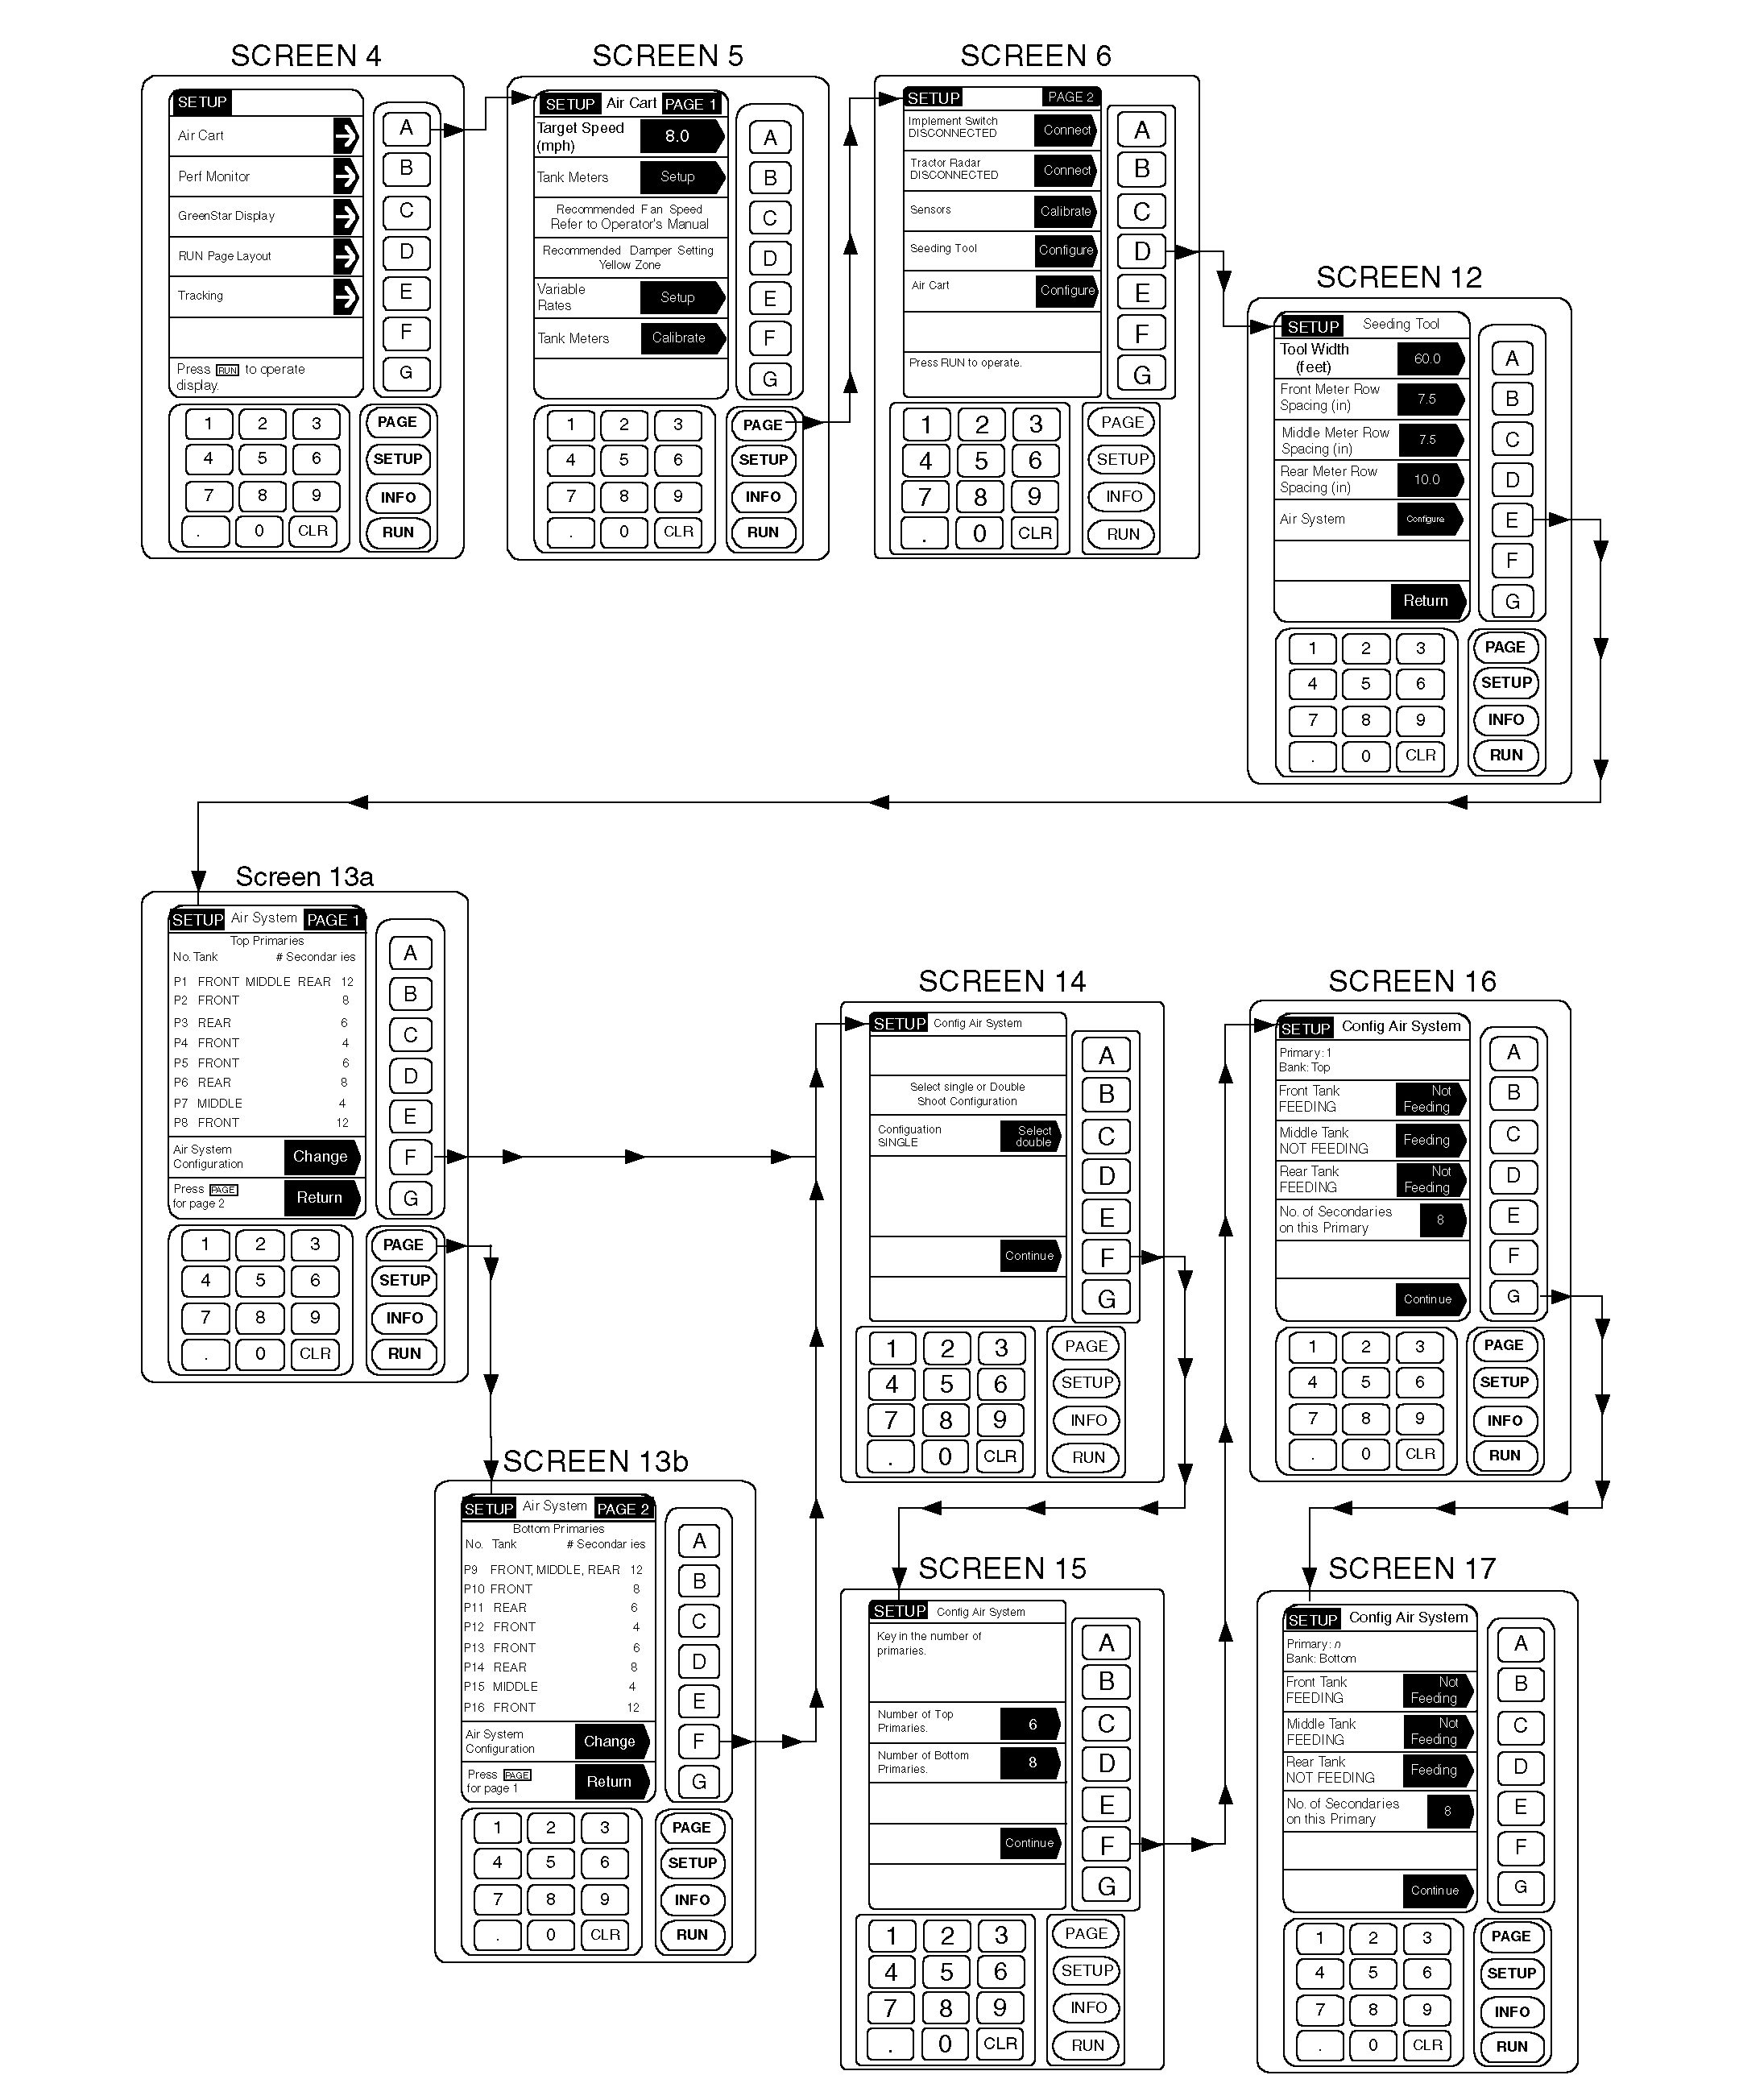
1. From any screen press SETUP. 2. From the list given, choose Air Cart. 3. Once on the Air Cart page, press PAGE to advance to PAGE 2. Select Seeding Tool key D. 4. Press key A to select tool width; then enter the machine width (30, 42, 61, etc.). Press key A again to accept. NOTE: On most machines, the row spacing for each tank meter will be the same. 5. Press key B, C or if the cart is equipped with a Middle Tank, press key D to change the Row Spacing. Enter the value (6, 7.5, 10, 12 or 15). Press the same key again to accept the value. Repeat step until each tank meter has a row spacing. 6. Press key E to configure the Air System. A summary screen that details the configuration of each Primary (P1, P2, etc.) is presented. This includes: Bank (Top primaries on Page 1; Bottom primaries on Page 2), Feeding Tank (FRONT, REAR, THIRD) and Number of Secondaries (7 to 12). 7. Press key F to change the Air System configuration. NOTE: The option in the shaded arrow is what becomes selected if this button is pushed. The unshaded area is the current selection. 8. Select the shoot system. Press key C to toggle between Single or Double. 9. Press key F to continue. NOTE: An advisory message will display if more than eight primaries are entered. |
10. Press key C to change the number of top primaries. Enter a number (1 thru 8). Press key C again to accept. If double-shoot, press key D to change the number of bottom primaries. 11. Press key F to continue. IMPORTANT: For most configurations, Single-Shoot carts will have all tanks feeding all primaries. NOTE: An information message will appear if two tanks with different row spacings are associated with the same primary line. 12. Starting with Primary 1, press key B, C, or if the cart is equipped with a Middle Tank, press key D to select which tank, or tanks, are feeding (putting product) in this particular primary. NOTE: On a double-shoot system, the same tank cannot feed both a top and bottom primary. A warning will be issued by the system if attempted. 13. Find the appropriate Meter Cartridge/Seeding Tool Diagram in the operator's manual (Product Metering System section). Note that these diagrams show the number of secondaries fed by each primary and they also show the number of fine tuning rings that should be installed on each primary meter roller to ensure the correct rate of application for that primary. 14. Press key E to change the number of secondaries associated with this primary. Enter a number (7 to 12). Press key E to accept. 15. Press key G to continue. 16. Repeat Steps 12 thru 15 for each primary (maximum of 16). |
AG,OUO6023,1099 -19-21JUL00-2/3 |
|
17. When all primaries have been configured, the summary screen will again be presented. (The Top primaries are shown on Page 1. Press the PAGE key to view the Bottom primaries on Page 2.) Double check that the tank, or tanks, that will be feeding each primary are listed under the Tank Heading. Also, check that the correct number of secondaries are entered for each primary. If an |
error is discovered, start over at Step 7 of this section to correct.
When all entries are made, the summary screen will be displayed. After verifying that all information is correct, press "Return" twice to end seeding tool configuration set-up. |
AG,OUO6023,1099 -19-21JUL00-3/3 |