Set-Up Mode-Seed Counter
|
AG,OUO6023,1104 -19-21JUL00-1/2 |
|
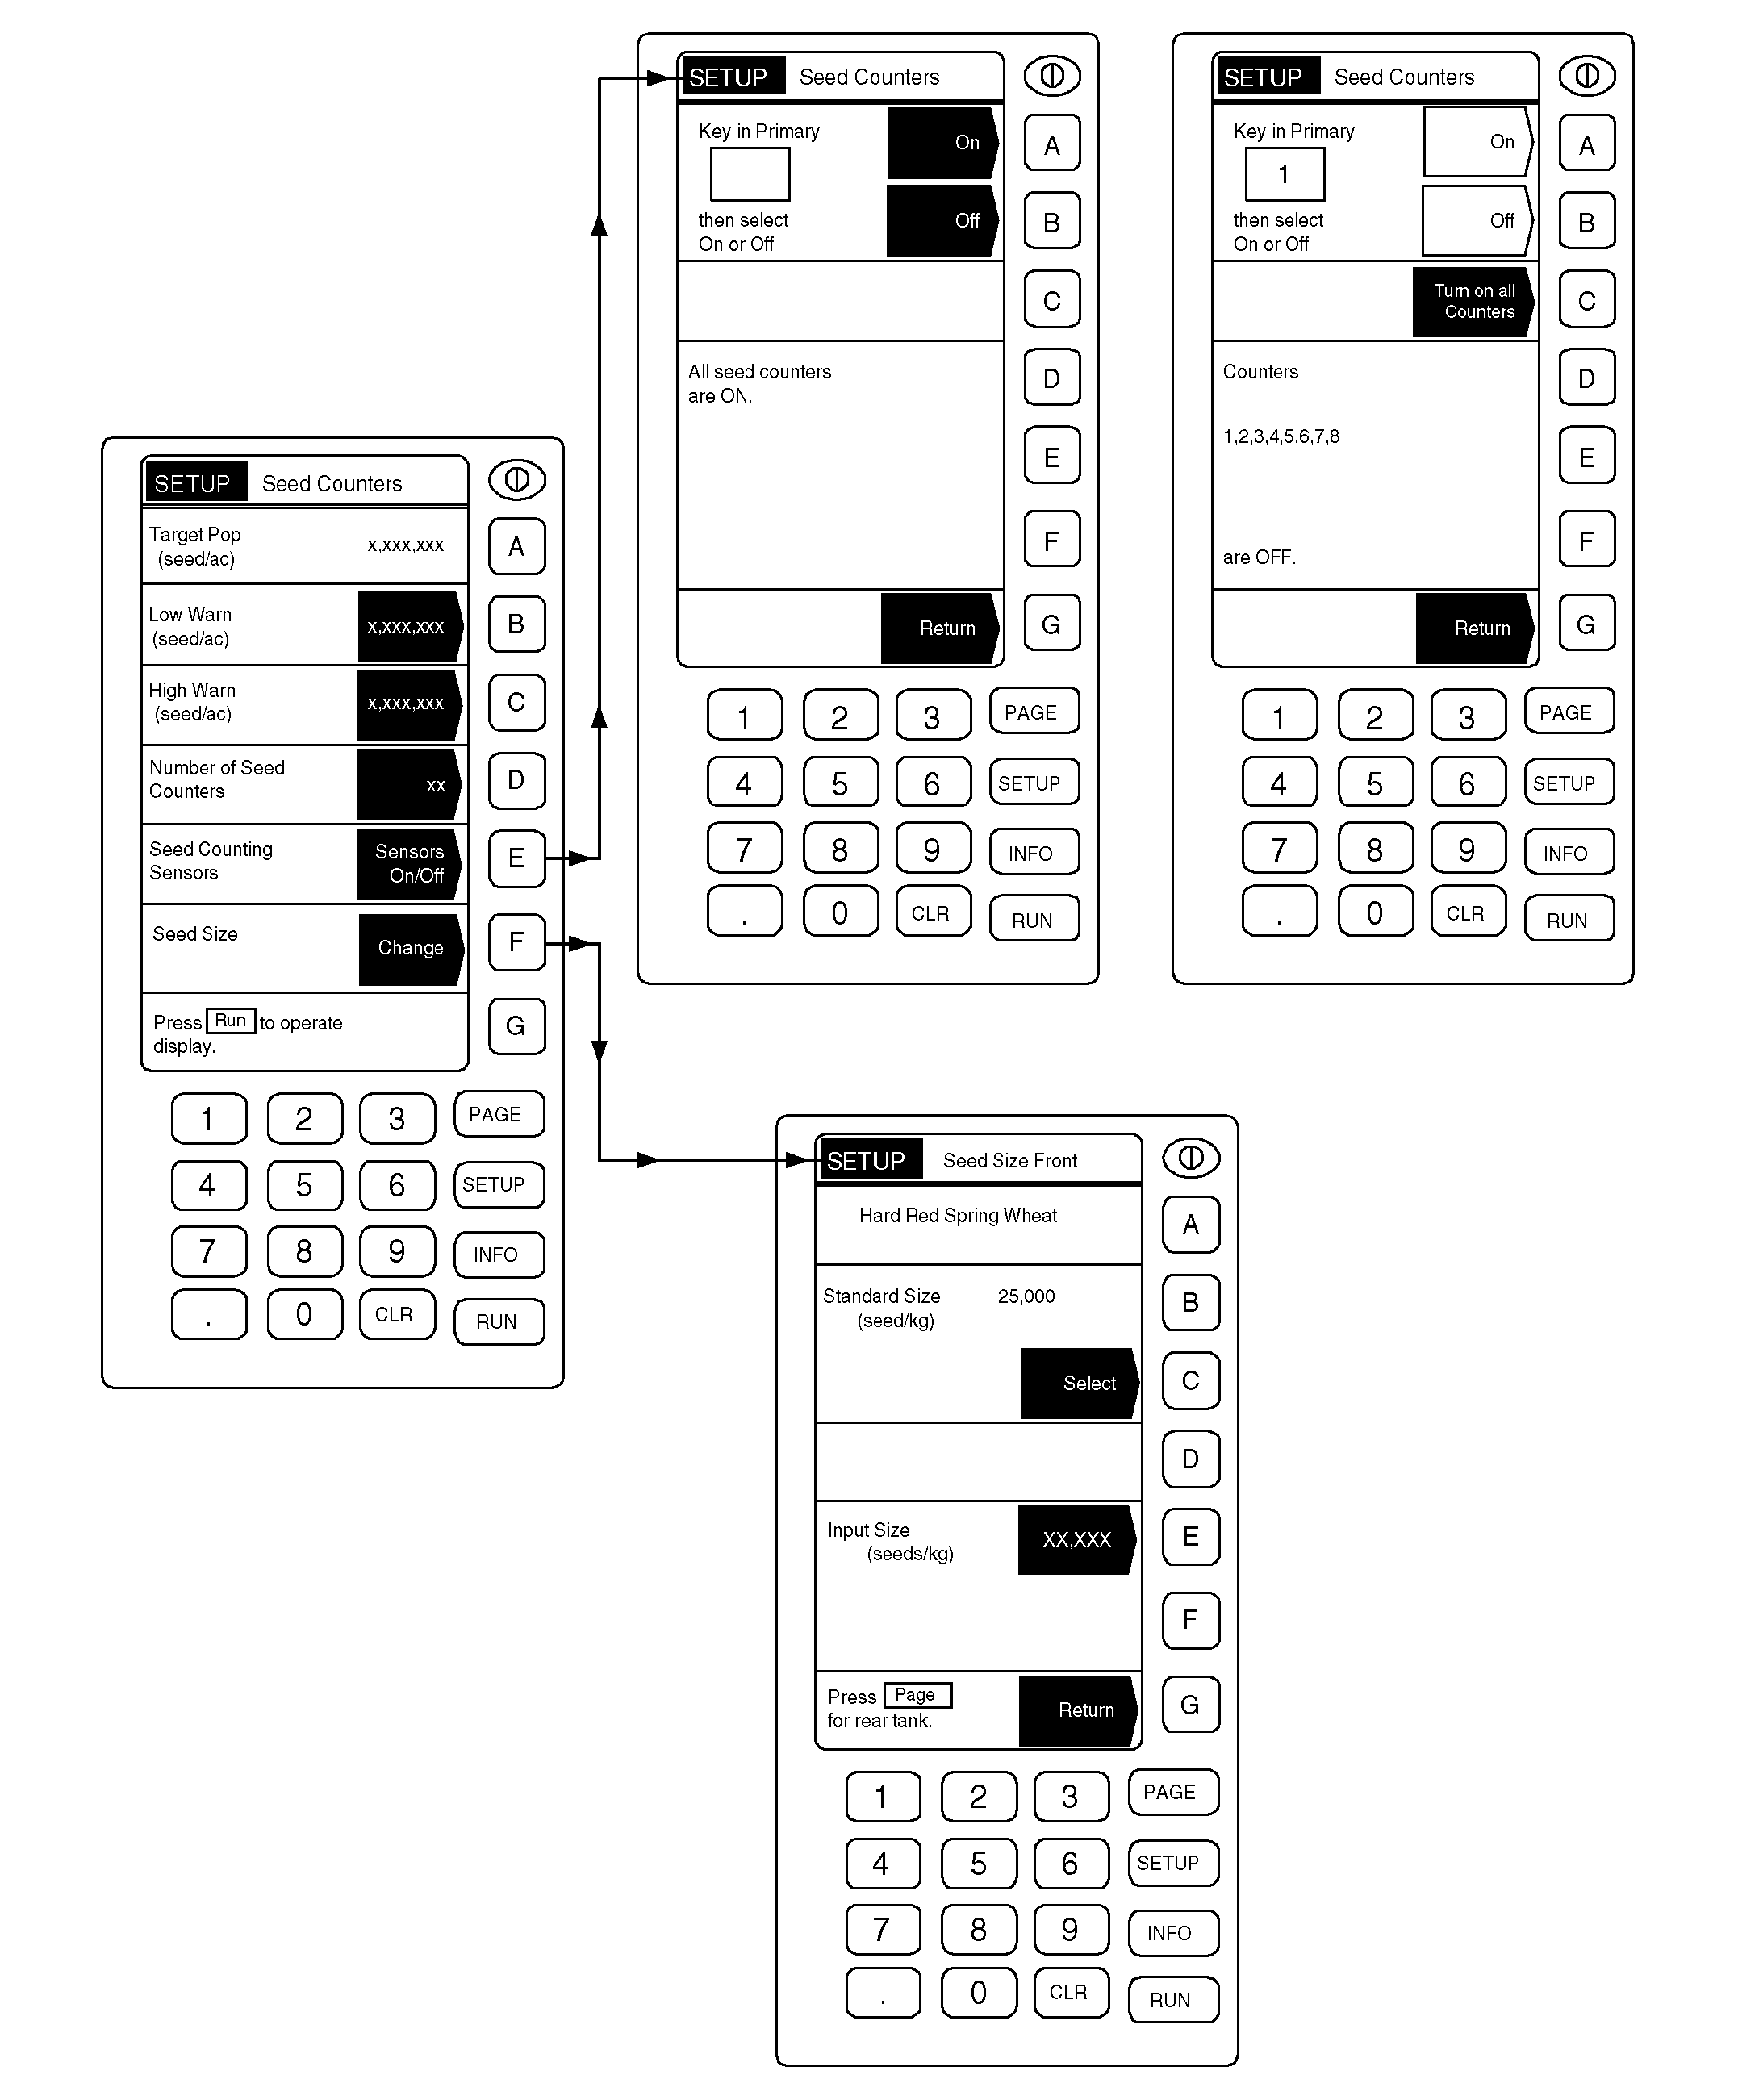
NOTE: Seed counter system uses product information settings previously entered in standard system Tank Meter Set-up. Advisory messages will display when keyed entries are not acceptable. Target population is displayed from standard Tank Meter Set-up or as defined by prescription selection from Variable Rate menu. No target population is displayed until cart begins seeding. Certain air seeded products, such as wheat, will display target population in pounds-per-hectare (acre). Other products, such as beans and peas, are converted from pounds-per-hectare (acre) to seeds-per-hectare (acre) for target population. No population is displayed when fertilizer is selected, or when two products are combined (single-shooting) in top primaries. See SEED COUNTER READOUTS in Seed Counting System section for listing of products that displays seeds-per-area and those that displays mass-per-area.
IMPORTANT: During monitor set-up, machines must be stationary (not seeding) with the fan off. 1. Be sure tractor is NOT MOVING and the fan on the 1900 cart is NOT RUNNING. 2. From any page press SETUP. 3. Select Seed Counter. 4. Press key D, enter the number of seed counters and press key D again to accept. 5. Press key E to turn sensors On/Off. 6. If the message "All seed counters are ON" is displayed, go to Step 7. Turn Seed Counters On or Off by entering the number of the counter and then pressing keys A or B to turn the Seed Counter On or Off respectively. 7. Press key G to return. |
8. Press key F to change seed size. 9. To select Standard Size Seed press key C. If seed size is other than standard size, input seed size by pressing key E, enter seeds per pound and press key E again to accept the value. 10. Press PAGE to repeat for other tanks. NOTE: Target population is the mid-point between high and low settings. Target population is automatically entered by the wedge box. Values entered should be in lb/hectare (acre) or seeds/hectare (acre), depending on the product being applied. 11. Press key G to return. Target value will be displayed when actual seeding begins. The High and Low Warning Limits default to 20% above and 20% below the target value. These settings can both be adjusted closer to the target population (or rate) to tighten the warning band and more closely monitor seed count. Tightening the warning band may produce an unacceptable number of rate deviation messages. Widening the warning band will reduce the number of nuisance warnings. A target population greater than zero must be displayed on the SETUP page before a different lower limit can be entered in. To generate a target population, the machine must be moving, the meters must be turning, and the fan must be running. While the target rate is being generated, the lower limit can be set to any value lower than what is being displayed. A different upper limit can be entered at any time in the SETUP menu. The limit must be higher than the target population. Once manually entered, the limits are set and will remain stored for a particular type of seed unless manually changed again. If the seed type is changed in the Cart Controller Setup, the entire process must be repeated for the new seed type. Limits already entered for a particular seed type are stored in regard to that seed type. |
AG,OUO6023,1104 -19-21JUL00-2/2 |