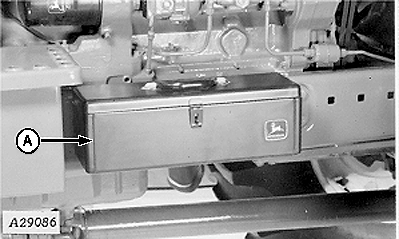
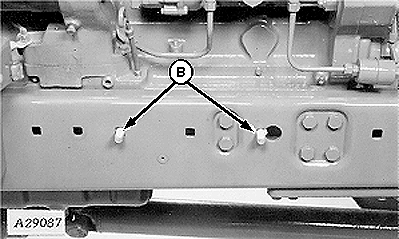
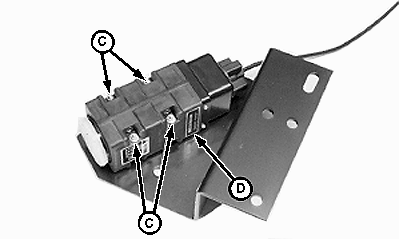
Install Radar-30-60 Series Row Crop Tractors1. Remove toolbox (A) and mounting bracket from right-hand side of tractor. 2. Insert 5/8 x 1-1/2 in. cap screws (B) in holes as shown. 3. Attach radar unit to mounting plate with 1/4 in. cap screws (C), washers and lock nuts (do not overtighten). Be certain radar unit is mounted on plate so serial number plate (D) is facing up when plate is attached to tractor.
|
|
AG,OUO6023,990 -19-21JUL00-1/2 |
|
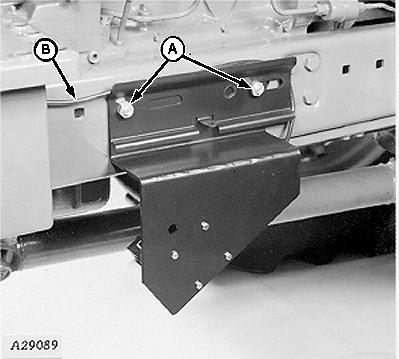
4. Install radar plate and toolbox mounting bracket on cap screws (A) and secure with lock washers and nuts. NOTE: 55 and 60 Series Tractors have spacers on toolbox mounting hardware. Install radar bracket against side frame; then spacers and toolbox mounting bracket (in this order). 5. Route cable (B) back toward rear axle and connect to console radar lead.
6. Fasten lead away from moving parts with tie straps. 7. Install toolbox on mounting bracket. |
|
 CAUTION:
Avoid looking directly into the sensor face to prevent possible eye damage from microwave signal emitted from radar sensor.
CAUTION:
Avoid looking directly into the sensor face to prevent possible eye damage from microwave signal emitted from radar sensor.
AG,OUO6023,990 -19-21JUL00-2/2 |