Lowering Locked Up Split Row Units (16/31)1. Lower machine. |
OUO6074,00001B3 -19-26JAN01-1/6 |
|
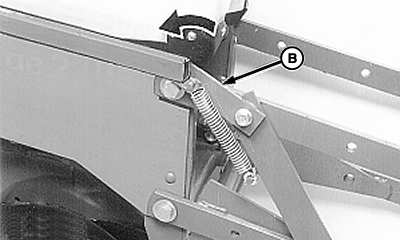
NOTE: Lift arm (A) is stored in end of machine wing frame. 2. Engage lift arm in spring retaining strap (B) and rotate rearward until spring moves to other side of pivot.
|
|
OUO6074,00001B3 -19-26JAN01-2/6 |
|
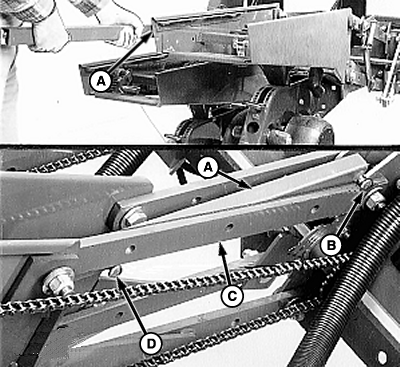
3. Install lift arm (A) on left-hand side with front pin (B) on TOP side of parallel arm (C) and rear pin (D) on BOTTOM side of parallel arm (C).
|
|
 CAUTION:
Avoid injury. Head of pins (B) and (D) must be hooked over edge of parallel arm. Lift arm may slip if not properly hooked.
CAUTION:
Avoid injury. Head of pins (B) and (D) must be hooked over edge of parallel arm. Lift arm may slip if not properly hooked.
OUO6074,00001B3 -19-26JAN01-3/6 |
|
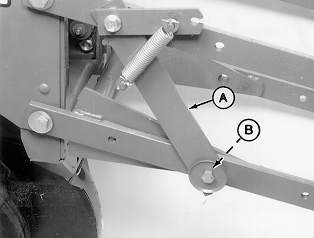
4. Raise planting unit with lift arm until compression link (A) disengages bushing (B) on lower parallel arm. 5. Lower unit to the ground with lift arm. 6. Remove hopper.
|
|
OUO6074,00001B3 -19-26JAN01-4/6 |
|
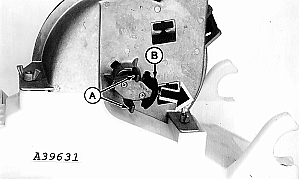
7. Push lock (B) back to release meter drive tabs (A).
|
|
OUO6074,00001B3 -19-26JAN01-5/6 |
|
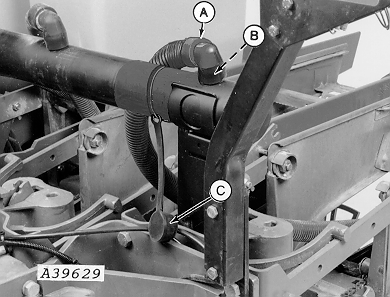
8. If lowered units are equipped with vacuum meters, remove cap (C) and install vacuum hose (A) on manifold fitting (B). 9. Repeat steps 2 thru 8 on remaining rows to be lowered. 10. Set down force on lowered units as desired. 11. Reset monitor when switching from 30 in. to 15 in. rows. a. Turn on all rows. b. Change machine width to 1219 cm (465 in.). c. Change row spacing. d. Change target population and seed disk being used. |
|
OUO6074,00001B3 -19-26JAN01-6/6 |