6000 Series Tractors with Exhaust on Hood—Radar and Bracket Installation
-
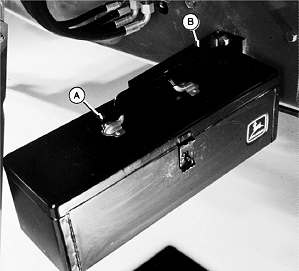
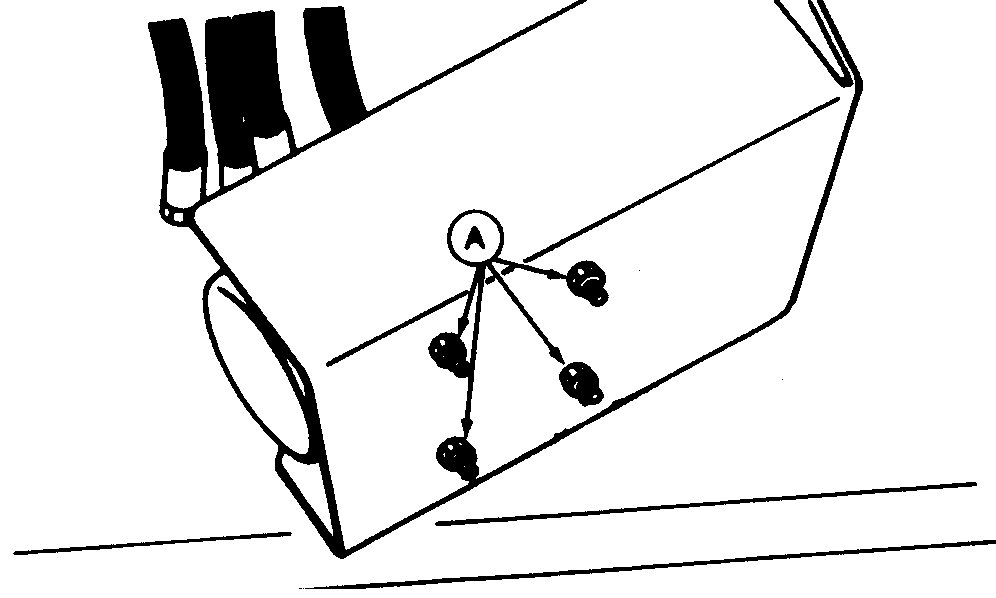
H45444-UN-02DEC92A - Toolbox
B - Bracket
Remove toolbox (A) and disassemble bracket (B). -
NOTE: Use M12 nuts provided if tractor frame holes are not threaded.
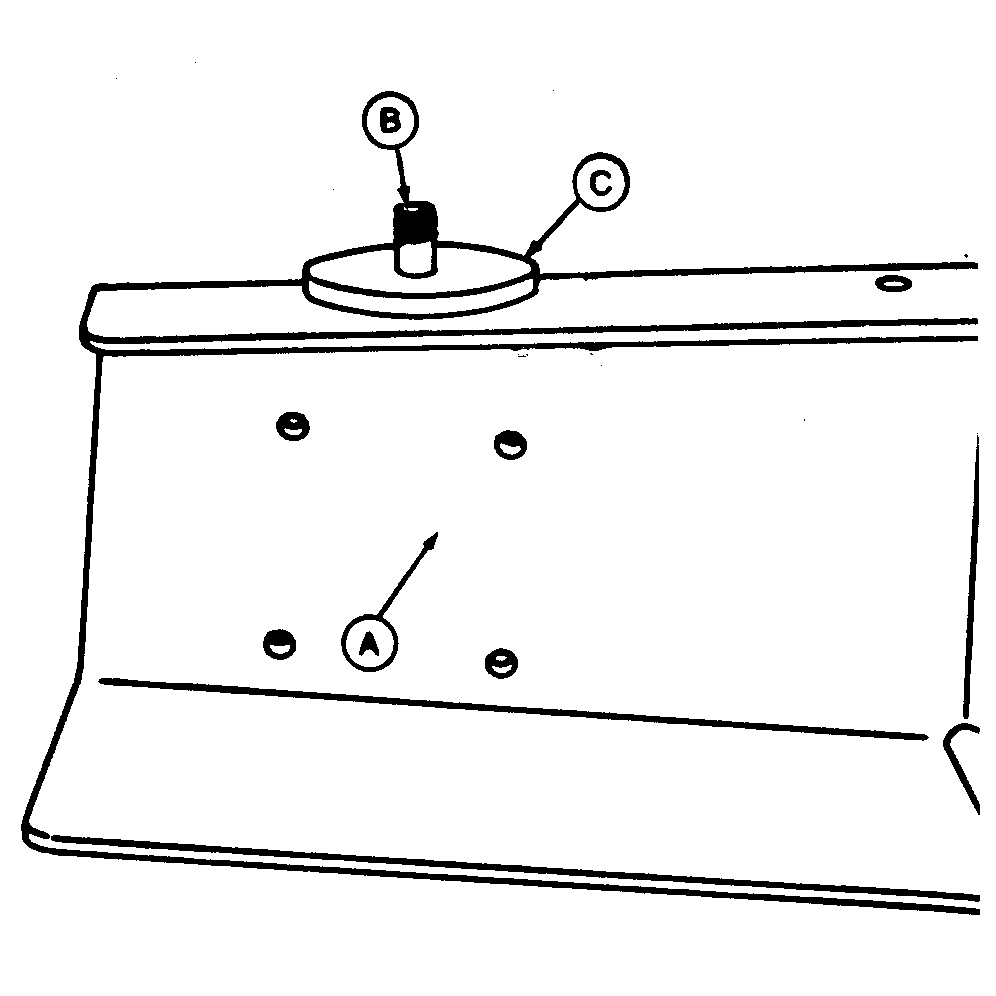
A35493-UN-03FEB93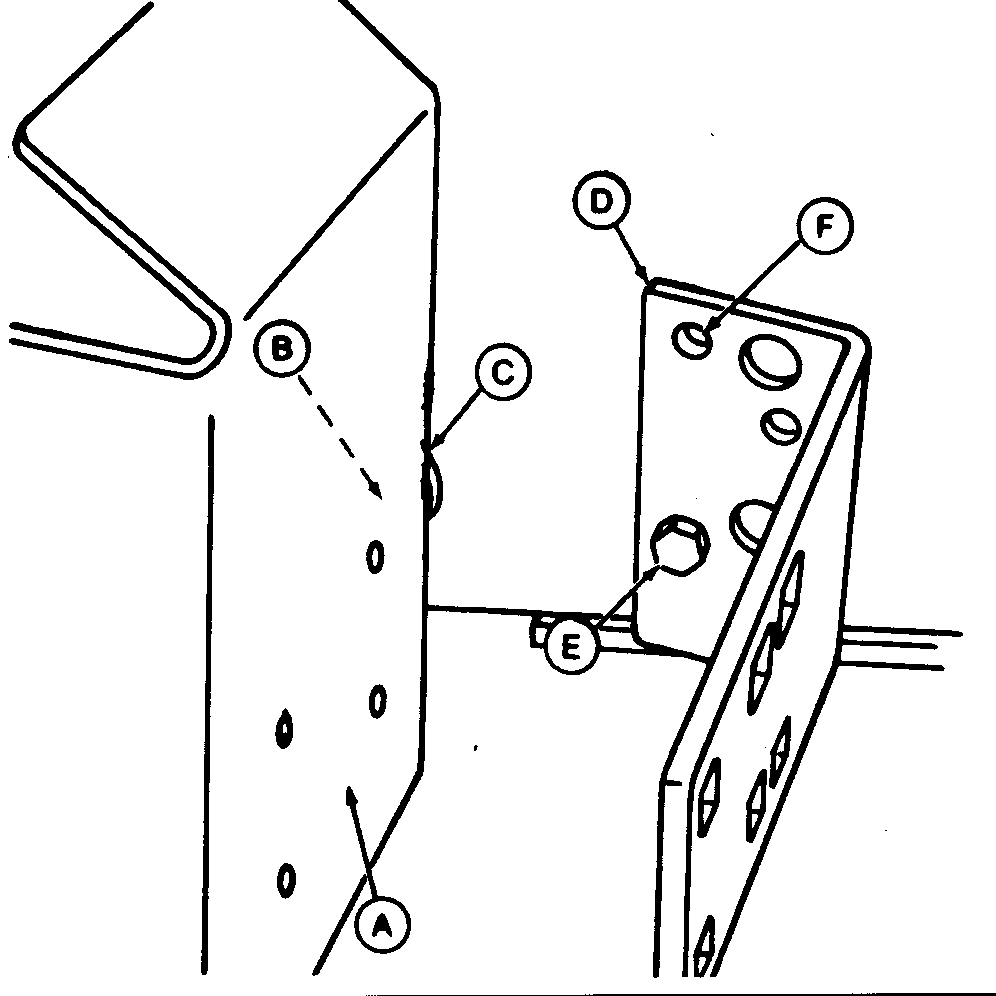
A35494-UN-03FEB93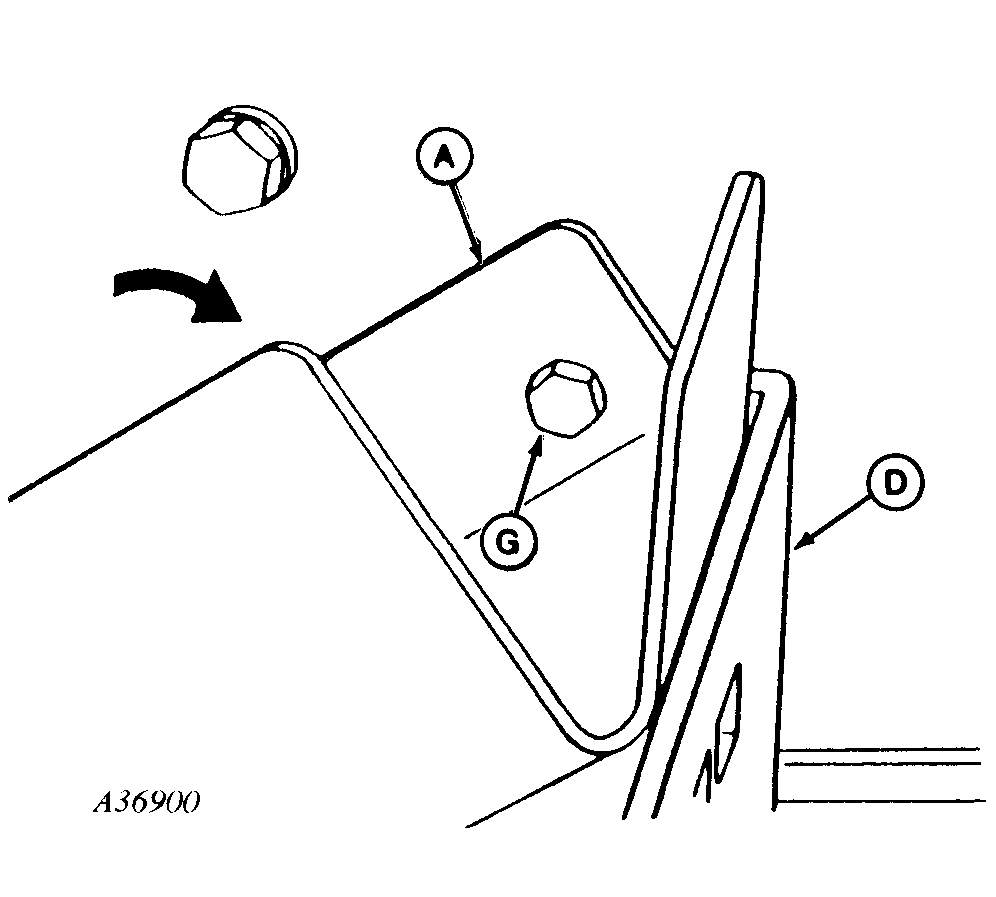
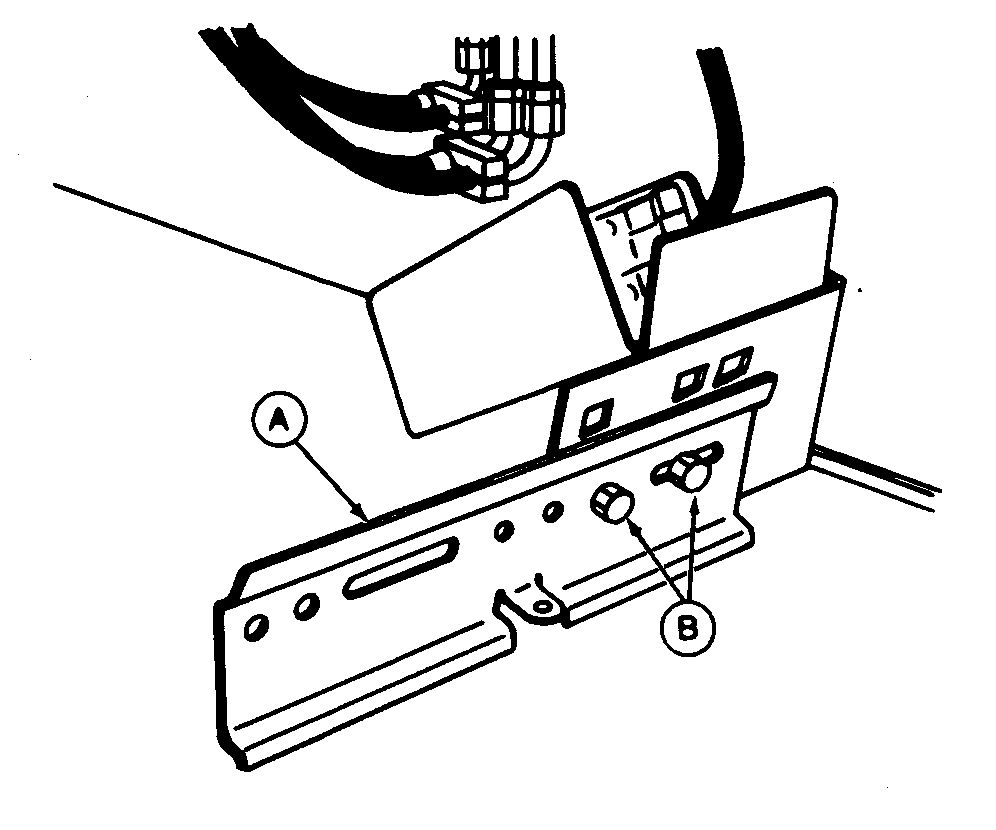
A36900-UN-26APR95A - Mounting Bracket
B - Cap Screw
C - Spacer
D - Tool Box Bracket
E - Cap Screw
F - Top Hole
G - Cap Screw
Install radar mounting bracket (A) with one M12 x 35 cap screw (B) and spacer (C). (Do not tighten cap screw.) -
Install tool box bracket (D) with M12 x 35 cap screw (E). Line up top hole (F) with hole in tractor frame as illustrated.
-
Rotate radar mounting bracket (A) and line up holes in both brackets and insert M12 x 35 cap screw (G).
TIGHTEN ALL MOUNTING HARDWARE.
-
A35497-UN-03FEB93A - Lock Nuts
Radar must be mounted with serial number tag facing up. Attach with four 1/4 x 4 in. cap screws, four washers and four lock nuts (A). Washers are installed between bracket and lock nuts. -
Route harness past cab side tipping hinge to rear of cab and connect to radar power harness. Secure with plastic self locking bands.
-
 CAUTION: Avoid looking directly into the sensor face of radar
to prevent possible eye damage from microwave signal emitted from
radar sensor.
CAUTION: Avoid looking directly into the sensor face of radar
to prevent possible eye damage from microwave signal emitted from
radar sensor.Nominal calibration for this radar installation is 7776. Radar points 7 degrees to side to miss rear tire. Calibration is less than other radars at 7836.
-
A35496-UN-03FEB93A - Bracket
B - Existing Hardware
Install tool box bracket (A) as shown using existing hardware (B) and install tool box.
|
AG,OUO1074,862-19-20000301 |