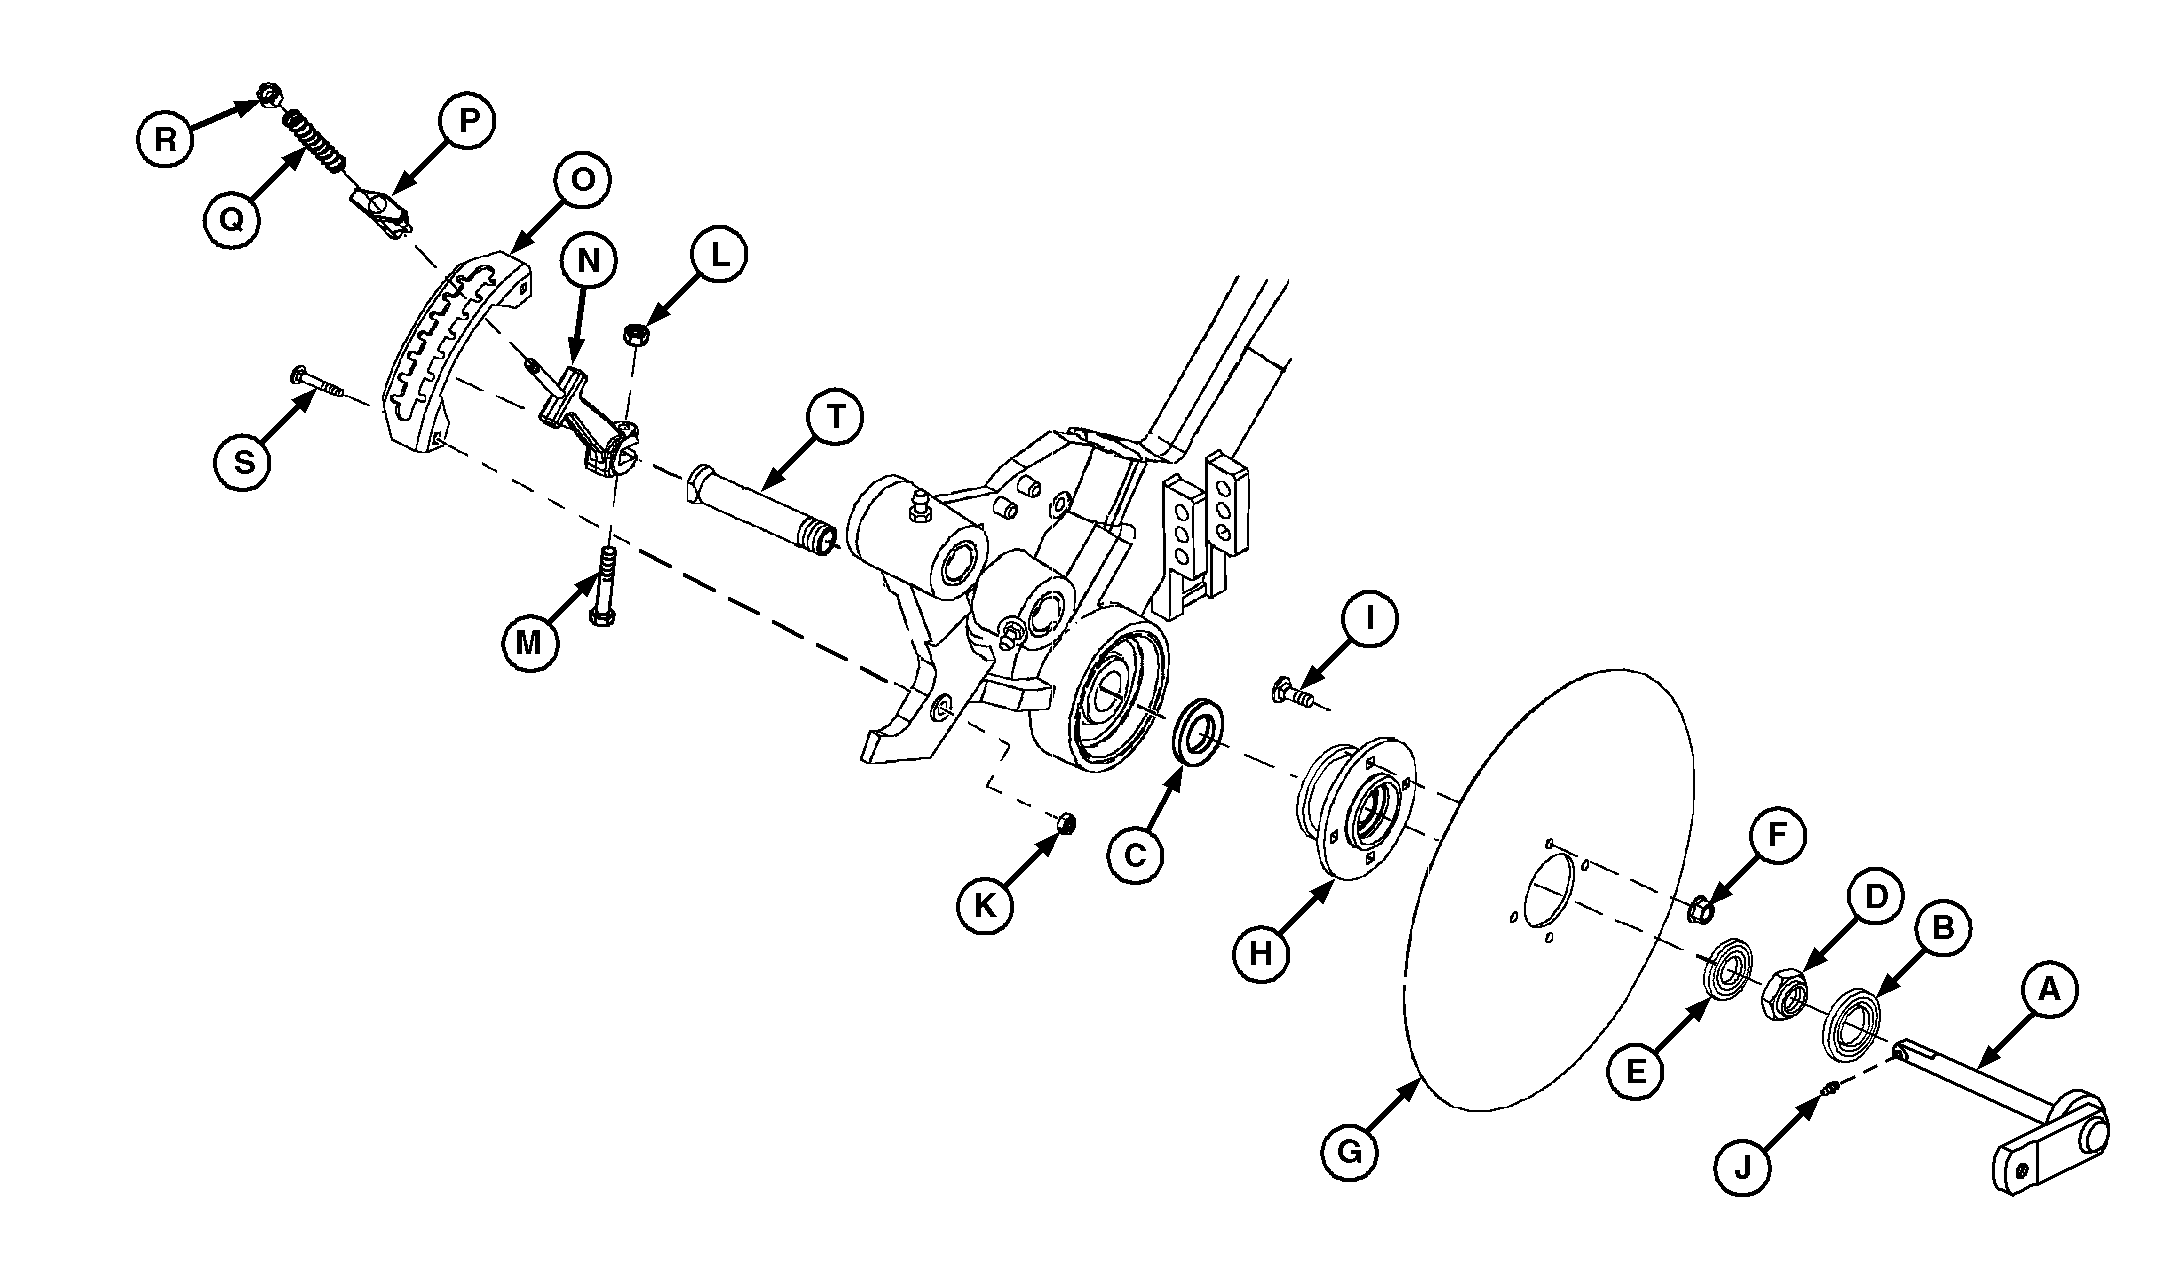
Replacing Disk Openers and BearingsDisk Openers
METHOD ONE: NOTE: Diameter of a new disk opener (G) is 457 mm (18 in.) Replace disk openers when diameter is less than 406 mm (16 in.) or if uneven seeding depth occurs. NOTE: Clean dirt from parts prior to removal. 1. Remove gauge wheel (not shown) from arm. See REPAIRING STEEL GAUGE WHEEL ASSEMBLY or REPAIRING SMOOTH-SIDED GAUGE WHEEL ASSEMBLY in this section for information. |
 CAUTION:
Disks are sharp. Use caution and wear protective clothing to avoid cutting hands.
CAUTION:
Disks are sharp. Use caution and wear protective clothing to avoid cutting hands.
AG,OUO1074,563 -19-22FEB00-1/3 |
|
|
|
|
|
|
2.
Place handle (P) in lowest possible slot.
3. Remove lock nuts (F).
4. Remove disk opener (G) by maneuvering around depth adjustment arm (A). 5. Install new disk with beveled side towards hub. IMPORTANT: Tire damage can occur if disk opener and gauge wheel are not correctly spaced. 6. Install previously removed parts. See CHECKING GAUGE WHEEL CLEARANCE-ALL GAUGE |
WHEELS in this section when installing gauge wheel.
METHOD TWO: NOTE: Clean dirt from parts prior to removal. 1. Remove gauge wheel (not shown) from arm. See REPAIRING STEEL GAUGE WHEEL ASSEMBLY or REPAIRING SMOOTH-SIDED GAUGE WHEEL ASSEMBLY in this section for information. 2. Remove grease fitting (J). IMPORTANT: Avoid damaging triple lip seal (B). Remove arm (A) carefully. 3. Remove cap screw (M) and depth gauge handle arm (N); then remove depth adjustment arm (A). |
AG,OUO1074,563 -19-22FEB00-2/3 |
|
IMPORTANT: Do not damage triple lip seal (B) on nut. Use care when removing and installing disk opener. 4. Remove lock nuts (F) and disk opener (G). 5. Install new disk opener with beveled side towards hub. IMPORTANT: Avoid damaging triple lip seal (B). Install arm (A) carefully. |
6. Grease triple lip seal (B) and install arm (A). IMPORTANT: Tire damage can occur if disk opener and gauge wheel are not correctly spaced. 7. Install previously removed parts. See CHECKING GAUGE WHEEL CLEARANCE-ALL GAUGE WHEELS in this section when installing gauge wheel. BearingsBearing replacement requires a special tool and procedure. See your John Deere dealer. |
AG,OUO1074,563 -19-22FEB00-3/3 |