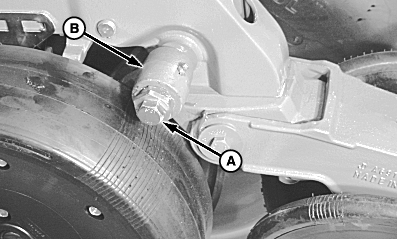
Replace Seed Opener Blades and Seed Tube GuardNOTE: Left-hand side shown. Right-hand side similar. 1. Remove cap screw (A), pivot shaft (B) and gauge wheel from row unit.
|
|
OUO6435,0001A4E -19-14JAN04-1/4 |
|
2.
Planting unit equipped with rotary or rigid scraper-Pull front engagement pin (A) outward, disengage scraper assembly (B) from shank panels.
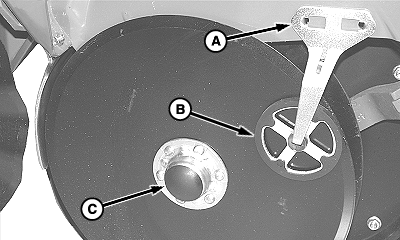
3. Remove hub cap (C).
|
|
OUO6435,0001A4E -19-14JAN04-2/4 |
|
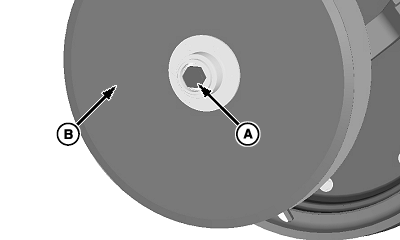
NOTE: Make sure that spacer washers on the inside of disk hub don't get lost. 4. Remove cap screw (A) and disk (B) as an assembly.
|
|
 CAUTION:
Disk blades are sharp. Wear protective gloves and handle disks carefully to avoid being injured.
CAUTION:
Disk blades are sharp. Wear protective gloves and handle disks carefully to avoid being injured.
OUO6435,0001A4E -19-14JAN04-3/4 |
|
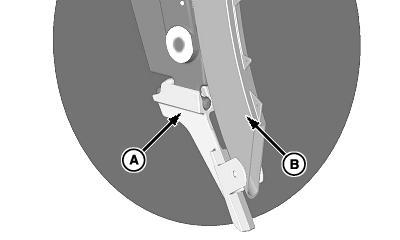
NOTE: Replace seed tube guard if excessively worn. 5. Replace seed-tube guard by rotating clockwise and sliding forward. IMPORTANT: To properly install blade assembly, add or remove hardened washers behind blade bearing to obtain 38 mm to 64 mm (1.5 in. to 2.5 in.) of blade edge contact at leading edge when cap screw is tightened. Washers not placed behind blade should be placed on front side of bearing. Inserting two pieces of paper between disks on each side of contact points on leading edge will help verify this dimension. 6. Inspect and replace seed opener disk as necessary. 7. Install in reverse order using the following instructions:
Specification
Specification
|
|
OUO6435,0001A4E -19-14JAN04-4/4 |