9000 and 9000T Series Tractors—Console Installation
-
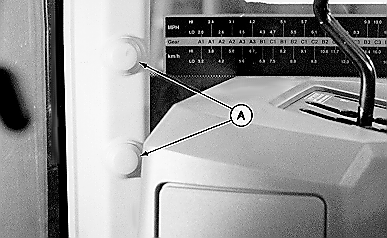
A41224-UN-19MAY97A - Plastic Covers
Remove plastic covers (A) from front right corner post. -
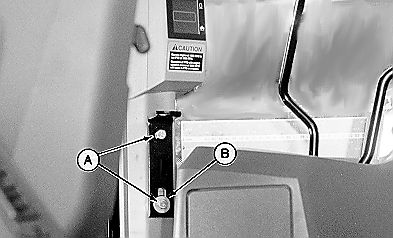
A41225-UN-19MAY97A - M10 x 20 mm Cap Screw (2 used)
B - Flat Washer
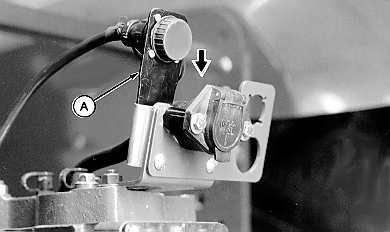
Position L-bracket on front right corner post using one M10 x 20 mm cap screw (A) in top hole of bracket as shown. -
Install second M10 x 20 mm cap screw (A) with flat washer (B) in lower slotted hole of bracket.
-
Fully thread M10 x 30 mm cap screw in L-bracket as shown.
-

A41226-UN-19MAY97A - Monitor Strap
B - Wing Nut
Attach monitor strap (A) to L-bracket using M10 wing nut (B). -
NOTE:
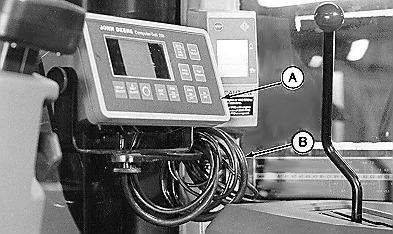
A41227-UN-19MAY97A - Monitor
B - Excess Harness
For tractors with mechanical shift transmission, position monitor so it does not interfere with shifter operation.Attach monitor (A) to strap with rubber washer between monitor and strap.
-
Coil excess harness (B) around strap.
-
Route monitor harness along right-hand window and behind instrument panel.
-
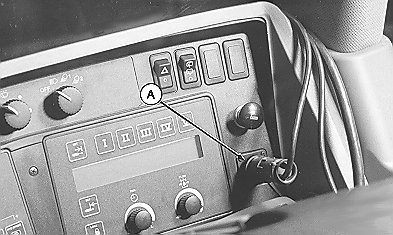
A41228-UN-19MAY97A - Convenience Outlet
Connect monitor power harness to rear convenience outlet (A). -
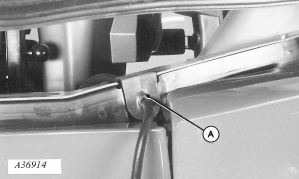
A36914-UN-26APR95A - Grommet
Remove existing right-hand grommet. Install harness in provided grommet. -
Install grommet (A).
-
Connect extension harness to monitor harness from cab.
-
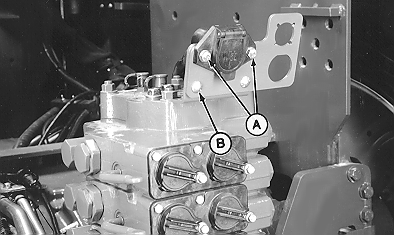
A41223-UN-19MAY97A - Cap Screw (2 used)
B - Round Head Bolt
Remove cap screws (A) attaching 7-pin connector. Discard cap screws. -
Remove and save carriage bolt (B).
-
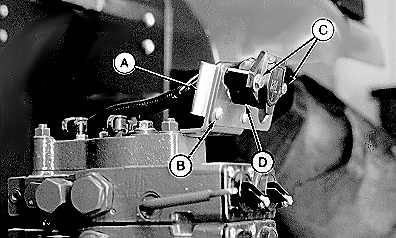
A41229-UN-19MAY97A - Spade Socket
B - M8 x 16 mm Carriage Bolt
C - M8 x 60 mm Cap Screw (2 used)
D - Spacer
Install spade socket (A) using M8 x 16 mm carriage bolt (B), washer, and nut previously removed. -
Install M8 x 60 mm cap screws (C), spacer (D), and 7-pin connector with flat washers against connector plastic and nuts. Tighten hardware.
-
H45416-UN-02DEC92A - Monitor Harness
B - Spade
C - Self-tapping Screw (4 used)
Attach monitor harness (A) to spade (B) using self-tapping screws (C). -
A41230-UN-11APR02A - Connector Spade
Install spade (A) into spade socket and push down to seat. -
Route extension harness along existing harnesses or hydraulic lines. Verify that harness is clear of moving parts.
-
Secure harness using tie bands as needed.
|
OUO6045,00000EA-19-20150716 |