Inspect and Adjust Opener Blades1. Support machine safely. (See procedure at the beginning of this section.
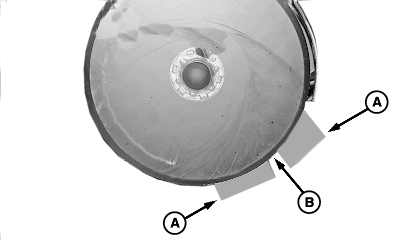
2. Inspect blade edge contact point as follows: a. Insert two small business cards (A) between blade opening and gently slide cards together until blade contact point is reached. b. Measure blade contact area (B) and compare to specification. Specification
c. If distance is not as specified, proceed as follows: |
|
 CAUTION:
Disk blades are sharp. Wear protective gloves and handle disks carefully.
CAUTION:
Disk blades are sharp. Wear protective gloves and handle disks carefully.
OUO6045,0000A28 -19-11MAY09-1/2 |
|
3.
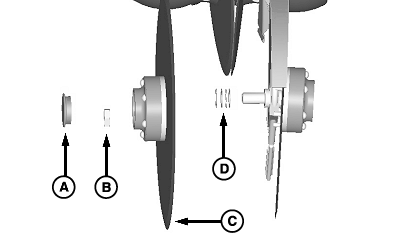
Remove dust cap (A), nut (B), and blade (C) from spindle.
4. Measure blade diameter and compare to specification. Replace blades, if diameter is below specification, beveled edge is worn off, or damage is apparent. Specification
5. If blade replacement is required, see REPLACE DISK FERTILIZER OPENER BEARING in this section. 6. Remove shim washers (D) to increase disk contact area, or add shim washers to decrease disk contact area.
7. Install blade in reverse order and tighten nut (B) to specification. Specification
8. Check blade contact area. 9. Repeat procedure until blade contact area is as specified. 10. Remove support components. |
|
OUO6045,0000A28 -19-11MAY09-2/2 |