Set Seed Depth
-
IMPORTANT: Actual seed location must be measured to determine depth. Gauge on seed opener is only an indicator of seed depth.
NOTE: Always level machine, set fertilizer depth, and set fertilizer breakout force before seed depth is set.
NOTE: To speed up the process, properly set a few seed tubes and then adjust the remaining seed tubes to the same depth gauge setting.
Select a level area in field.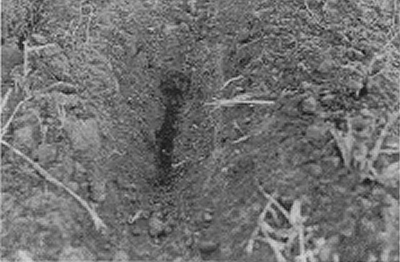
A60320-UN-02JUL07 -
Activate air cart fan and pull the seeder about 5 m (15 ft.) with machine lowered into the soil.
-
Check seed depth at several furrows behind the machine. Seed is located approximately 20 mm (3/4 in.) from centerline of furrow. Remove soil straight down to seed level. Brush away ridge of loose top soil created by shank to determine true surface level of field. Measure seed depth. (See MEASURE PRODUCT DEPTH in this section.)
-
 CAUTION: Avoid serious injury or death. Whenever working under
frame, always close lock-up valve.
CAUTION: Avoid serious injury or death. Whenever working under
frame, always close lock-up valve.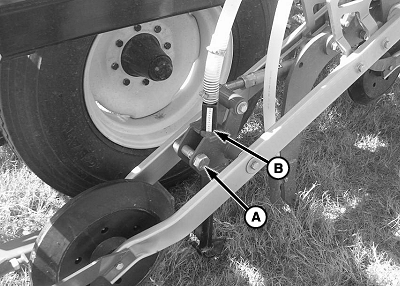
A60432-UN-14JUL08A - Cap Screw
B - Gauge
Adjust seed tube to place the seed deep enough to reach moisture. Avoid seeding deeper than necessary. Press wheel force effects seed placement. Balance both the seed tube adjustments and the press wheel force adjustments to achieve proper seed placement.Loosen cap screw (A) enough to move seed tubes on the furrows checked.
-
Raise or lower seed tubes to desired position.
-
Tighten cap screw (A) to specification.
Item Measurement Specification Seed Tube Retaining Cap Screw Torque 270 N·m (200 lb.-ft.) -
Pull seeder forward again and verify proper seed depth at those openers.
-
Note gauge (B) indicator position on those openers.
-
Set all seed tubes to same gauge position.
-
Measure seed depth at all openers to verify proper depth. Adjust as necessary.
|
OUO6435,00003B8-19-20100614 |