Check Valves
 CAUTION: To avoid injury from escaping hydraulic oil, relieve
pressure from system.
CAUTION: To avoid injury from escaping hydraulic oil, relieve
pressure from system.
A47959-UN-13SEP01
-
Lower planter with engine running.
-
Place hydraulic lever in “Float” position and PLANT-TRANS switch in “Plant” position. Depress all remaining switches in both directions.
-
Place PLANT-TRANS switch in “Trans” position. Depress all remaining switches in both directions.
-
Leave SCV in “Float” position and shut off engine.
-
Clean area around solenoid of any debris.
-
NOTE: Some solenoid covers have a thin washer beneath the cover.
Remove from solenoid:
- nut
- thin washer, if equipped
- cover
-
Lift solenoid from valve.
-
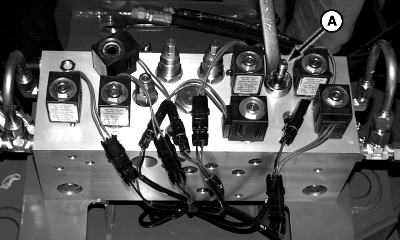
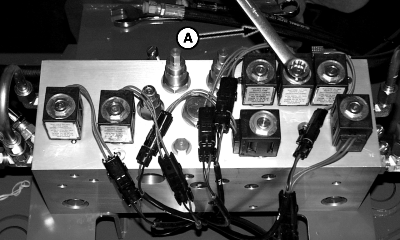
A47960-UN-13SEP01A - Valve
Remove valve (A). -
Place valve in solvent and press poppet inside of valve back and forth to dislodge any foreign material from the valve.
-
Inspect threads on both ends of valve for rust or oxidation. Use a wire brush to clean threads.
-
IMPORTANT: Do not overtighten valves. Valve bodies distort and cause valves to stick or hang up.
NOTE: SV1 or SV3 is stamped on hex of valve.
Install valve. Tighten SV3 valves (small hex valve) to specification.
Tighten SV1 valves (large hex valve) to specification.Item Measurement Specification SV3 Valve Torque 47.5 N·m (35 lb.-ft.) Item Measurement Specification SV1 Valve Torque 102 N·m (75 lb.-ft.) -
Install solenoid and washers.
-
Install nut on top of solenoid. Tighten nut to specification.
Item Measurement Specification Nut Torque 6.5 N·m (57 lb.-in.) -
If problem still exists, replace valve.
Counter-Balance Valves
CAUTION:
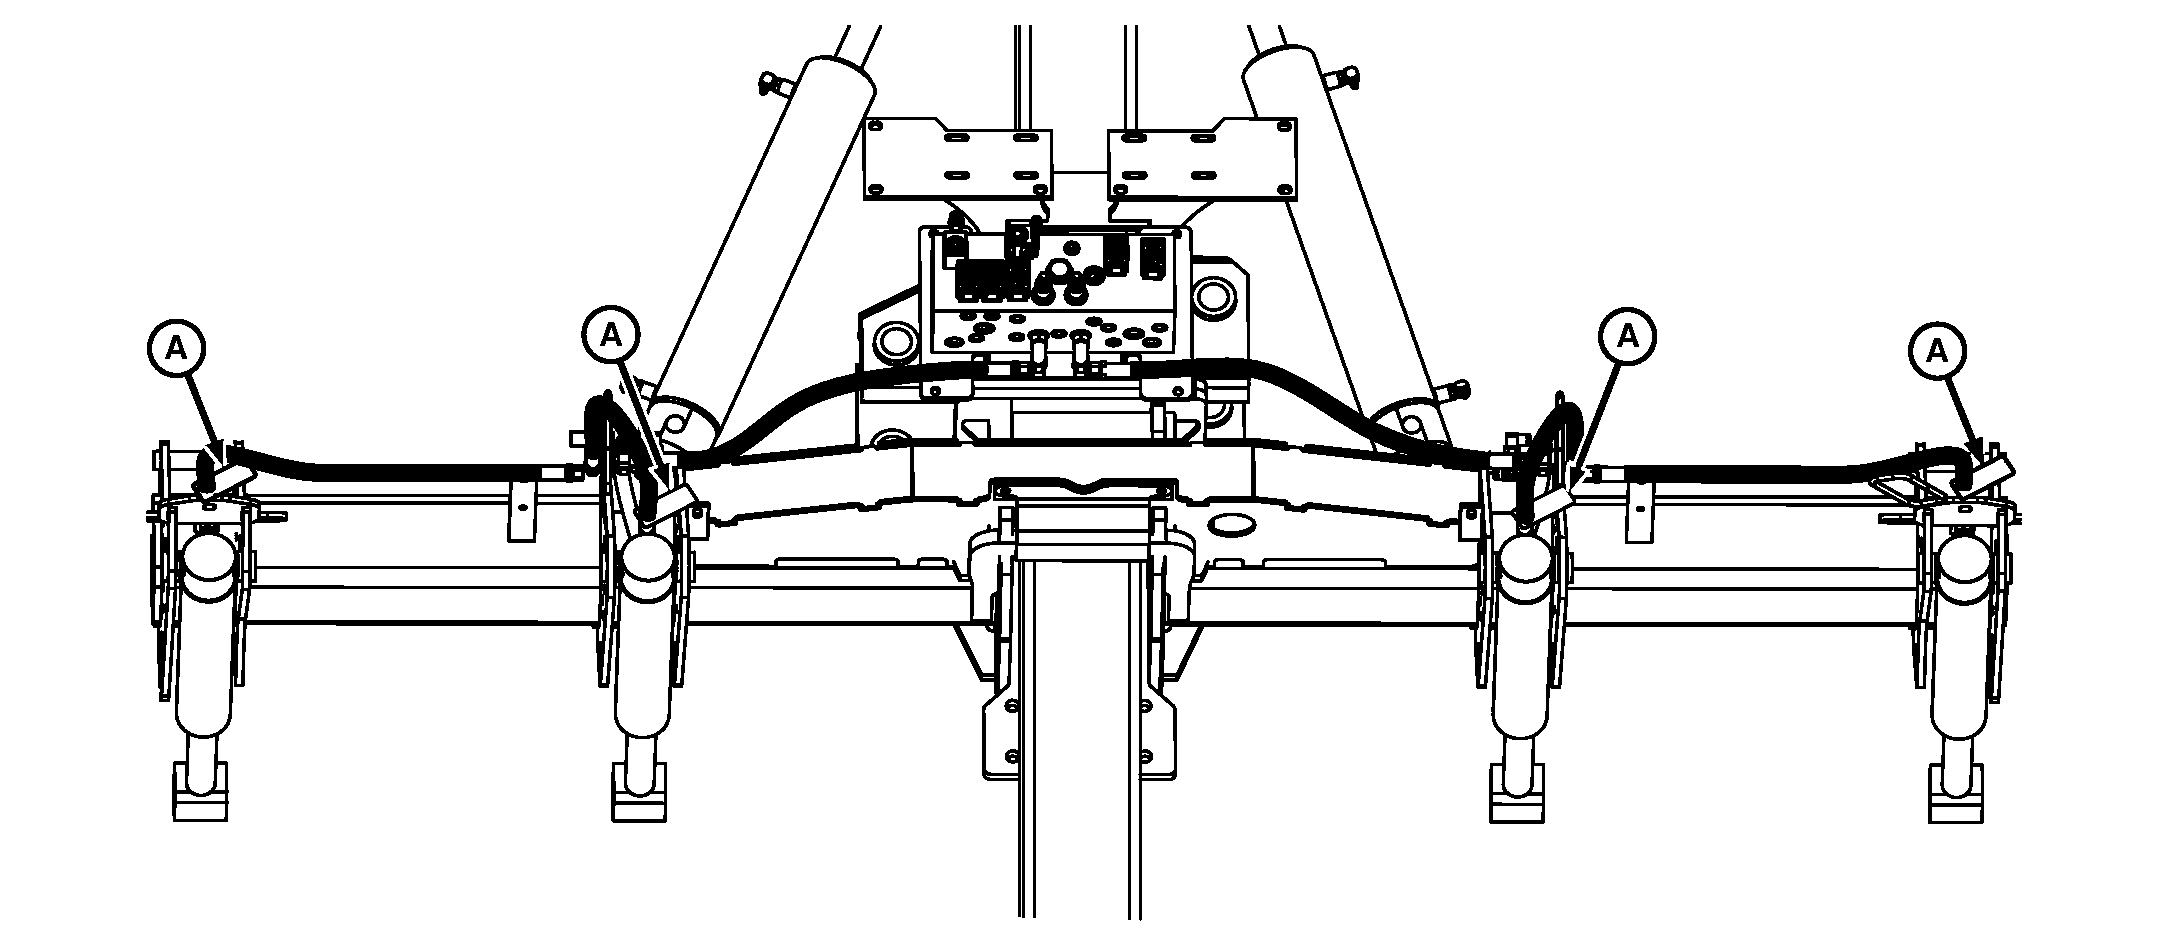
A64629-UN-07MAY09
A - Warning Tag
Before disconnecting main frame lift cylinder hoses, (all hoses will be marked with a warning decal (A) on cylinder head) place control box in “Plant” position. Lower machine to the ground. Hydraulic pressure must be relieved. Refer to tractor Operators Manual for SCV operation.Machine is equipped with two counter balance valves inside the main valve body. Counter balance valves are used as a safety feature to hold the machine in the up position.
Before removing hose from base end of lift cylinders:
- Lower planter completely with engine running.
- Place PLANT-TRANS switch in “Plant” position.
- Place hydraulic lever in “Float” position.
- Depress all remaining switches in both directions.
- Place PLANT-TRANS switch in “Trans” position.
- Depress all remaining switches in both directions.
- Leave SCV in “Float” position and shut off engine.
|
OUO6064,00007DA-19-20120222 |