Clean Or Replace Batteries
Cleaning Batteries
 CAUTION:
A82413-UN-22APR14
Avoid a short circuit or spark that results in an explosion, use extreme caution when using tools, wires, or metal objects near batteries. To prevent shorting out batteries, wrap tools with vinyl tape.
Remove all jewelry (watches, rings, bracelets, and similar items) before servicing the electrical system or batteries.
Cleaning is a key element in battery maintenance, for both safety and performance. Regular cleaning reduces dirt and corrosion from forming. Cleaning reduces the chance of acid contact and provides efficient electrical connections. Lack of cleaning causes the following problems:
- Reduced reliability and performance.
- Shortened overall battery life.
- Increased corrosion.
- Possibility of a fire.
-
Access battery tray. (See Access And Check Batteries in this section.)
-
Clean all moisture and corrosion in battery compartments with a solution of one-part baking soda to five parts water. Rinse with clean water and allow to dry.
A83745-UN-26SEP14 -
IMPORTANT: Avoid machine damage and component malfunction. Do not direct pressurized water at electrical components or connectors, bearings, or other sensitive parts and components. Reduce water pressure if pressurized spray is used to clean the batteries and surrounding areas.
Wash down batteries, battery terminals, and battery compartment. If battery corrosion is excessive, more cleaning of batteries and surrounding area is necessary.
-
CAUTION: To prevent electrical shock, do not touch battery terminals,
connectors, or wires that are not insulated.
Note the position of each battery in the battery compartment and the location of both the positive and negative terminals.
-
CAUTION: Avoid a short circuit or spark that results in an explosion,
use extreme caution when using tools, wires, or metal objects near
batteries. To prevent shorting out of batteries, wrap tools with vinyl
tape.
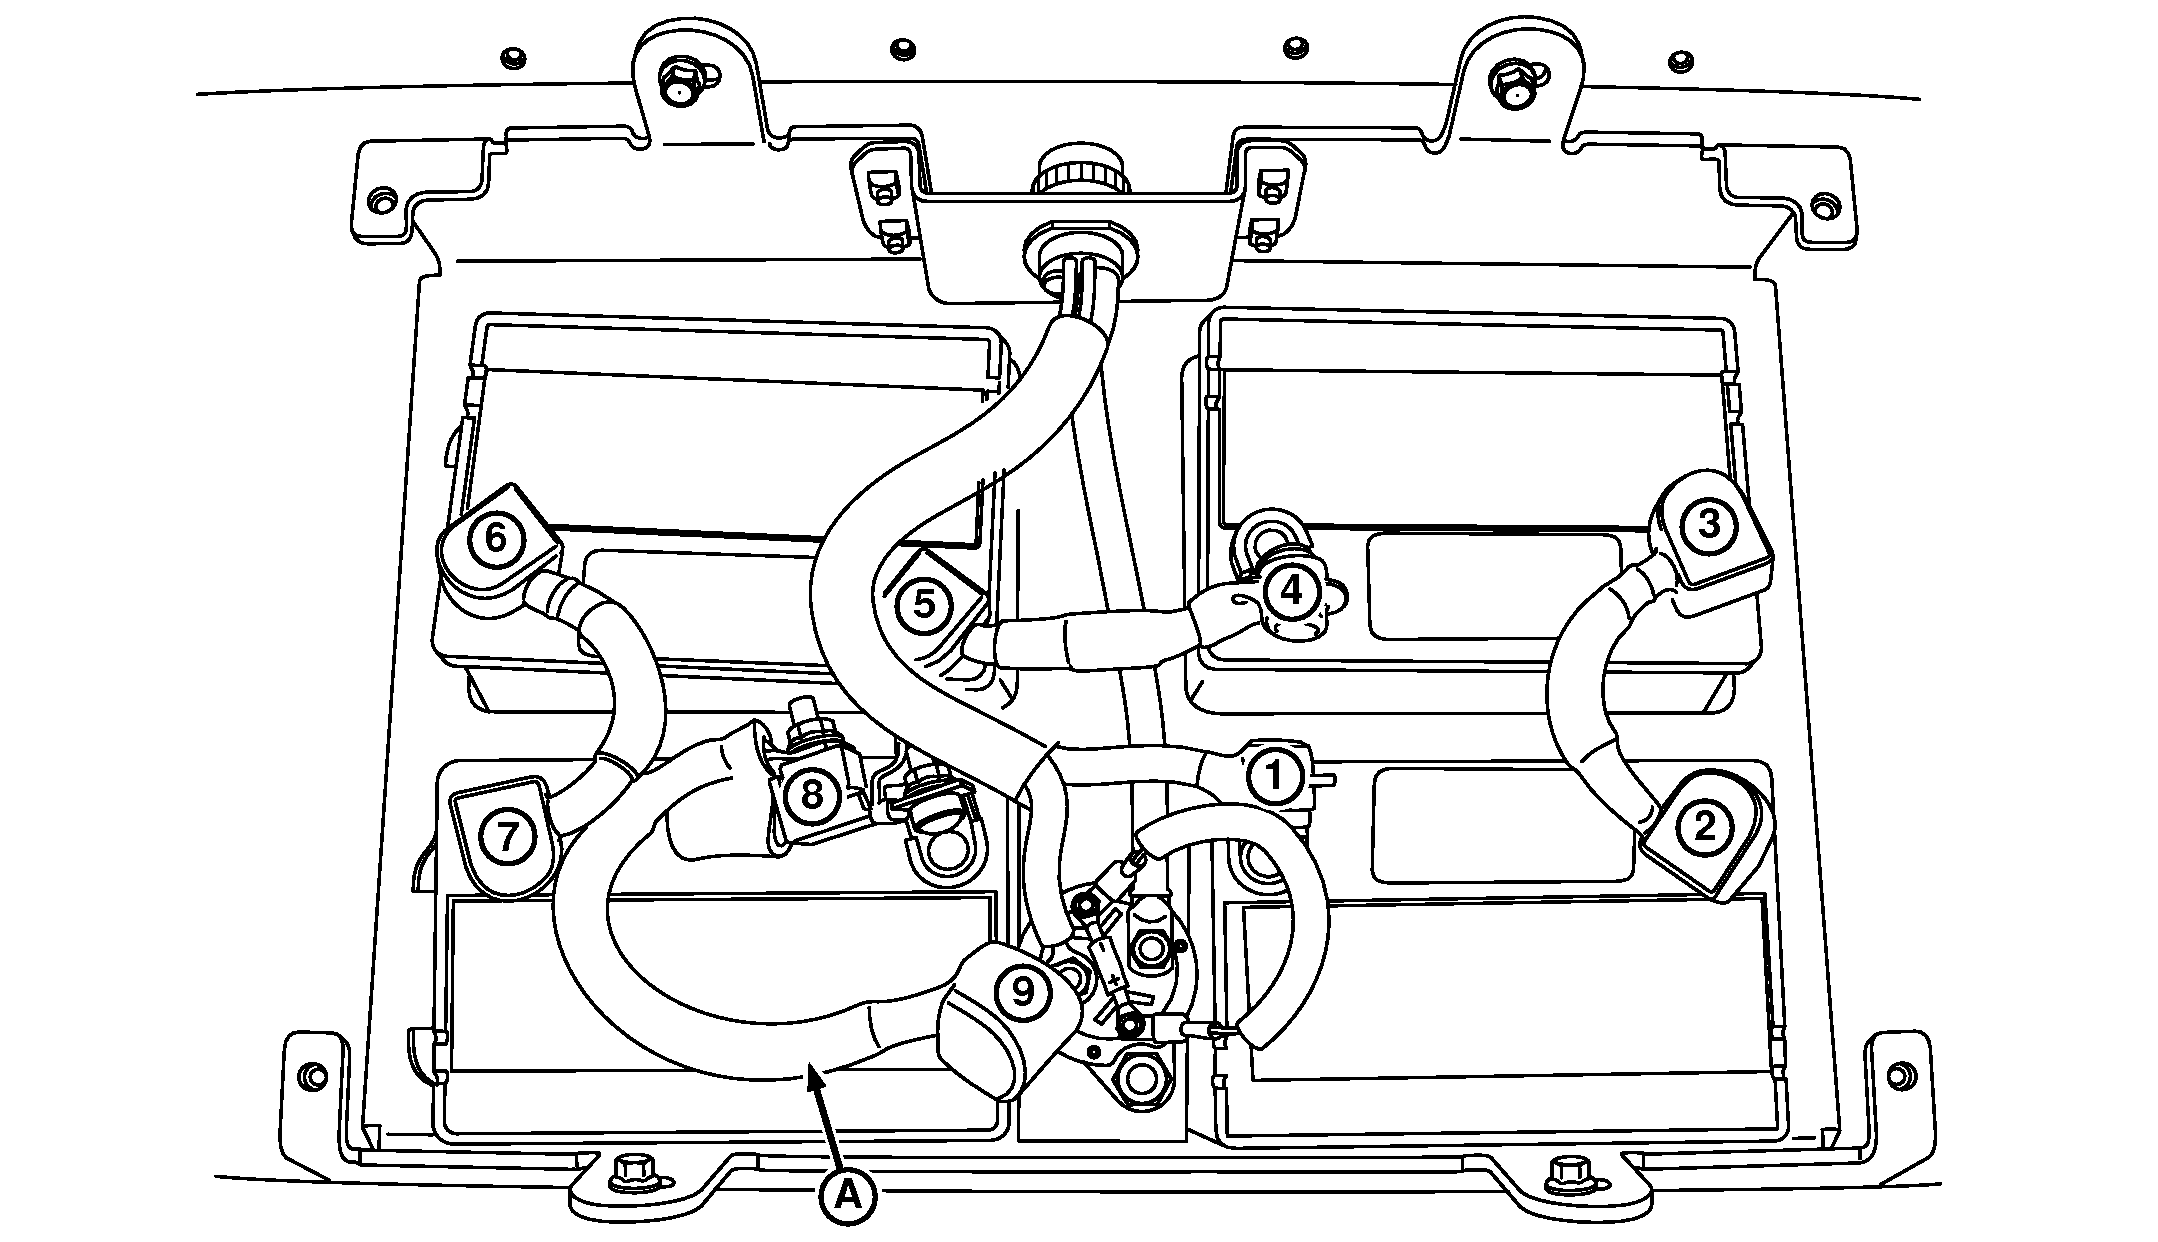
A83744-UN-30SEP14A - Positive Cable
Using insulated tools, remove connection 8 and 9 of positive cable (A) from positive terminal on battery and coil. -
Pull the boots on the terminal cables back far enough to expose terminals 1—9 for cleaning.
-
NOTE:
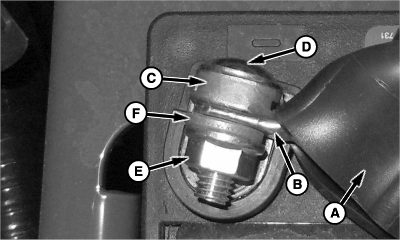
A82466-UN-01MAY14A - Cable Boot
B - Battery Cable
C - Battery Terminal
D - Round Head Bolt
E - Nut
F - Washer
Battery positive “+” and negative “-” connections are marked and color coded.Battery cables are of specific length for each connection. (See Battery Cables And Charging in this section for the diagram on proper installation.)
Remove and retain battery cable (B) from battery terminal (C) that is corroded:
- Move cable boot (A) to expose terminal.
- Remove and retain round head bolt (D), nut (E), and washer (F).
- Repeat with next terminal.
-
Remove corrosion from battery terminals and cable ends.
- Clean battery terminals and cable ends with a solution of one-part baking soda to five parts water. Use a wire brush if more cleaning is required.
- Rinse all parts with clean water and allow to dry.
- Repeat with next terminal.
-
Charge batteries.
-
After charging is complete:
- Install battery cover and wing screws.
- Close CCS platform door and turn latches back to original positions on planter.
- Install previously removed harness connectors on outside of battery container.
Replace Batteries
-
IMPORTANT:
Verify that the state of charge of all batteries is the same. Charge existing batteries to the same state of charge as the new batteries, so that an overcharge or boil over does not occur.
A82413-UN-22APR14Access battery tray. (See Access And Check Batteries in this section.)
-
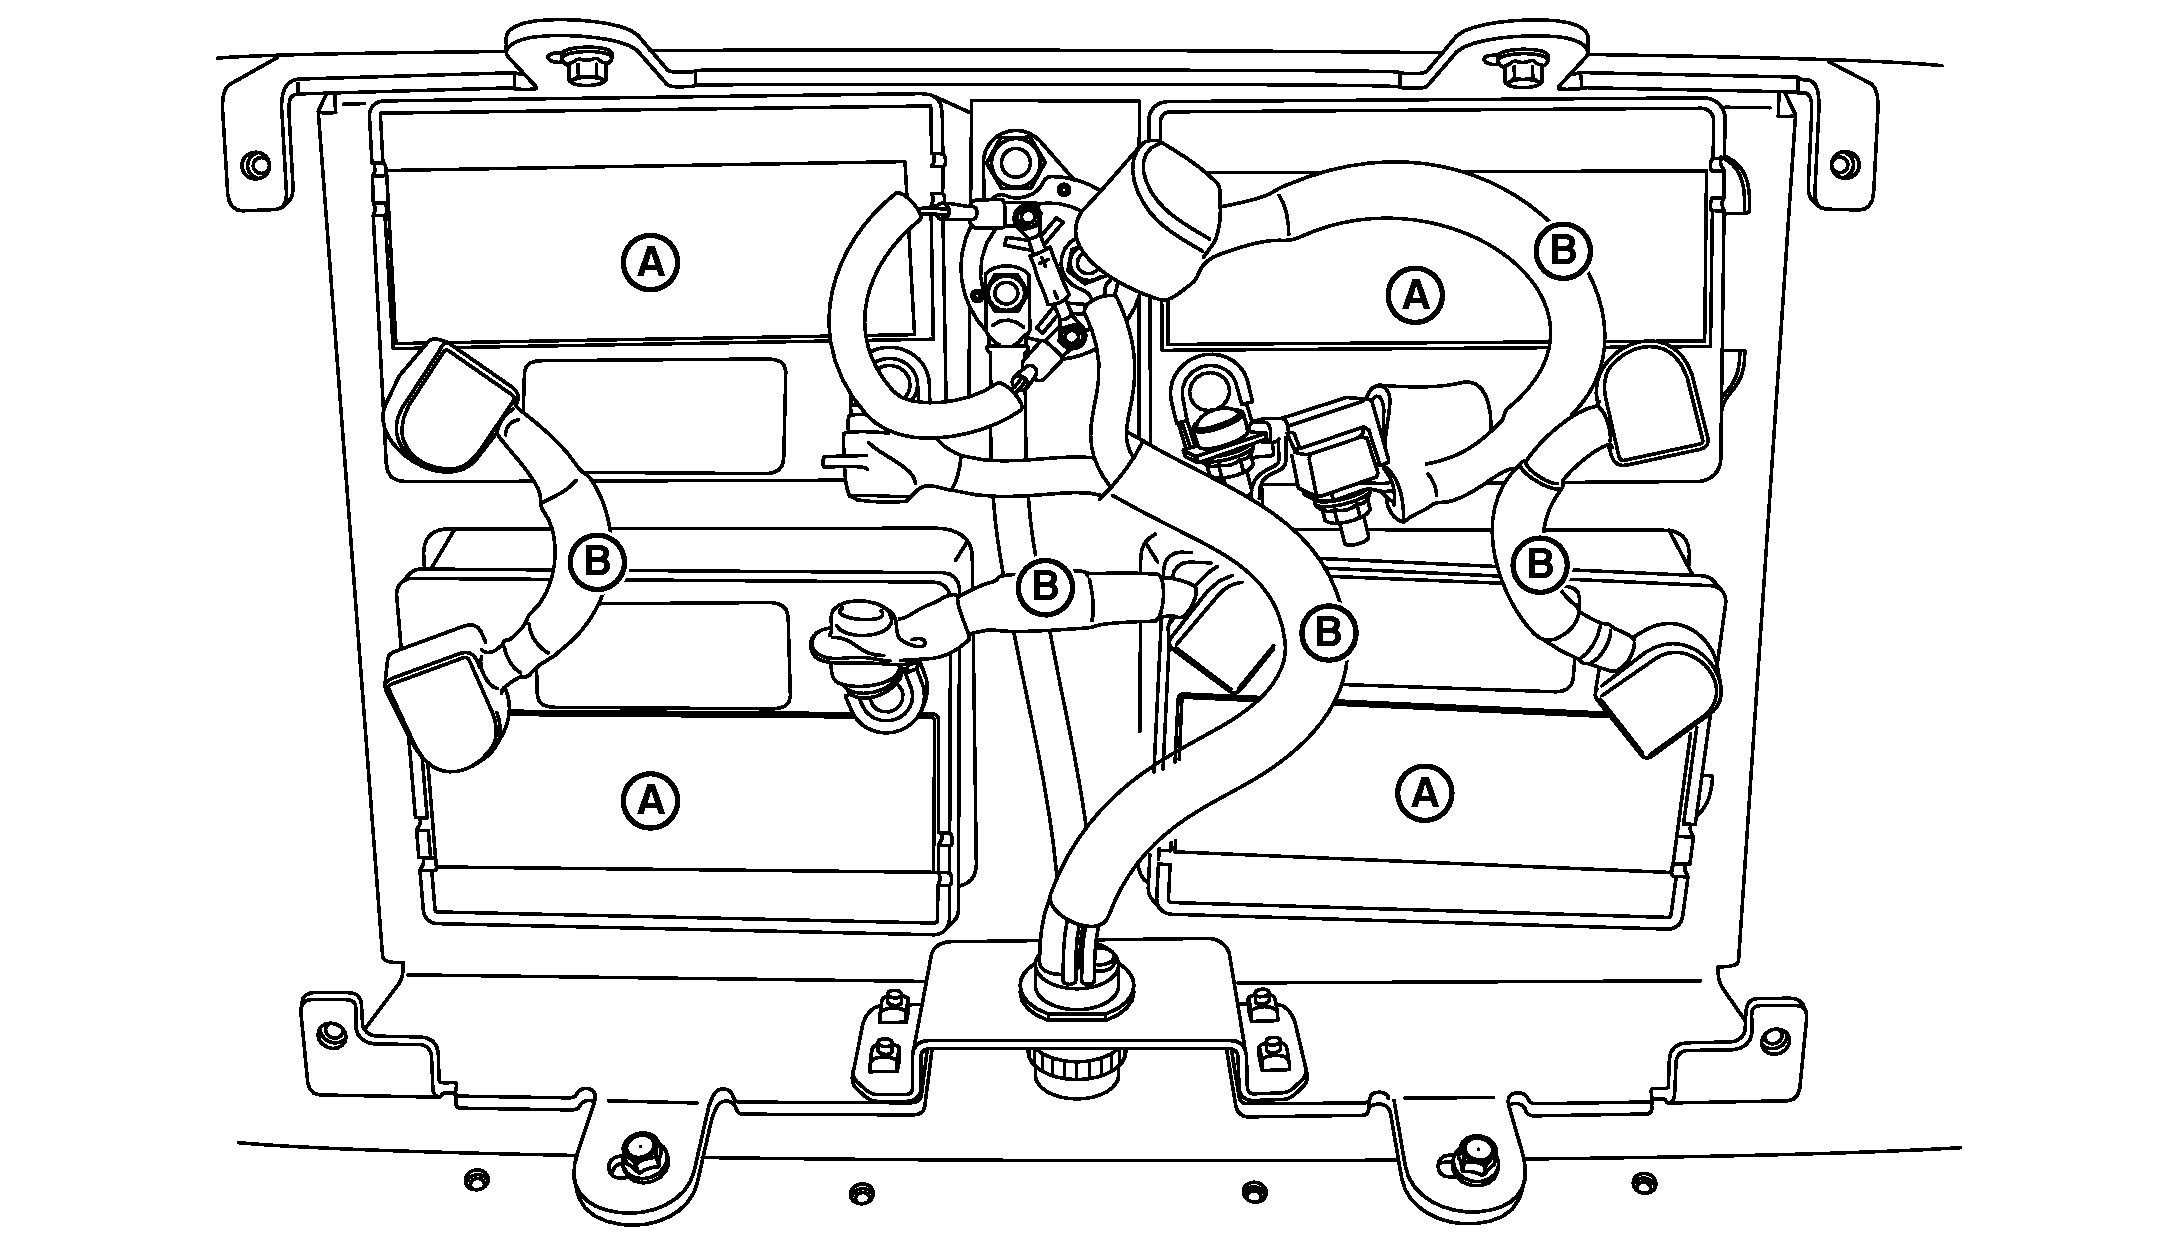
A83742-UN-30SEP14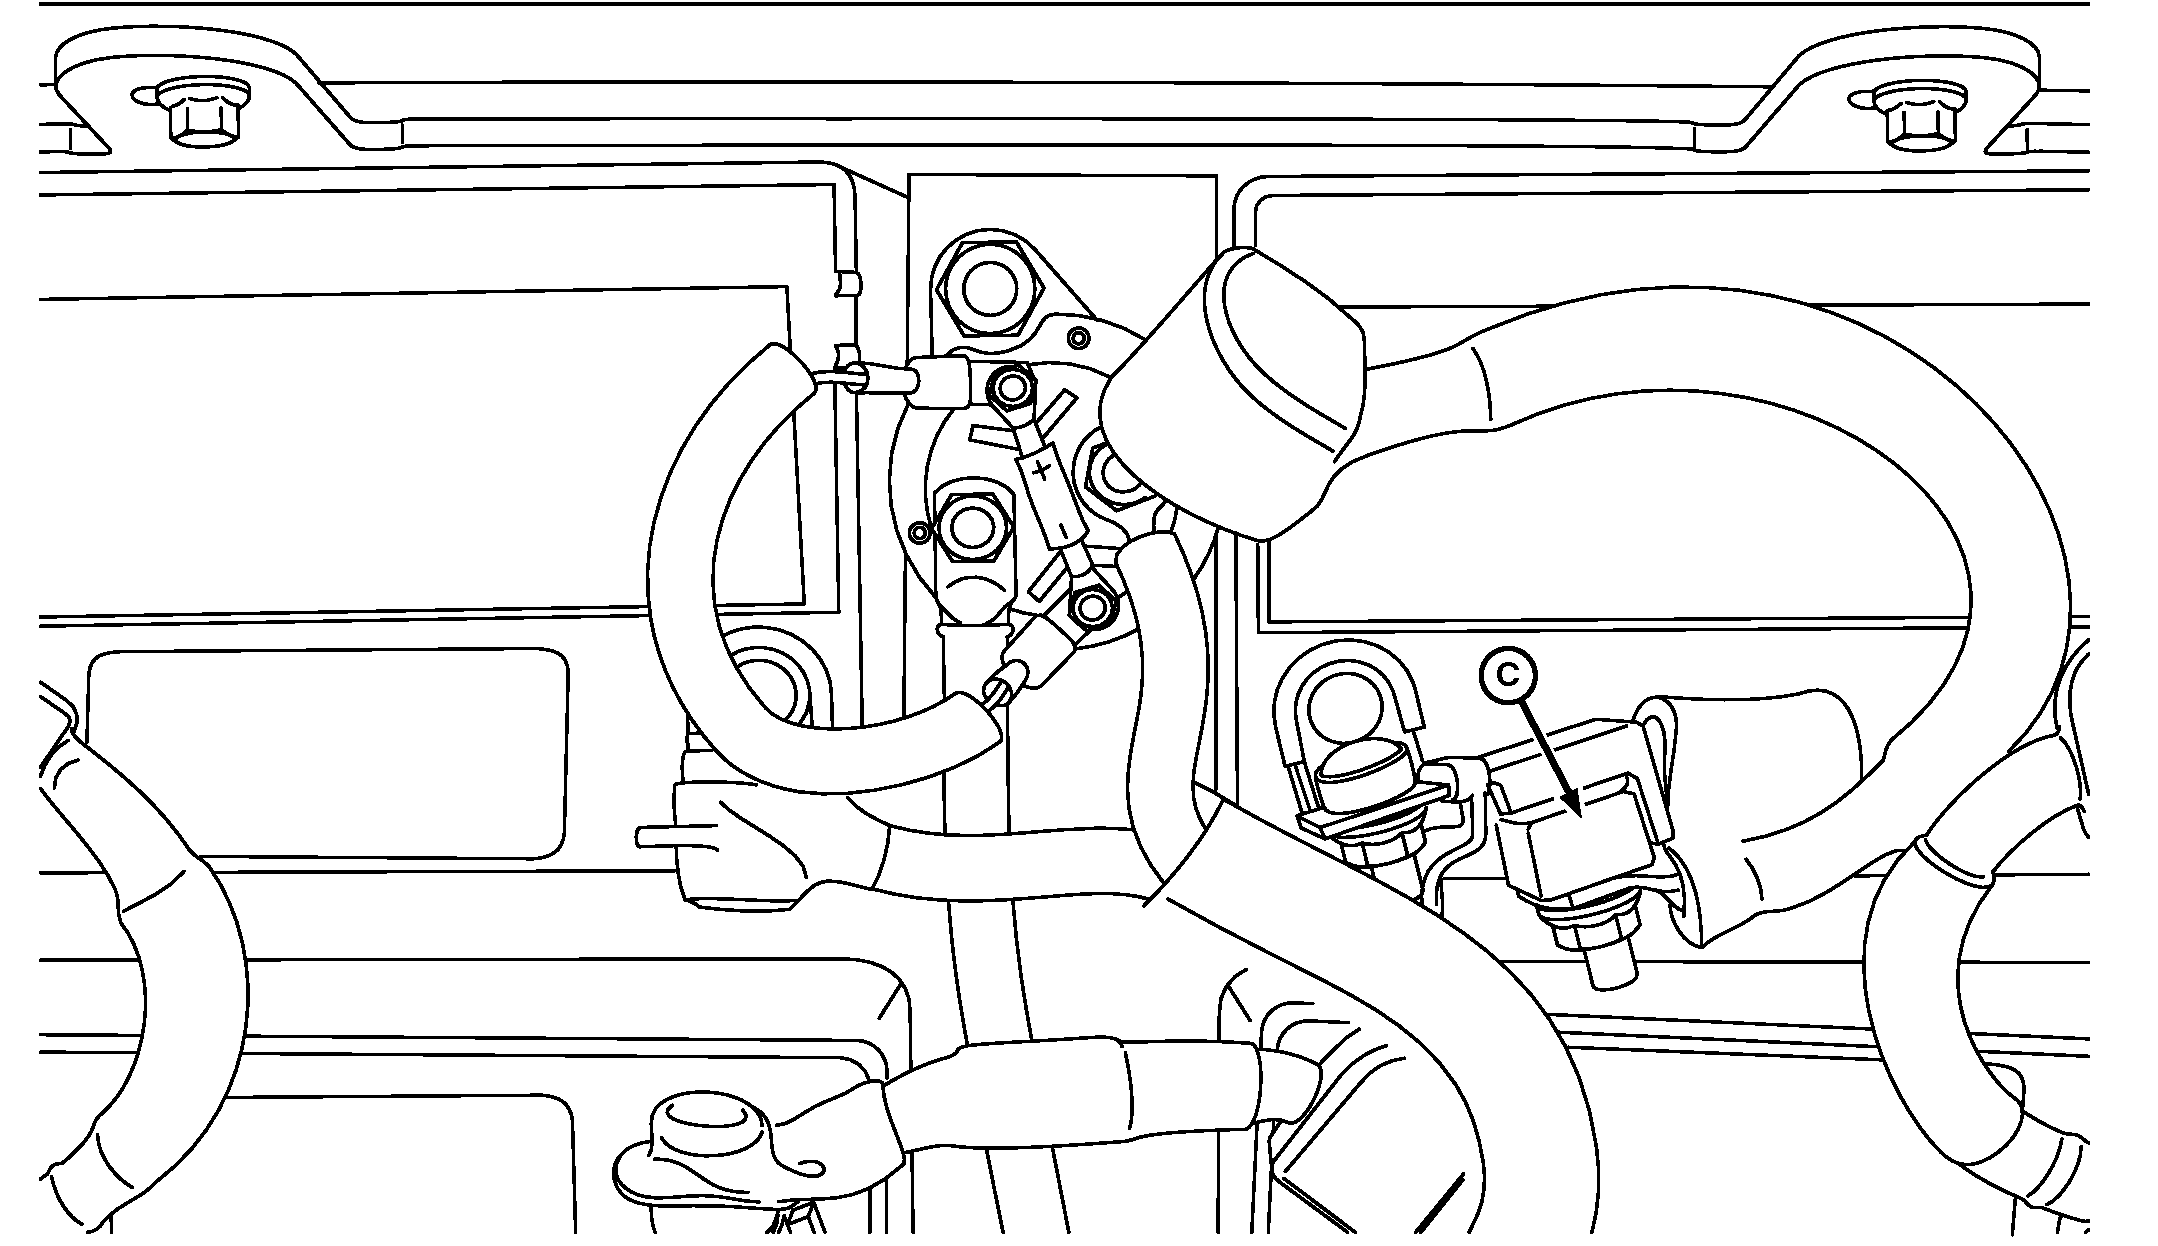
A83743-UN-30SEP14A - Batteries
B - Battery Cables
C - Battery Cable with Fuse
Remove and retain battery cable with fuse (C) first. -
Remove and retain remaining battery cables (B).
-
Remove batteries (A).
CAUTION: Help prevent serious personal injury or a damaged battery:- Batteries are heavy. Always use proper lifting techniques and a proper lifting device when moving them.
- Never lift by the battery terminals. A dropped battery causes an acid spill causing severe burns.
- Carefully lift batteries out of the planter. Store batteries until they are properly disposed of or recycled.
- Clean plastic battery tray if corroded or rusty.
- Check battery tray and supports for corrosion.
- Clean area with a solution of one-part baking soda to five parts water.
- Rinse area with clean water and allow to dry.
-
Paint rust or corrosion affected areas with acid resistant paint.
-
Install new batteries in the same orientation. (See Battery Cables And Charging in this section for diagram.)
-
Install battery cables. (See Battery Cables And Charging in this section for diagram.
- Install rubber post cover.
-
Tighten each battery terminal nut to specifications.
Item Measurement Specification Battery Terminal Nut Torque 15 N·m (133 lb-in.)
-
Replace the terminal boots over each battery terminal.
-
Once the batteries are installed and cables are connected do the following:
- Install battery cover and wing screws.
- Close CCS platform door and turn latches back to original positions on planter.
- Install previously removed harness connectors on outside of battery container.
|
WP29706,0000755-19-20141029 |