Install Service Advisor Remote (SAR) Battery Harness
Harness Overview:
IMPORTANT: To ensure that SAR battery is charged during operation, install SAR battery harness.

A83089-UN-23JUL14
A - SAR Battery Harness
B - Battery Terminal (+)
C - Battery Terminal (-)
D - 40A Fuse
E - Convenience (4-pin)
F - SAR Power
G - 9-Pin Bulkhead Harness
H - Jumper Connector
I - Unswitched Power
J - CAN Connector (Planter Bulkhead)
K - CAN Connector (Tractor)
The SAR battery harness (A) supplies power from the tractor battery to the planter 9-pin bulkhead harness (G) through connector (E) and (F).Battery power is supplied to the SAR battery through connector (J) of the planter 9-pin bulkhead harness.
John Deere™ 8030 and 8R Series Tractors
TS230-UN-24MAY89

A82413-UN-22APR14
A83269-UN-12AUG14
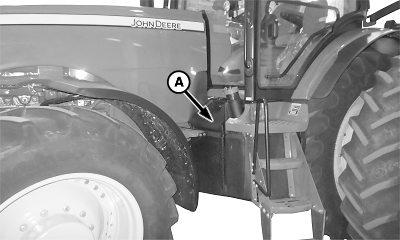
8R Tractor
A - Outer Battery Cover
-
Park the vehicle safely. (See Parking Safely in the SAFETY section.)
-
Engage parking brake, shut off engine and remove key.
-
NOTE: Unless noted, retain removed components and hardware for later installation.
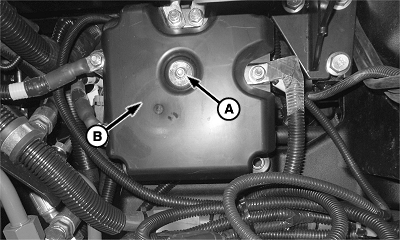
Remove outer battery cover (A) on tractor.
-
A84147-UN-29OCT14FT4 Washing Fluid Container
A - Nuts
B - Washing Fluid Container
For iT4 tractors, remove nuts (A). Retain placement washing fluid container (B) to nearby tractor step with wire tie so total disconnection of container is not needed. -
A83272-UN-12AUG14iT4 Inner Battery Cover
A84151-UN-29OCT14FT4 Inner Battery Cover
A - Nuts
B - Inner Battery Cover
Remove nuts (A) from inner battery cover (B). Remove inner cover. -
NOTE: For older John Deere™ tractors and competitive tractors, find suitable battery power source. Harness modification is required.
A68070-UN-08JUL10John Deere™ iT4 8R Tractor Shown
A - Nut
B - Ground Cable
Remove nut (A) and disconnect battery ground cable (B) from single point ground location. -
NOTE: To pull wiring harness between cab and frame, use wire or fish tape.
NOTE: Only pull enough of the wiring harness for reaching connections.
A68071-UN-08JUL10Left Side of Tractor
A - SAR Battery Harness
B - Cab and Frame
Route SAR battery harness (A) between cab and frame (B). -
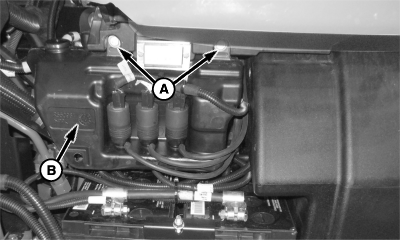
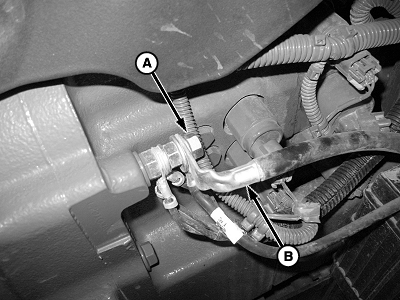
A83278-UN-12AUG14John Deere™ iT4 8R Tractor Shown
A84146-UN-29OCT14John Deere™ FT4 8R Tractor Shown
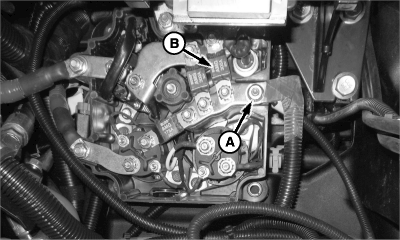
A - Nut
B - Master Fuse (Fusible Link)
Remove nut (A) from tractor harness side of master fuse (fusible link) (B). -
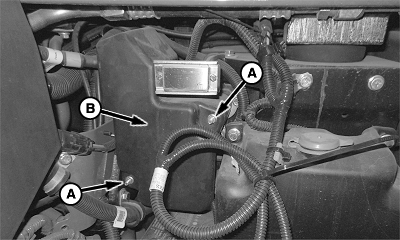
A83270-UN-12AUG14John Deere™ iT4 8R Tractor Shown
A84148-UN-29OCT14John Deere™ FT4 8R Tractor Shown
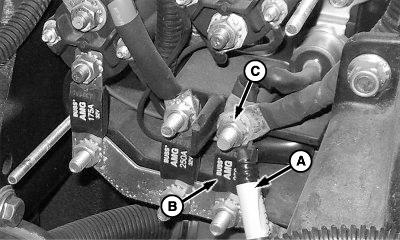
A - Positive Cable
B - Master Fuse (Fusible Link)
C - Nut
Install positive cable (A) of battery harness to tractor harness side of master fuse (fusible link) (B) with nut (C). -
A83272-UN-12AUG14iT4 Inner Battery Cover
A84151-UN-29OCT14FT4 Inner Battery Cover
A - Nuts
B - Inner Battery Cover
Install inner battery cover (B) back with nuts (A). -

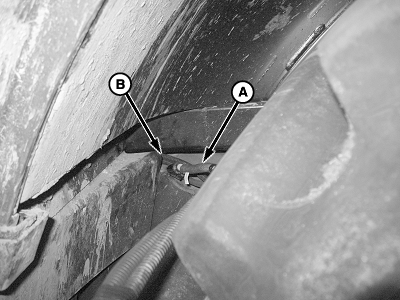
A83271-UN-12AUG14John Deere™ iT4 8R Tractor Shown
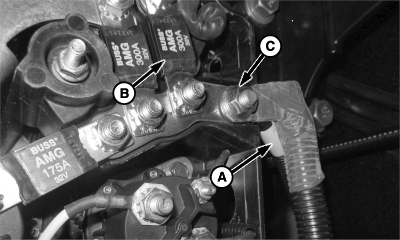
A - Negative Cable
B - Ground Cable
C - Nut
Install battery harness negative cable (A), battery ground cable (B), and nut (C). -
A83279-UN-12AUG14John Deere™ iT4 8R Tractor Shown
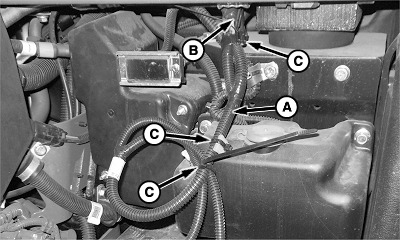
A - SAR Battery Harness
B - Fuse (40 A)
C - Tie Straps
Secure SAR battery harness (A) and fuse (B) with tie straps (C). Follow existing wiring harness paths whenever possible. -
A84147-UN-29OCT14iT4 Washing Fluid Container
A - Nuts
B - Washing Fluid Container
Install washing fluid container (B) in position using nuts (A). -
A68077-UN-08JUL10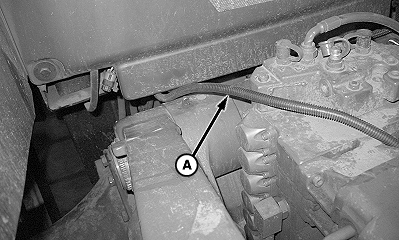
A68078-UN-08JUL10A - SAR Battery Harness
B - Tie Straps
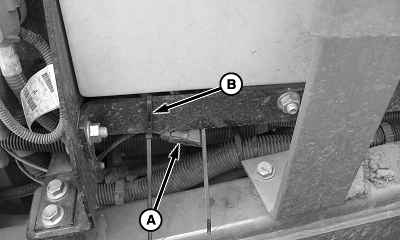
Route remaining SAR battery harness (A) to back of tractor cab and secure with tie straps (B). Follow existing wiring harness paths whenever possible. -
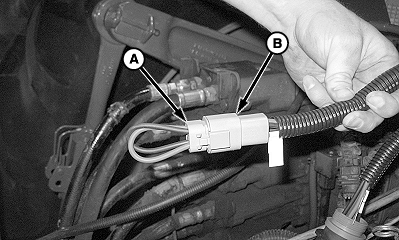
A83274-UN-12AUG14A - Planter Bulkhead CAN Connector
B - Connector
Connect planter bulkhead CAN connector (A) of 9-pin bulkhead harness with connector (B) on bulkhead. -
NOTE: Harness locations vary from tractor to tractor.
A47096-UN-02FEB01A - 9-Pin Bulkhead Harness
B - Connector
Connect 9-pin bulkhead harness (A) with tractor connector (B). -
NOTE: Make tractor and planter SAR power connection as follows:
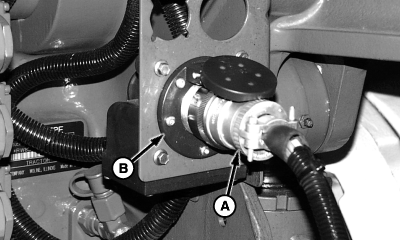
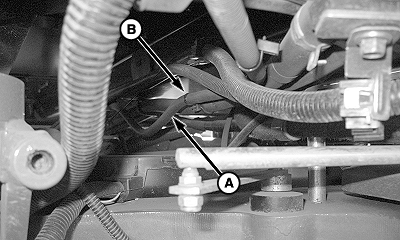
A68083-UN-08JUL10A - Jumper Connector
B - Battery Connector
Ensure jumper connector (A) is seated in battery connector (B) completely. -
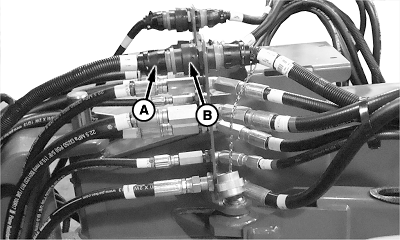
Connect SAR power connector (A) of SAR battery harness to SAR power connector (B) of planter 9-pin bulkhead harness.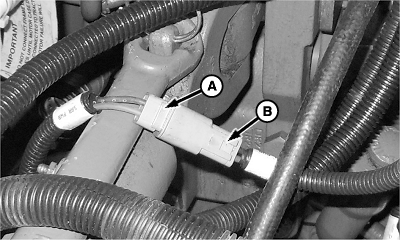
A83273-UN-12AUG14
John Deere™ 9030 Series Tractors
-
TS230-UN-24MAY89
Park the vehicle safely. (See Parking Safely in the SAFETY section.)
A82413-UN-22APR14 -
Engage parking brake, shut off engine and remove key.
-
NOTE: For older John Deere™ tractors and competitive tractors, find suitable battery power source. Harness modification is required.
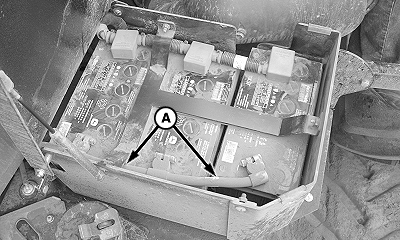
A68305-UN-19JUL10A - Battery Ground Cable
Remove battery ground cable (A) from batteries at battery box -
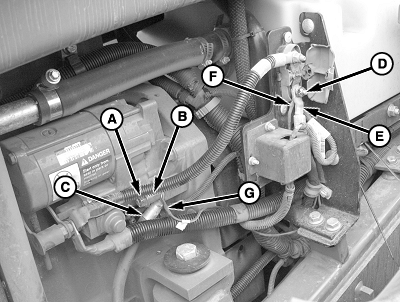
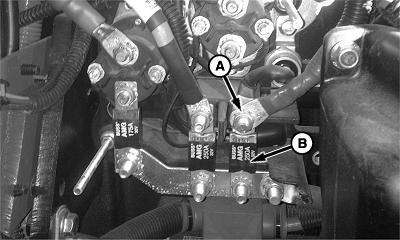
A68116-UN-12JUL10John Deere™ 9030 Series Tractor Shown
A - Cap Screw
B - Spacer
C - Ground Cable
D - Nut
E - Master Fuse (Fusible Link)
F - Positive Terminal
G - Negative Terminal
Remove cap screw (A), spacer (B), and ground cable (C). -
Remove battery ground cable (C).
-
Remove nut (D) from master fuse (fusible link) (E).
-
Install positive terminal (F) of SAR battery harness to master fuse (fusible link) (E) with nut (D).
-
Install negative terminal (G) and ground cable (C) with cap screw (A) and spacer (B).
-
A68090-UN-08JUL10John Deere™ 9030 Series Tractor Shown
A - Fuse
B - Tie Strap
Secure fuse (A) with tie strap (B). -
A68095-UN-08JUL10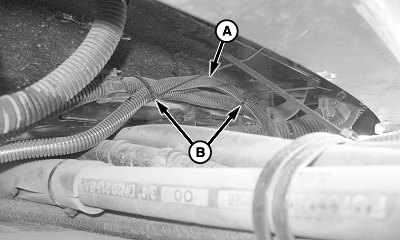
A68096-UN-08JUL10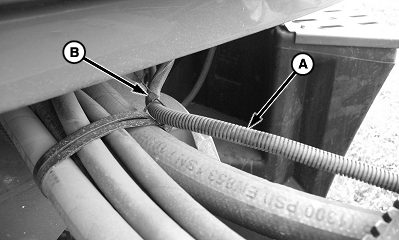
A68097-UN-08JUL10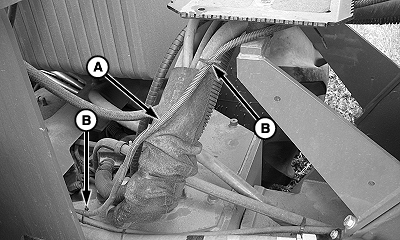
A68098-UN-08JUL10A - Battery Harness
B - Tie Straps
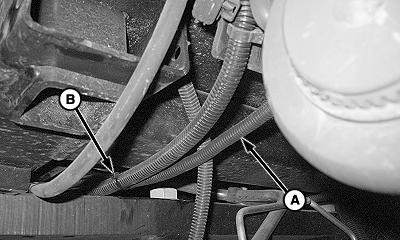
Route battery harness (A) to back of tractor and retain position with tie straps (B). To avoid damage from articulating tractor frame, follow existing wiring harness routing paths whenever possible for routing harnesses. -
A83274-UN-12AUG14A - Planter Bulkhead CAN Connector
B - Connector
Connect planter bulkhead CAN connector (A) of 9-pin bulkhead harness with connector (B) on bulkhead. -
NOTE: Harness locations vary from tractor to tractor.
A47096-UN-02FEB01A - 9-Pin Bulkhead Harness
B - Connector
Connect 9-pin bulkhead harness (A) with tractor connector (B). -
NOTE: Make tractor and planter compressor power connection as follows:
A68083-UN-08JUL10A - Jumper
B - SAR Connector
Ensure jumper connector (A) is seated in battery connector (B) completely. -
Connect SAR power connector (A) of SAR battery harness to SAR power connector (B) of planter 9-pin bulkhead harness.
A83273-UN-12AUG14
|
WP29706,00007AB-19-20141030 |