Information Decal and Tag Locations

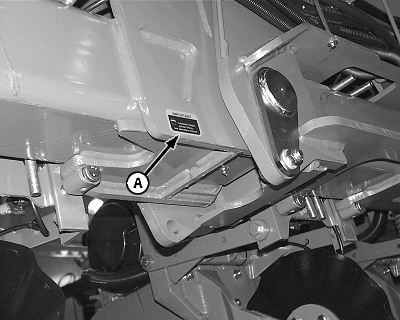
A71439-UN-11MAY11
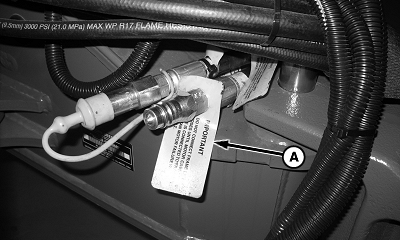
A - Tag, Case Drain Hose
IMPORTANTFan motor case drain line.
Avoid fan motor failure. Connect this hose during fan operation.
(See LOW PRESSURE CASE DRAIN CONNECTION in Preparing Tractor section.)
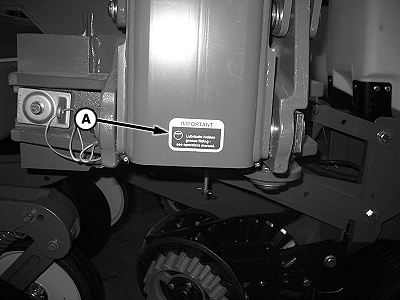
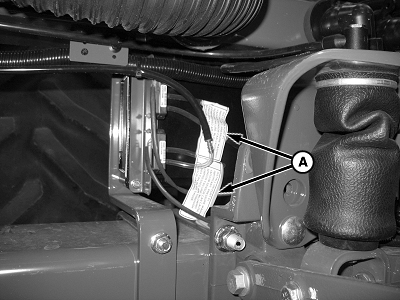
A74116-UN-27JAN12
A - Tag, Frame Hose
IMPORTANTAvoid fan motor failure. Do not connect frame lift hoses until motor case drain line is connected to tractor.
(See Preparing Machine section.)
A82127-UN-28MAR14
12 and 16 Row
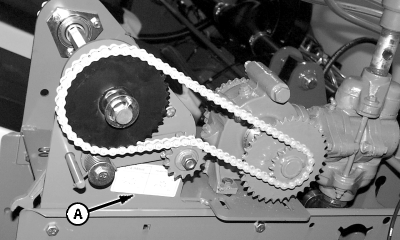
A - Fertilizer Pump Range
(See Liquid Fertilizer section for details.)- Pump is shipped filled with oil. At initial start-up and daily afterwards, check oil level.
- Single piston pump: Fill with TY6296 SAE 80/90 W EP gear oil or equivalent oil until level with check plug.
- Double piston pump: Fill both cavities with non-detergent SAE 30 oil until level with check plug.
- Fill pump lube fittings with multipurpose grease every 10 hours of operation.
A82129-UN-31MAR14
12 and 16 Row
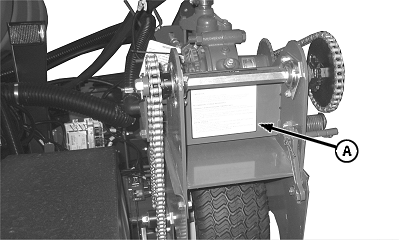
A - Fertilizer Pump, Store, and Prime
IMPORTANTLUBRICATION
- Keep pump filled with fluid.
- Protect from freezing. (See following storage information.)
- Remove drive chain when not in use.
PREVENT DAMAGE TO PUMP
- Clear liquids with steady or rising temperatures: Leave pump and hoses filled with solution.
- Clear liquids with falling temperatures (liquid and solids separate): Fill pump with water and leave filled (do not admit air).
- Suspension fertilizer: This system is not recommended for use with suspension fertilizers.
OVERNIGHT STORAGE ABOVE FREEZING TEMPERATURES
EXTENDED STORAGE (OVER 1 WEEK) INCLUDING WINTER STORAGE (Refer to FRAME DECAL AND OPERATOR MANUAL)
- Open shutoff valve at tank and strainer.
- Set pump to maximum rate
- High-pressure system with unit-mounted single disk fertilizer openers: Disconnect one opener hose unless using number 12 nozzles. Skip this step when priming a high-pressure system at application rate and travel speed for nozzle in use. High-pressure system with orifices: Remove one orifice unless using largest orifice. If available on system, loosen manifold valve . Low-pressure flow divider system: No action required.
- Partially fill tank with water and check system for leaks.
- Lower machine to planting position and drive 90—180 m (100—200 yd.) at planting speed.
- Fully charge system to eliminate all air bubbles. Air bubbles prevent even application. Repeat steps 5 and 6 until all air bubbles are flushed from lines.
- Remove strainer screen and check for foreign material. Clean as necessary.
- Reconnect hose, close valves, or install orifice removed in step 3.
- Select fertilizer rate using rate charts.
-
For any delayed restart, check application lines for air bubbles
and prime system as necessary.
(See PRIMING AND INITIAL PUMP START-UP in Liquid Fertilizer section.)
IMPORTANT
PUMP PRIMING
A82202-UN-02APR14
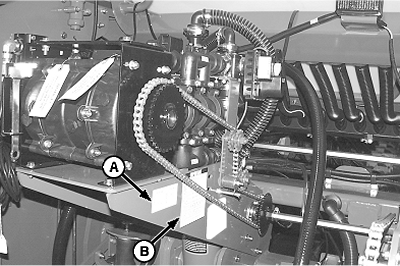
24 Row Fixed Rate Fertilizer
A - Pump Range
B - Store and Prime
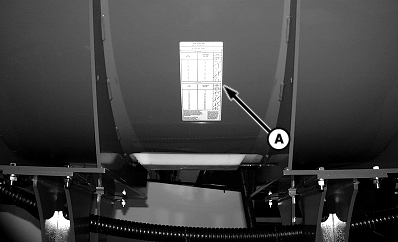
A50571-UN-07OCT02
Optional Tank Location
A - Fertilizer Rate Decal
- Place transport switch in TRANS position, hold wing wheel switch, operate SCV lever to extend wing wheels completely to field raise position (complete cycle).
- Place transport switch in TRANS position, hold fold switch, operate SCV lever to unfold planter.
-
Place transport switch in PLANT position, operate SCV lever
to lower machine to plant position.
Note: Avoid an unlevel frame. Do not stop step 1 before cycle is complete. To correct an unlevel frame, lower machine completely with transport switch in PLANT position.
(See UNFOLD and FOLD MACHINE in Operating Machine section.)
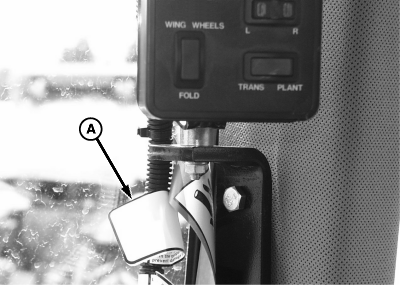
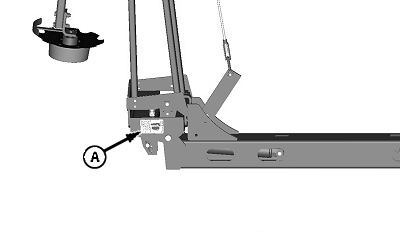
A74114-UN-27JAN12
A - Decal, Hydraulic Instruction
TRANSPORT TO PLANT:-
A74114-UN-27JAN12A - Decal, Hydraulic Instruction
Place transport switch in TRANS position, hold wing wheel switch, operate SCV lever to extend wing wheels to field raise position (complete cycle). -
Place transport switch in PLANT position, operate SCV lever
to lower machine to plant position (complete cycle).
Note: Avoid an unlevel frame. Do not stop step 1 or step 2 before cycle is complete. To correct an unlevel frame, lower machine completely with transport switch in PLANT position.
(See RAISE OR LOWER MACHINE in Operating Machine section.)
LOWER TO PLANT WHILE FOLDED:
A74115-UN-27JAN12
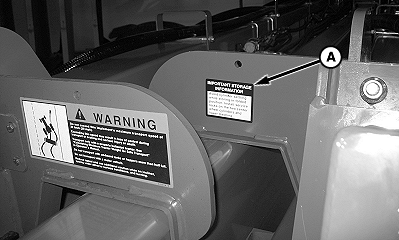
A - Decal, Important Storage Information
IMPORTANT STORAGE INFORMATIONAvoid cylinder settling while stored in folded position. Install service locks on the two center wheel cylinders and lower machine.
(See STORE MACHINE in Storage section.)
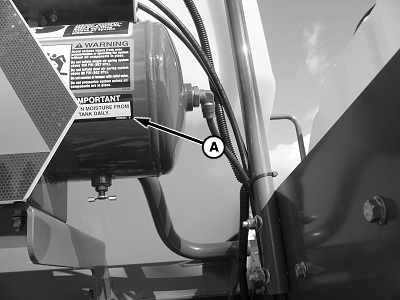
A74120-UN-27JAN12
A - Decal, Air Tank Drain
IMPORTANTDrain moisture from air tank daily.
(See DRAIN AIR STORAGE TANK in Integrated Pneumatic Down Force section in your SeedStar™ Monitor Manual.)
A75388-UN-07JUN12
Wing Flex
A74119-UN-27JAN12
Marker
A - Decal, Lube Fittings
IMPORTANTLubricate hidden grease fitting. (See OPERATOR MANUAL.)
(See LUBRICATION INTERVALS in Lubrication section.)
A80379-UN-08APR14
24 Row Marker
A - Shear Bolt Label
REPLACING SHEAR BOLT- Install new shear bolt (A) and nut. Do not tighten now.
- Adjust bolt (B) until slack is removed and links (C) are in a straight line.
- Turn bolt (B) an additional one quarter turn and tighten nut.
- Tighten shear bolt (A) with nut and lock with nut.
(See REPLACE 24 ROW BREAKAWAY BOLT in Service and Adjustment section.)
A74117-UN-27JAN12
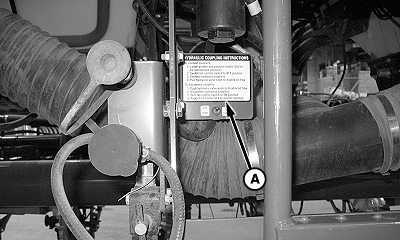
A - Decal, Hydraulic Coupling Instruction
To connect couplers:- Lower planter and position tractor SCV to forward detent (continuous position).
- Switch fan control switch to OFF position.
- Connect hydraulic couplers.
- To enable oil flow, pull hydraulic valve knob .
To disconnect couplers:
- To disable oil flow, push hydraulic valve knob .
- Disconnect hydraulic couplers.
- Turn fan control switch to ON position.
- Reposition tractor SCV to neutral position.
A72425-UN-01SEP11
A - Decal, Vacuum Sensor
IMPORTANTAvoid sensor failure. Avoid pressure washing the vacuum sensor. Do not blow compressed air through sensor lines.
(See REMOVE FROM STORAGE and STORE MACHINE in Storage section.)
|
SeedStar is a trademark of Deere & Company |
WP29706,00007E1-19-20140908 |