Position Conveyance Tube for Transport
Auger Only
-
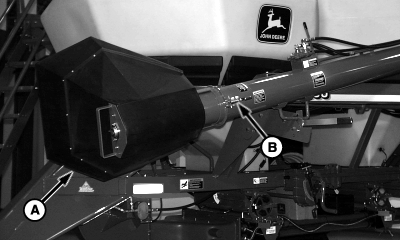
IMPORTANT: To avoid contact with left-hand front tire on a tow-behind cart, hopper must be stored with closed side facing out, away from cart frame.
A46141-UN-26JUN00A - Hopper
B - Spring-Loaded Pin
Auger Only: Hopper (A) is rotated so closed side is facing away from cart and secured with spring-loaded pin (B). -
With hopper turned to this position, rain cannot collect in the bottom.
Auger and Conveyor
-
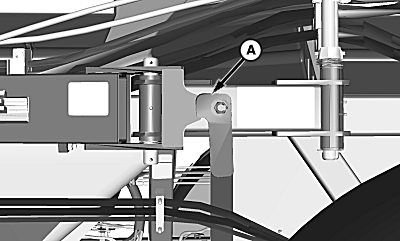
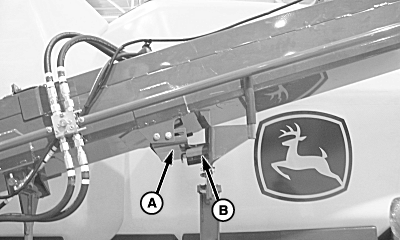
IMPORTANT: All Except 350 and 430 TBT: Avoid machine damage. Swing link lock (A) must be securely locked in the straight position when conveyance is in storage position.
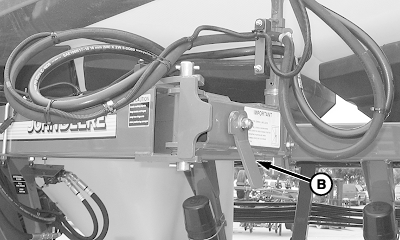
350 and 430 TBT Only: Avoid machine damage. Swing link lock (B) must be securely locked in the angled position when conveyance is in storage position.
A73097-UN-13OCT11All Except 350 and 430 TBT
A70726-UN-17FEB11350 and 430 TBT Only
A - Swing Link Lock, Engaged
B - Swing Link Lock, Engaged
All Except 350 and 430 TBT: Rotate swing link in the straight position and engage lock (A) to restrict movement. -
350 and 430 TBT Only: Rotate swing link in the angled position and engage lock (B) to restrict movement.
-
A71129-UN-05APR11Conveyor Shown
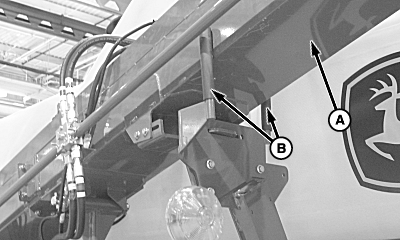
A - Conveyance Tube
B - Guides
Align conveyance tube (A) with guides (B). -
A71128-UN-05APR11Conveyor Shown
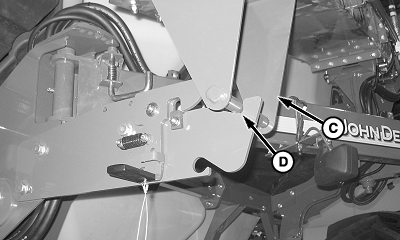
A71130-UN-05APR11A - Plate
B - Support
C - Latch Bracket
D - Latch Tube Bracket
Lift lower end of conveyance tube, aligning plate (A) with support (B), and set latch tube (C) onto latch bracket (D). -
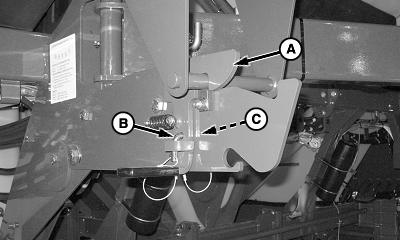
A71131-UN-05APR11A - Latch
B - Pin
C - Spring Pin
Push lower end of conveyance tube into latch (A). -
Insert pin (B), front to rear, through lever and latch bracket. Rotate pin behind locking tab as shown and install spring pin (C).
-
IMPORTANT: Plate (B) must be properly inserted in slot (A) when in storage position or machine damage can occur.
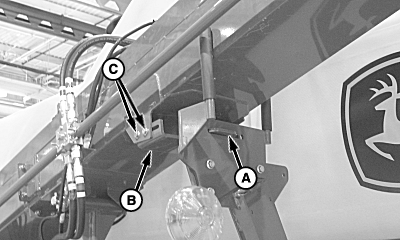
A71132-UN-05APR11A - Slot
B - Plate
C - Cap Screws (4 used)
Verify plate (B) extends through slot (A) as specified. If not, use cap screws (C) to adjust. See SERVICE section for adjustment procedure.Item Measurement Specification Tab Extended Through Rear of Slot Distance 23 mm (15/16 in.)
|
LD45720,00004CF-19-20120213 |