Switch Row Spacings (5-Section 1890 No-Till Air Drill Only)
-

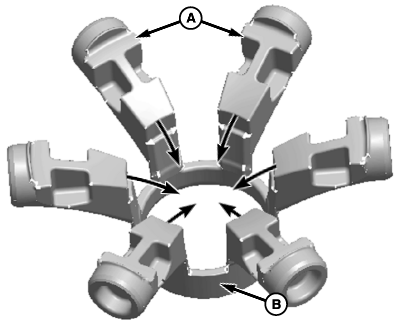
A66904-UN-14APR10A - Header Lid
B - Tabs
Rotate header lid (A) counterclockwise to disengage from tabs (B) and remove. -
NOTE: Use talc or graphite on the plug before inserting it into the tower to reduce the friction and allow the plug to be inserted with less force.
A67092-UN-06MAY10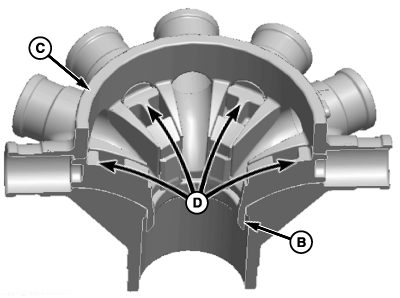
A67093-UN-06MAY10Header Manifold Cross-Section
A - Plugs
B - Ring
C - Header Manifold
D - Ports
Flex plugs (A) inward and lower ring (B) into header manifold (C). Release plugs. -
Insert plugs into desired ports (D).
-
Reinstall lid.
-
Monitor Adjustments for 38 cm (15 in.) Row Spacing:
- Select primary Menu button >> Air Cart button >> Configuration softkey >> Tool tab. Select the Row Spacing drop down box and choose 38 cm (15 in.). Select and check either the Front or Rear rank to deliver seed.
- See CONFIGURE 1890 WITH DUAL ROW SPACING in Monitor Setup for Blockage System section.
Monitor Adjustments for 19 cm (7.5 in.) Row Spacing:
- Select primary Menu button >> Air Cart button >> Configuration softkey >> Tool tab. Select the Row Spacing drop down box and choose 19 cm (7.5 in.).
- Select primary Menu button >> Blockage button >> Blockage Configuration softkey.
- Select and check the No check box next to 1890 With Dual Row Spacing.
-
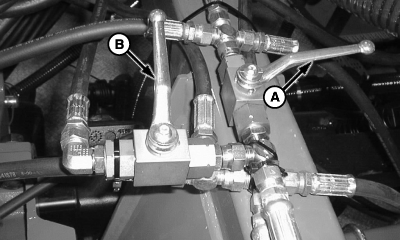
A47310-UN-11APR01A - Front Rank Valve
B - Rear Rank Valve
Seeding Tool Opener Adjustments:- 19 cm (7.5 in.) Row Spacing: Open both the front rank valve (A) and rear rank valve (B).
- 38 cm (15 in.) Row Spacing: Fully raise all openers and close hydraulic lock-up valve for unused rank.
-
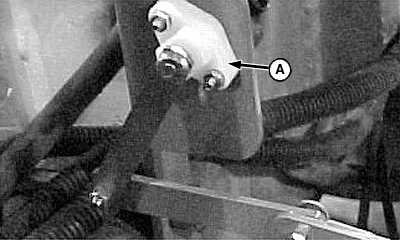
A54080-UN-15MAR04A - Single Remote Switch
Remote Switch Adjustments:38 cm (15 in.) Row Spacing: If seeding tool is equipped with a single remote switch or a single height sensor (A), reposition the switch to the rank of openers used for seeding.
-
Meter Calibration Adjustments:
- If meter rollers are changed, ensure proper meter rollers are installed in all active runs. (See HOW TO CHANGE METER ROLLERS in Meter Setup and Operation section.)
- 19 cm (7.5 in.) Row Spacing: Calibrate meters according to Calibration Procedure listed in this manual. Calibration provides correct setting.
- 38 cm (15 in.) Row Spacing: Calibrate meters according to Calibration Procedure listed in this manual. Calibration provides correct setting.
|
LD45720,00005B2-19-20120210 |